| iKnowBase Development Studio | ||
|---|---|---|
| Previous | Next | |
| Introduction | iKnowBase Content Studio | |
iKnowBase contains iKnowBase Development Studio, a suite of web-based tools for developers, administrators, and meta-modelers. This chapter describes the work area and the basic tasks you can perform using the tools.
Development Studio enables you to build and administer iKnowBase applications, and integrate them with external systems.
Development Studio will often be deployed as http://www.example.com/ikbStudio, but this may vary depending on installation choices.
When starting the Development Studio, you will be asked to log in. The exact mechanism for this will vary from installation to installation; please ask your support personnel for assistance.
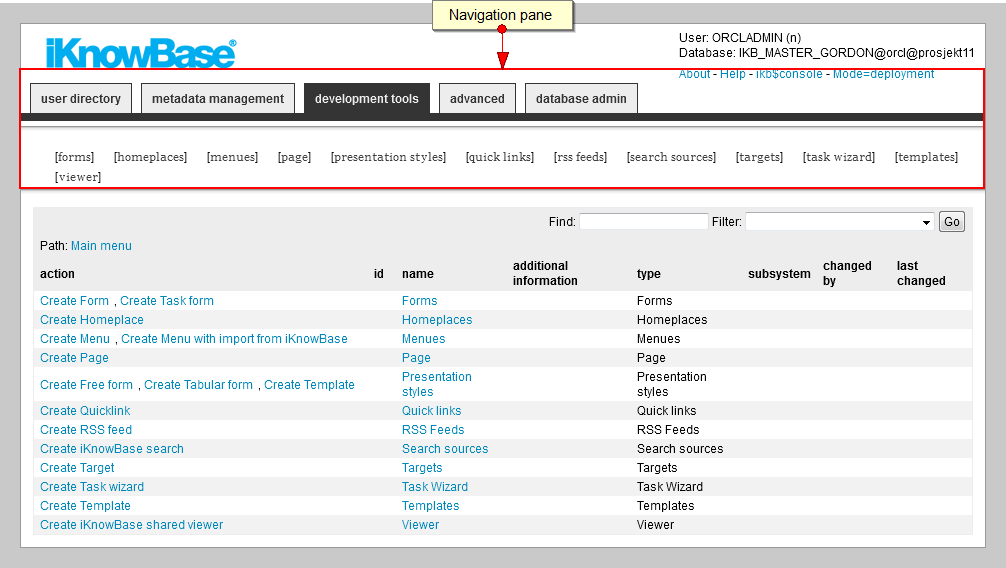
The development work area consists of the Navigation pane, List pane, and Edit pane.
The Navigation pane enables you to navigate between the different tools of the Development Studio, and between the different types of iKnowBase components. The development tools and advanced tabs represents the tools used for development of iKnowBase applications. The user directory and metadata management tabs represents the tools used for aministration and meta-modelling.
Note: When you first enter the development tools and the advanced tabs you get access to the front page with the main menu and global search facilities. Click on a sub menu element in the Navigation pane to enter the work area for the corresponding component type. To return to the front page, click on the Main menu link in the List pane.
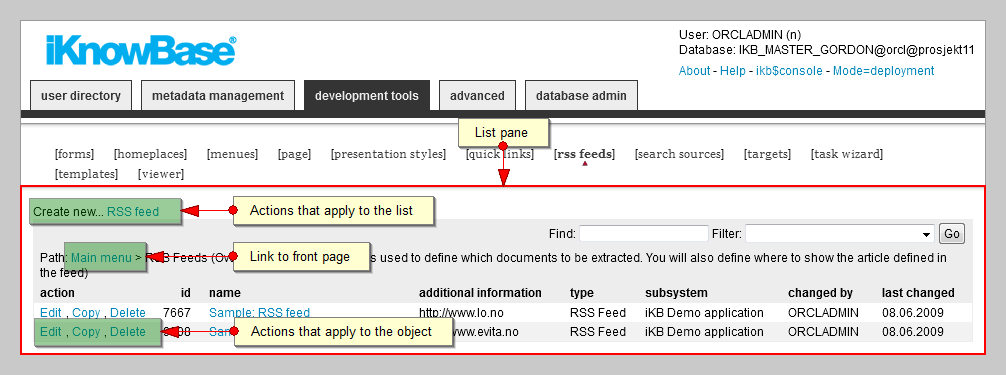
The List pane lists the existing components of the component type selected in the Navigation pane. If no component type is selected you are on the front page. Then the List pane contains either links to the different component types or a list of components matching the search filter, if given. The List pane enables you to filter the list and perform actions like create new components, and edit, copy, and delete existing components.
For the development tools and advanced, your location in the Development Studio is indicated by Path, which also includes a link to the front page.
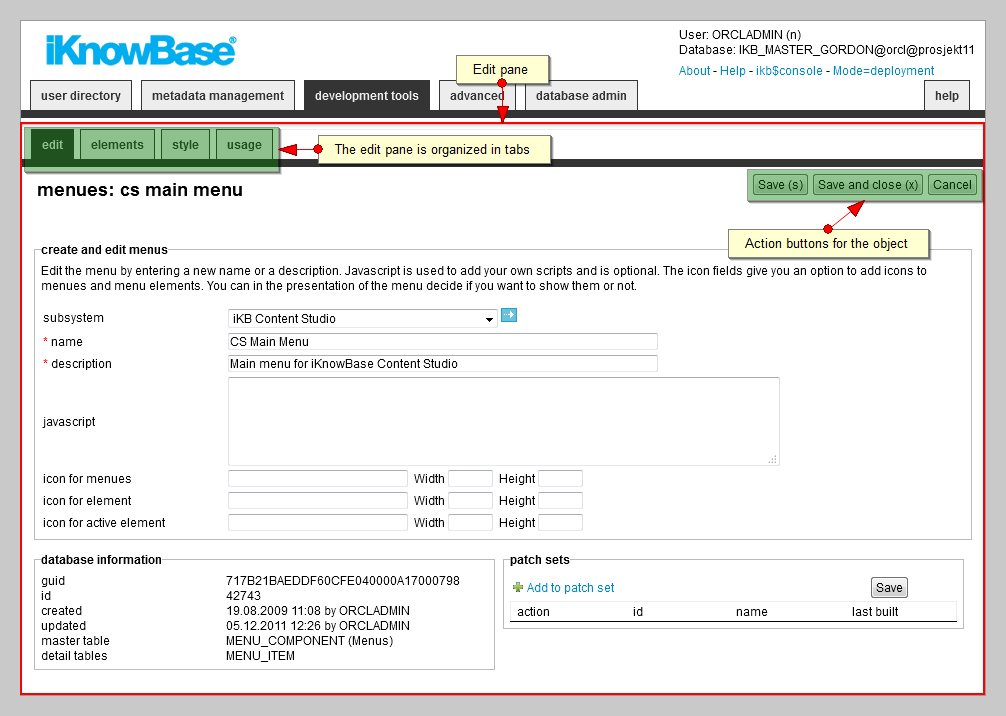
You get access to the Edit pane by clicking on the create action or the edit action for a particular component in the List pane. The Edit pane enables you to create new components, or view details for and update existing components.
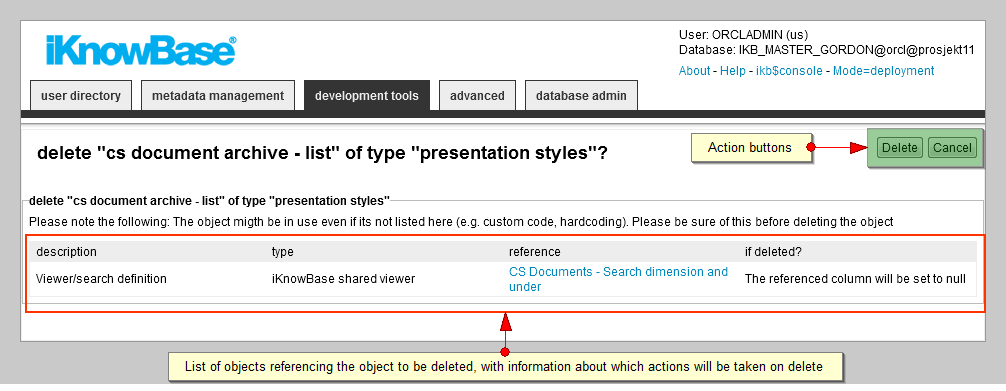
For existing components under development tools and advanced, the Edit pane is organized in tabs. Which tabs that are available, are dependent on the component type. The edit and usage tabs are available for all components. The edit tab contains the properties available at creation time. The usage tab shows a list of all objects that are dependent of the component being edited, as well as actions that will be taken if the component is deleted. The tabs are not available while creating a new component, but become available after initial save of the component. Note:Remember to save you work before you navigate to another tab within the Edit pane.
Mandatory fields are indicated with red stars.
Common action buttons available on the Edit pane are Save (accesskey S), Apply (accesskey S), OK (accesskey X), Copy, Delete and Cancel. You can click on Apply, Save, or OK to save your work. If you use Apply or Save the Edit pane will remain open, and you can continue editing the object. If you use OK the Edit pane will close, and you return to the List pane for the object type.
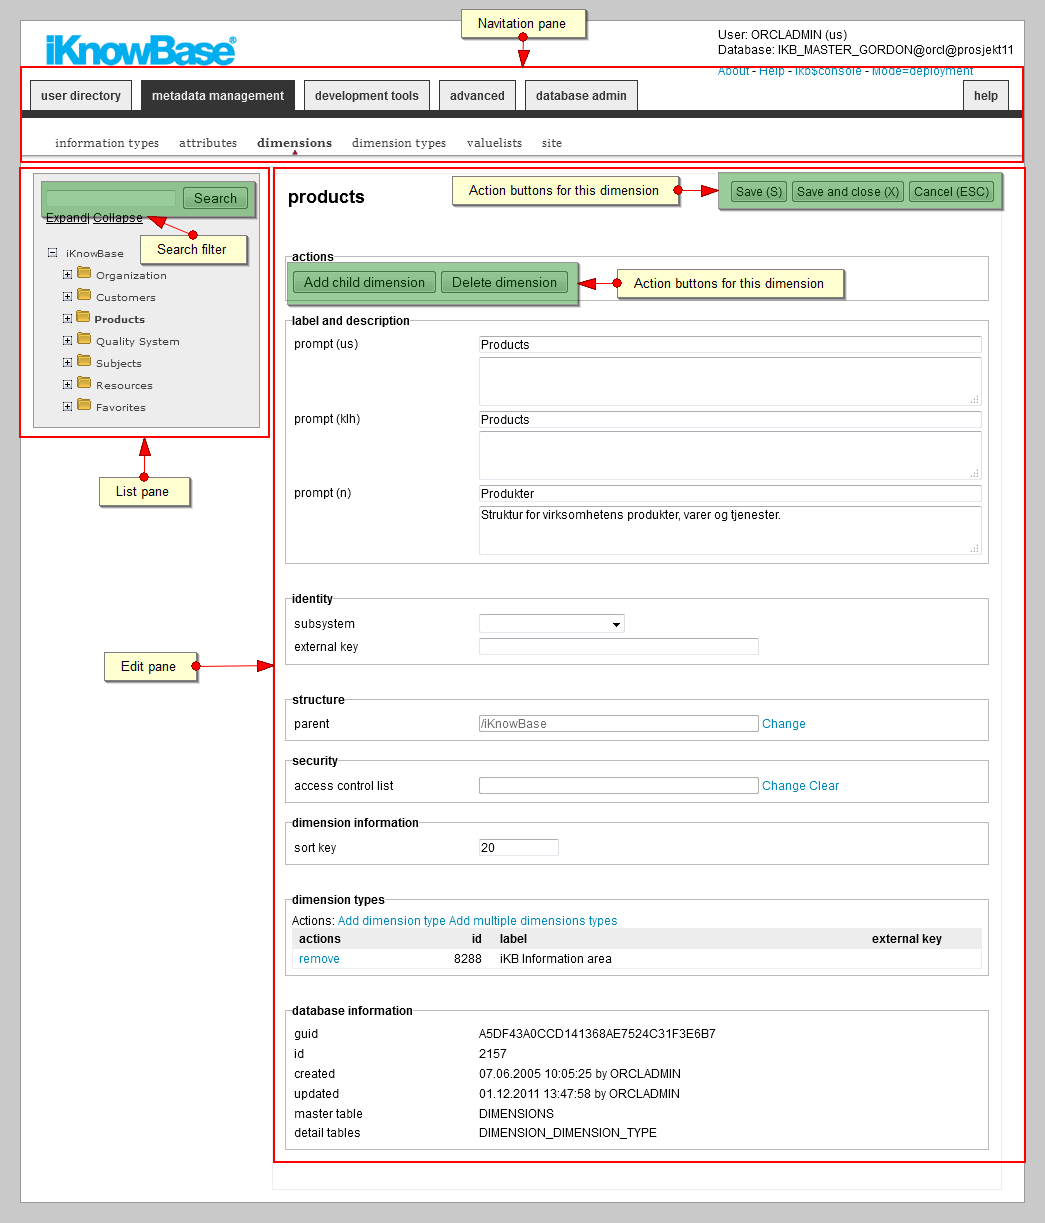
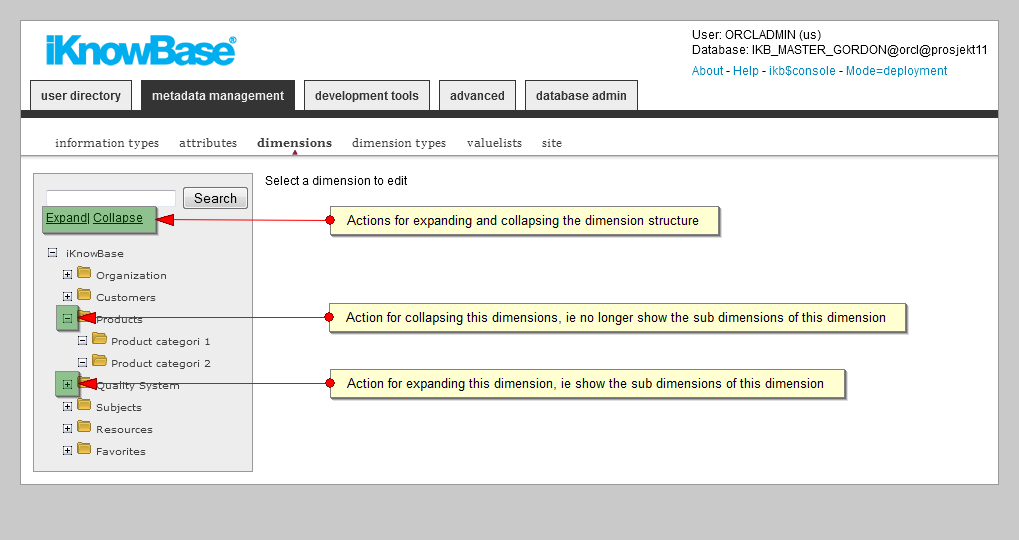
Note: The work area for dimensions under metadata management differs from the other work areas. All three panes are present in the same work area. The List pane contains a tree structure rather than a list. You get access to the Edit pane by clicking on a dimension in the tree structure. The actions for Add child dimension and Delete dimension are available in the Edit for a particular dimension.
In the top right corner you will see the username you are logged in as, as well as information about the database you are connected to.
The tabs of the top menu correspond to the four major tools of the iKnowBase Development Studio: user directory, development tools, advanced and metadata management. To navigate to the subpage for a particular tool, click on the tab representing that tool. The current tab selection is highlighted with a dark background.
Underneath the tabs is another set of navigation links; the sub menu for the current tool. These menu elements correspond to the various metadata or object types that you can maintain using the tool. To navigate to the List pane for a particular metadata or object type, click on the menu element representing that type. The current selection is highlighted with a triangle underneath.
The Edit pane is organized in tabs. The current tab selection is highlighted with a dark background. To navigate to the correct tab of the Edit pane, click on the tab.
Note:When you navigate between the tabs of the Edit pane, unsaved work is lost.
In
Edit panes for components referring to other components, it is possible to navigate directly to the
Edit pane of the referenced component. Behind a property referencing another component there is an arrow icon (
 ). Click on this icon to navigate to the referenced component. This will cause a new browser window to open.
In the List pane, list navigation links are present in the top right corner. To navigate to a given page, click on a number, which represents the page. To navigate to the first or last page of the list, click on the << or >> respectively. To browse the list page by page forward or backward, click on the > or < respectively.
In the List pane for dimensions / dimension navigators, click on the Expand action to show all the dimensions in the structure, click on the Collapse action to collapse the structure and show only the top dimension. Click on the + to expand a given dimension. This will show the sub dimensions of the dimension Click on the - to collapse a given dimension. This will hide the sub dimensions of the dimension. If you want to filter the dimension structure, type the appropriate filter that you want to apply in the search filter, and press ENTER or click the Search button.
On the front page you will find a global search facility which enables you to search for components across all component types. If you know which type of component you are looking for, you can use the local search facility. This is available in the List pane for the given component type. Both free text search and a subsystem filter are available for both global and local searches. Note:The given subsystem filter will be applied until you select otherwise.
To search for information, perform the following steps:
Note:If you do not specify any filter, all existing objects are displayed.
To search for information, perform the following steps:
If you do not specify any information in the search filter field, iKnowBase displays all existing objects.
You can sort the list in the List pane by clicking on the heading of the column you want to order by. The first click will result in ascending order. The next click will result in descending order. Sorted columns are indicated with up or down arrows next to the sort column.
This chapter describes the basic tasks you can perform using Development Studio.
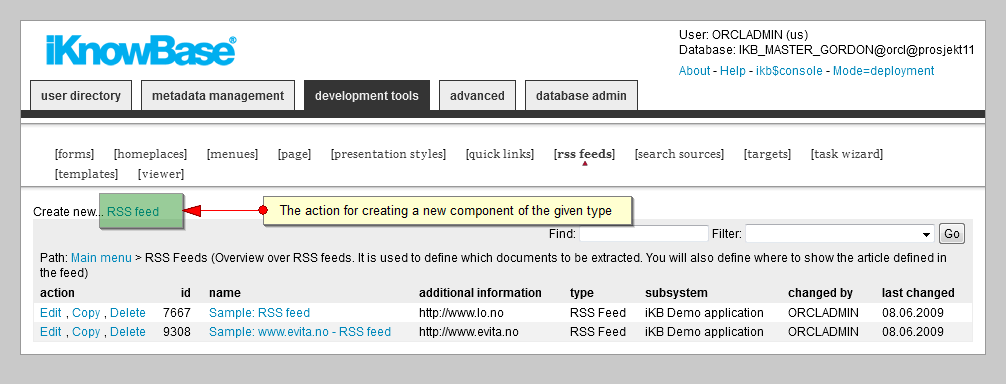
To create a new object, perform the following steps:
 objectType
or
Create
objectType
action, where
objectType
is the type of object you want to create. An empty
Edit pane opens.
objectType
or
Create
objectType
action, where
objectType
is the type of object you want to create. An empty
Edit pane opens.
You can view the properties of an existing object in iKnowBase.
To view the properties of an object, perform the following steps:
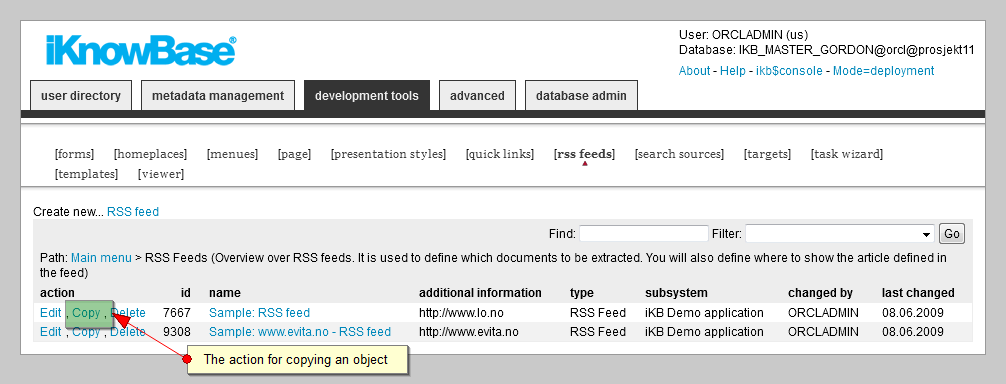
Instead of going through all the steps that you need to perform to create an object, you can create a copy of an object and then update the properties for that object.
To create a copy of an object, perform the following steps:
You can update the information that you provided for an object.
To update an object, perform the following steps:
Note: Click Cancel if you want to cancel the changes you’ve made.
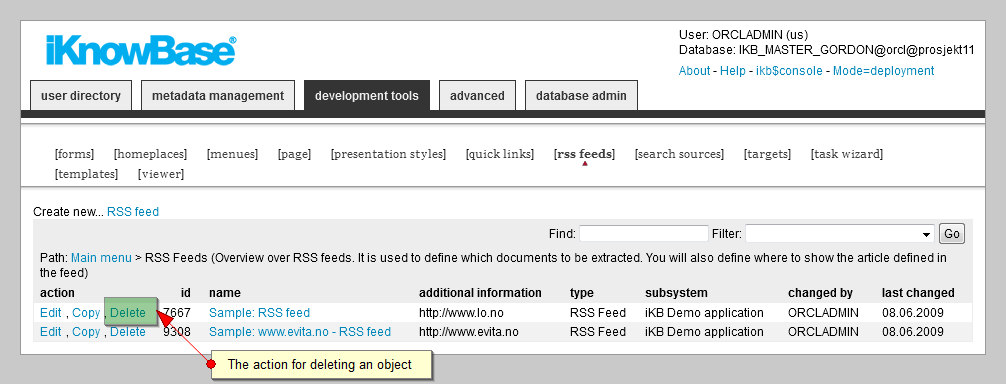
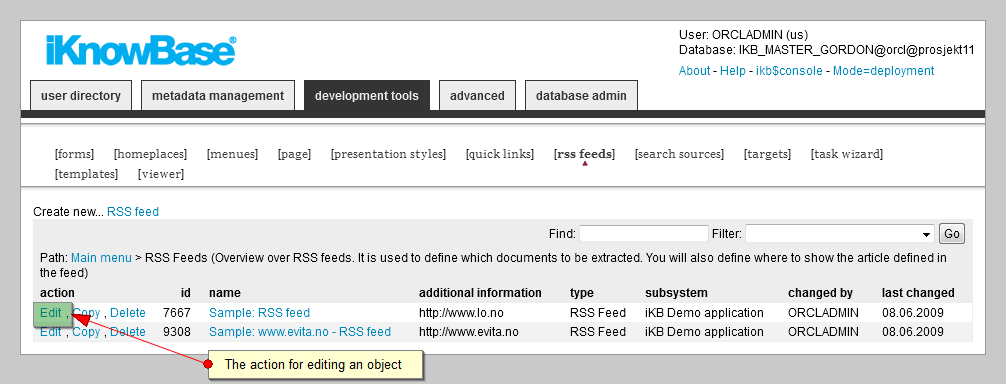
You can delete an object from iKnowBase.
To delete an object, perform the following steps:
Note: You can click Cancel to cancel the deletion.
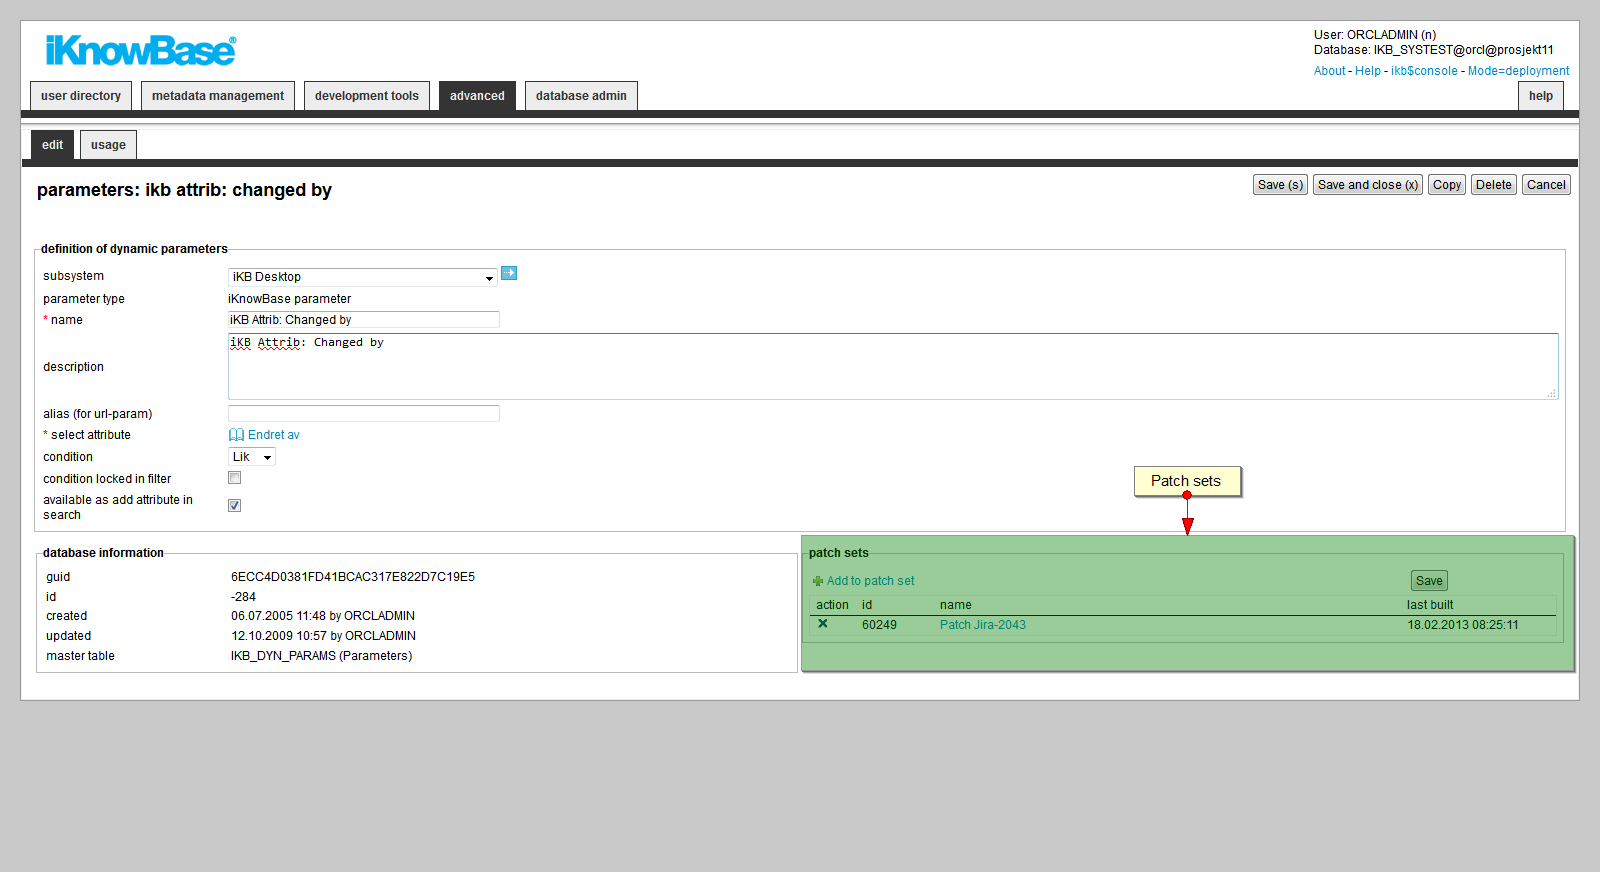
You can add an object to a patch set within each component type. The patch set can later be exported and installed somewhere else.
To add an object to a patch set, perform the following steps:
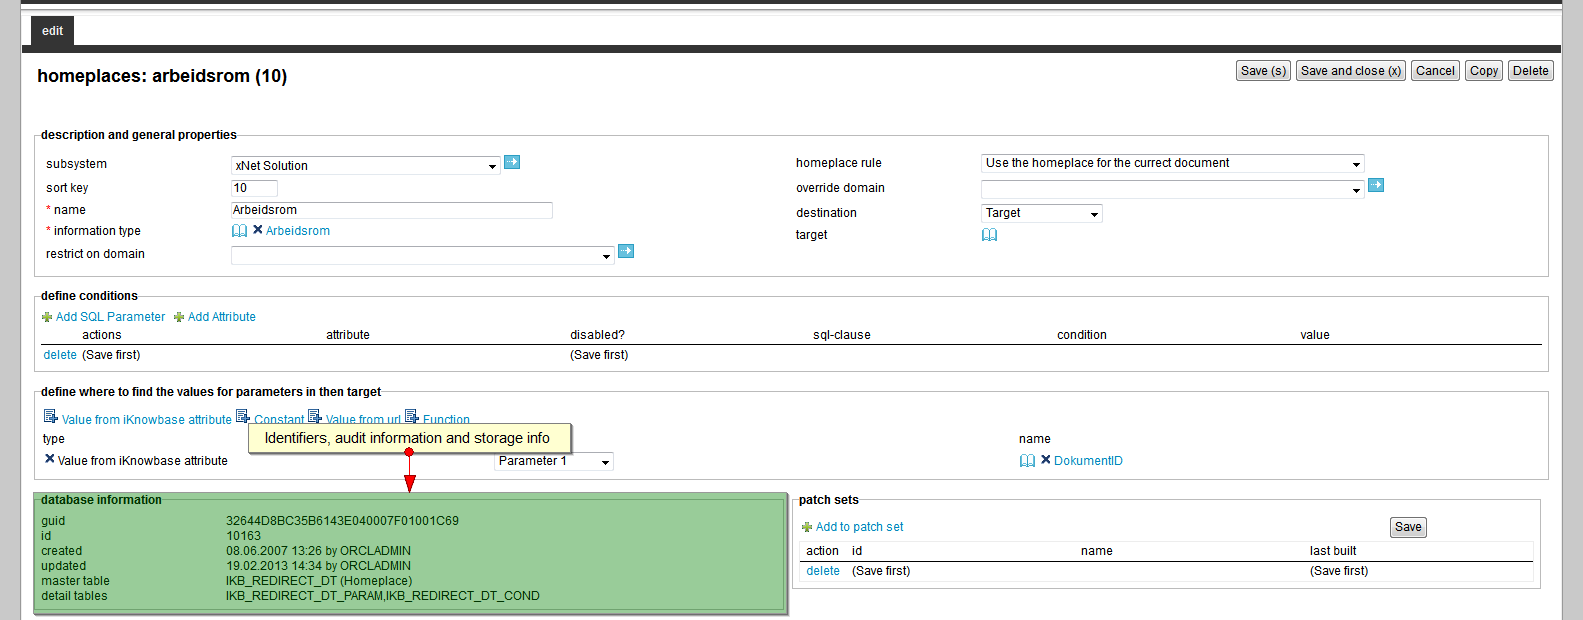
All objects has a section where audit information, internal identifiers and storage information are displayed.
| Property | Description |
|---|---|
| Guid |
Displays a globally unique identifier number for this component. This property appears after you save a component. You cannot update the information of this property. |
| Id |
Displays a unique identifier number for this component. This property appears after you save a component. You cannot update the information of this property. |
| Created |
Displays when the component was created and by whom it was created. |
| Updated |
Displays when the component was last updated and by whom it was updated. |
| Master table |
Main database table where the instance is stored |
| Detail tables |
Displays other database tables where details for the object are stored. |
| Previous | Top | Next |
| Introduction | iKnowBase Content Studio |