iKnowBase Development Reference
1. Crop areas
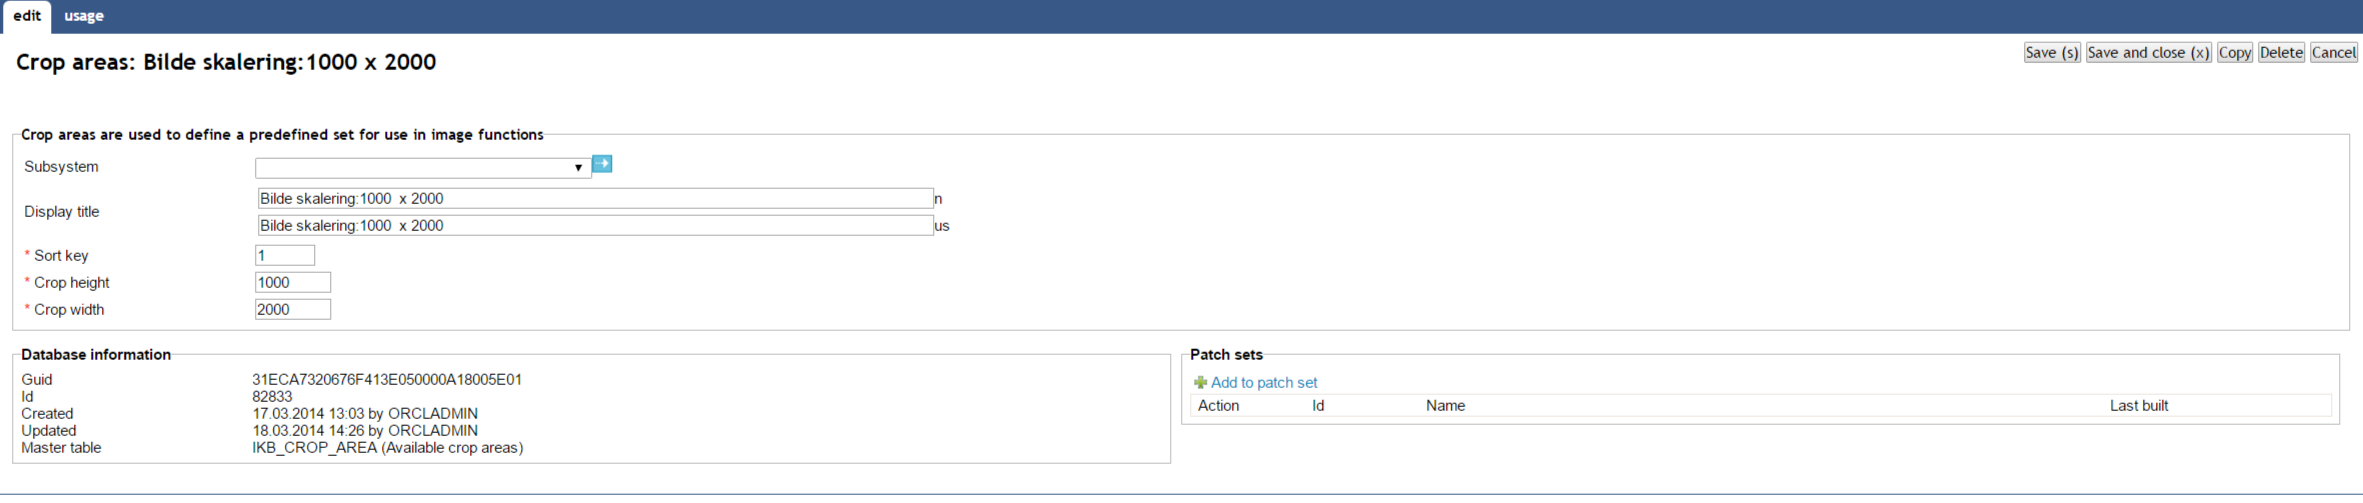
Crop areas are predefined definitions used in image processing functions where cropping is part of the functionality. Use of crop areas guarantees the same scaling attributes.
1.1. Properties
This section describes the properties of a crop area, as shown on the corresponding Edit pane.
| Property | Description |
|---|---|
Subsystem |
Select the appropriate subsystem. |
Display name |
Name to describe the crop area. |
Sort order |
Used to order the records of crop sizes. |
Crop width |
Enter the width of the image. |
Crop height |
Enter the height of the image. |
2. Database Functions
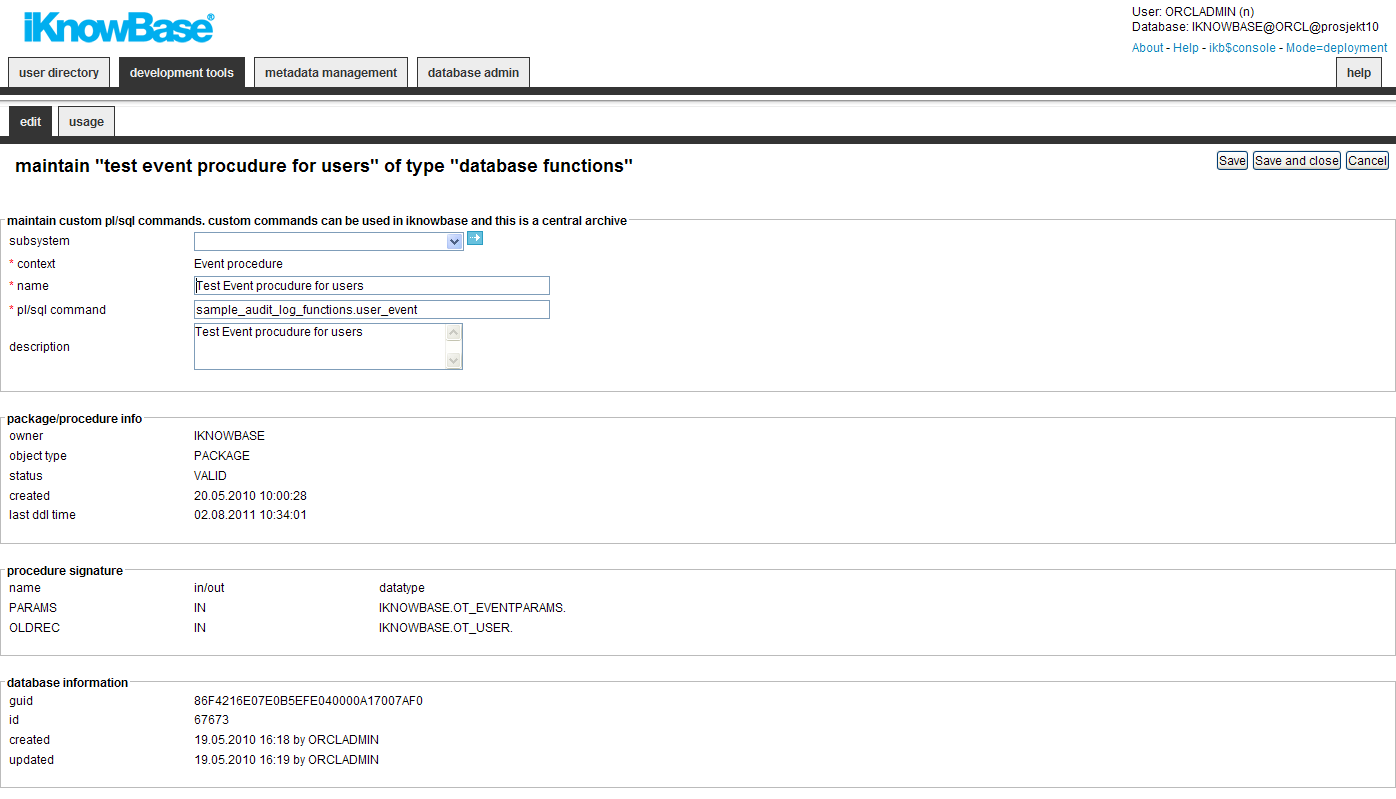
Several components of iKnowBase can be configured to use database functions (written in Oracle PL/SQL) for customization. Rather than specify the names of the functions at each use, they are collected in this module. Database functions come in several flavors, depending on their intended usage scenarios.
2.1. Properties
This section describes the properties of a database function, as shown on the corresponding Edit pane.
| Property | Description |
|---|---|
Subsystem |
Select the subsystem the profile belongs to |
Context |
Select the appropriate context for which you want to call the PL/SQL command. Available values are:
|
Name |
Type the name of the database function. |
PL/SQL Command |
Type the PL/SQL command that you want to call from the iKnowBase Oracle database. |
Description |
Type a description for this database function. |
Does the function execute dml-statements? |
If the function executes insert, update or delete statements, it must be executed differently (but not as efficient) than functions without it. The flag is only applicable for Presentation style functions. If you experience the error : ORA-14551 cannot perform a DML operation inside a query, the flag should most likely be checked. |
Package/Procedure info |
Displays info about the database object like owner, object type, status, created date and last ddl time. |
Procedure signature |
Displays the signature of the function/procedure. |
2.2. Database function signatures
2.2.1. Event procedure - document events
<package>.<procedure name> (
    p_event_params      in      ot_eventparams,
    p_old_record        in      ot_document
);
2.2.2. Event procedure - user events
<package>.<procedure name> (
    p_event_params      in      ot_eventparams,
    p_old_record        in      ot_user
);
2.2.3. Event procedure - group events
<package>.<procedure name> (
    p_event_params      in      ot_eventparams,
    p_old_record        in      ot_group
);
2.2.4. Event procedure - acl events
<package>.<procedure name> (
    p_event_params      in      ot_eventparams,
    p_old_record        in      ot_acl
);
2.2.5. Event procedure - File upload events
<package>.<procedure name> (
    p_event_params      in      ot_eventparams,
    p_old_record        in      ot_upload_temp_document
);
2.2.6. Parse/build url from a listener url
The function names must support two methods: if p_method=BUILD then you will receive a set of values and return the values to be shown in the URL. p_method=PARSE must do the opposite.
Function <function name> (
    p_method    in varchar2,
    p_target_guid in varchar2,
    p_fragments in ct_portlet_runtime_fragments default ct_portlet_runtime_fragments())
  return ct_portlet_runtime_fragments;
2.2.7. Target/Homeplace: Database function
<package>.<procedure name>;
2.2.8. Form:Custom Show
<package>.<procedure name> (
    p_style_id          in      number
    p_document_id       in      number,
    p_parent_id         in      number,
    p_site_id           in      number,
    p_reference_path    in      varchar2,
    p_page_url          in      varchar2,
    p_back_url          in      varchar2
);
2.2.9. Form:Custom Save
<package>.<procedure name> (
      p_back_url                 IN VARCHAR2,
      p_site_id                  IN NUMBER,
      p_style_id                 IN NUMBER,
      p_request                  IN VARCHAR2 DEFAULT 'save',
      p_page_url                 IN VARCHAR2 DEFAULT NULL,
      p_document_id              IN NUMBER DEFAULT NULL,
      p_parent_id                IN NUMBER DEFAULT NULL,
      p_document_type_id         IN NUMBER DEFAULT NULL,
      p_title                    IN VARCHAR2 DEFAULT NULL,
      p_acl_id                   IN NUMBER DEFAULT NULL,
      p_url                      IN VARCHAR2 DEFAULT NULL,
      p_description              IN     CLOB default null,
      p_text_indexed             IN     CLOB default null,
      p_attribute_clobs          IN     ct_value_clobs default ct_value_clobs(),
      p_long_text_ids            IN ikb_portal_api.vc_arr DEFAULT ikb_portal_api.empty_vc_arr,
      p_valid_from               IN VARCHAR2 DEFAULT NULL,
      p_valid_to                 IN VARCHAR2 DEFAULT NULL,
      p_status_id                IN NUMBER DEFAULT NULL,
      p_external_key             IN VARCHAR2 DEFAULT NULL,
      p_file                     IN VARCHAR2 DEFAULT NULL,
      p_document_format          IN VARCHAR2 DEFAULT NULL,
      p_attrib_value             IN ikb_portal_api.vc_arr DEFAULT ikb_portal_api.empty_vc_arr,
      p_old_attrib_value         IN ikb_portal_api.vc_arr DEFAULT ikb_portal_api.empty_vc_arr,
      p_attribute_id             IN ikb_portal_api.vc_arr DEFAULT ikb_portal_api.empty_vc_arr,
      p_line_no                  IN ikb_portal_api.vc_arr DEFAULT ikb_portal_api.empty_vc_arr,
      p_line_no_ref              IN ikb_portal_api.vc_arr DEFAULT ikb_portal_api.empty_vc_arr,
      p_external                 IN ikb_portal_api.vc_arr DEFAULT ikb_portal_api.empty_vc_arr,
      p_dav_external_guid        IN VARCHAR2 DEFAULT NULL,
      p_template                 IN NUMBER DEFAULT NULL,
      p_document_id_ref          IN NUMBER DEFAULT NULL,
      p_attachment               IN ikb_portal_api.vc_arr DEFAULT ikb_portal_api.empty_vc_arr,
      p_task_guid                IN VARCHAR2 DEFAULT NULL,
      p_task_step_guid           IN VARCHAR2 DEFAULT NULL,
      p_version                  IN VARCHAR2 DEFAULT NULL,
      p_version_no               IN NUMBER DEFAULT NULL,
      p_version_comment          IN VARCHAR2 DEFAULT NULL,
      p_handle_redirect_local    IN BOOLEAN DEFAULT FALSE,
      p_reference_path           IN VARCHAR2 DEFAULT NULL,
      p_session_id               IN VARCHAR2 DEFAULT NULL,
      p_return_type              IN VARCHAR2 DEFAULT NULL,
      p_callback_function        IN VARCHAR2 DEFAULT NULL,
      p_last_timestamp           IN VARCHAR2 DEFAULT NULL,
      p_attribute_file_ident     IN ikb_portal_api.vc_arr DEFAULT ikb_portal_api.empty_vc_arr,
      p_attribute_file           IN ikb_portal_api.vc_arr DEFAULT ikb_portal_api.empty_vc_arr,
      p_files_guid_remove        IN ikb_portal_api.vc_arr DEFAULT ikb_portal_api.empty_vc_arr,
      p_files_attribute_remove   IN ikb_portal_api.vc_arr DEFAULT ikb_portal_api.empty_vc_arr
      );
2.2.10. Portlet:Run PL/SQL function
<package>.<procedure name>;
2.2.11. Tooltip function (PLSQL)
<package>.<function name>  (
      p_site_id          IN   NUMBER,
      p_document_id      IN   NUMBER,
      p_attribute_id     IN   NUMBER,
      p_page_url         IN   VARCHAR2,
      p_back_url         IN   VARCHAR2,
      p_reference_path   IN   VARCHAR2,
      p_language_id      IN   VARCHAR2,
      p_version_no       IN   NUMBER
   )
      RETURN VARCHAR2
2.2.12. Solr - GetDocument
<package>.<function name>  (
        p_solr_message in ot_solr_message,
        p_indexerType in varchar2 default 'SOLR')
    return ct_solr_rows;
2.2.13. Solr - attribute functions
<package>.<Procedure name>  (
        p_document_id           in number,
        p_attribute             in ot_document_attribute default null,
        p_solr_data             in out ct_solr_rows default ct_solr_rows())
        );
2.2.14. Pres.Style:Database Function (Advanced function)
Advanced function has two variants depending on the datasource in the presentation style. If the datasource is set to DOCUMENT use this signature:
<package>.<function name>  (
    p_site_id           IN   NUMBER,
    p_document_id       IN   NUMBER,
    p_attribute_id      IN   NUMBER,
    p_page_url          IN   VARCHAR2,
    p_back_url          IN   VARCHAR2,
    p_reference_path    IN   VARCHAR2,
    p_language_id       IN   VARCHAR2
) RETURN VARCHAR2/CLOB/NUMBER/DATE
and if the datasource is VERSIONED_DOCUMENT, this is the correct signature:
<package>.<function name>  (
    p_site_id           IN   NUMBER,
    p_document_id       IN   NUMBER,
    p_attribute_id      IN   NUMBER,
    p_page_url          IN   VARCHAR2,
    p_back_url          IN   VARCHAR2,
    p_reference_path    IN   VARCHAR2,
    p_language_id       IN   VARCHAR2,
    p_version_no        IN   NUMBER
) RETURN VARCHAR2/CLOB/NUMBER/DATE
A good advice is to use the latest one so it can be used for both datasource. You must then make a test in the function to check if its a version or not you are working with. If returning a number or a date, make sure to set the corresponding return type to the same, it will enable a correct sort command (not only alphanumeric sort).
2.2.15. Pres.Style:Database Function (Simple function)
Simple functions don’t take any parameters (e.g. dbms_random.random).
<package>.<function name> or <sql-function>
2.2.16. Pres.Style:Format Clause
Use an SQL-function like char/date-functions, arithmetic functions or SQL built ins. #value will be substituted with the attribute value. Examples:
to_char(#value,'hh24.mi');
dbms_random.random;
2.2.17. Target/Homeplace: Database function
<package>.<procedure name>;
2.3. Register a Database Function
You must register database functions, which will be called through the URL in iKnowBase Page Engine. For Custom Save Functions (used in forms) this will be done automatically for you. If you need to verify/register manually, use the screen for Package Aliases.
3. Domains
An iKnowBase installation may serve multiple uses at the same time. For example, it may serve an external site (http://www.example.com), an intranet (http://intra.example.com), a partner site (https://partner.example.com) and a customer service site (https://service.example.com).
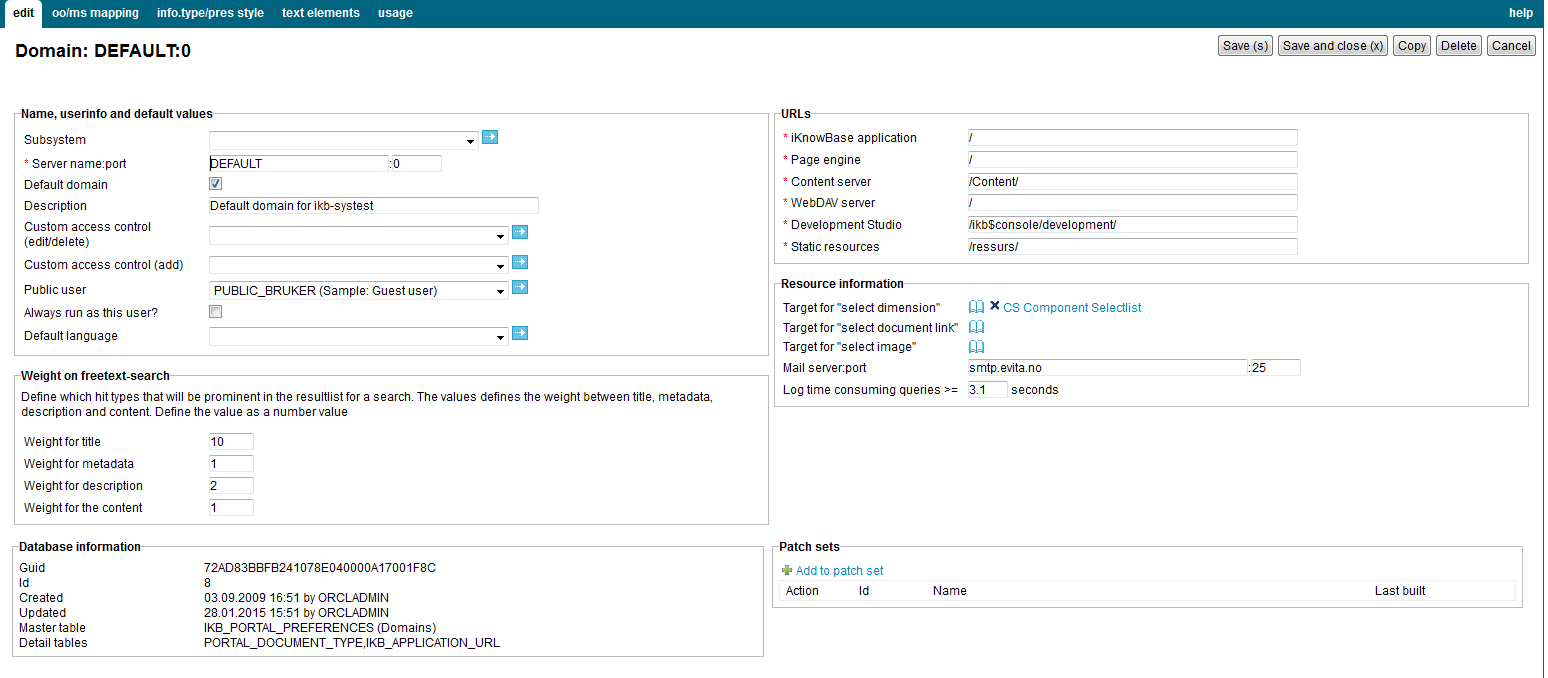
iKnowBase Domain defines a preference set that apply to a particular host name, to allow the user experience to differ between them.
See Development Guide for further information.
3.1. Properties
This section describes the properties of a domain, as shown on the corresponding Edit pane tabs.
3.1.1. Edit Tab
The Edit tab contains general information about the domain.
| Property | Description |
|---|---|
Subsystem |
Select the appropriate subsystem. |
Server name:port |
The servername and port this domain applies to, for example www.example.com : 80. |
Default domain |
Indicates the default domain. Default domains will be used where the domain context is unknown, e.g. sendmail functions. For that reason, it must always be one default domain defined. |
Description |
Type a description for this domain. |
Custom access control (edit/delete) |
Select a custom access control function, used to extend or override the default access control when editing and deleting documents. |
Custom access control (add) |
Select a custom access control function, used to extend or override the default access control when adding documents. |
Public user |
The name of the iKnowBase user used for clients that are not logged on. This property displays all the guest users defined in User administration. |
Always run as this user |
Indicates whether to always run as the public user, even for clients that are in fact logged on. |
Default language |
The default language used when iKnowBase does not find a language on the individual portlet, the user or the browser language. |
Weight for title |
Search score weight for hits in the document title. Value must be between 0.1 and 10. |
Weight for metadata |
Search score weight for hits in the document metadata. Value must be between 0.1 and 10. |
Weight for description |
Search score weight for hits in the document description. Value must be between 0.1 and 10. |
Weight for Content |
Search score weight for hits in the document content (URL, body, text, or file). Value must be between 0.1 and 10. |
iKnowBase application |
Path to the deployed iKnowBase ikbViewer application, including the trailing slash. For a default installation, use "/". |
Page engine |
Path to the iKnowBase page engine, including the trailing slash. For a default installation, use "/page/". |
Content server |
Path to the iKnowBase content server, including the trailing slash. For a default installation, use "/Content/". |
WebDAV server |
URL to the WebDAV server. Certain clients will only work properly if the WebDAV server available at the root context. Either using User-Agent detection (default) or a separate host, e.g. "https://webdav.example.com". Also, most clients will require https to be enabled in order to work properly. Note: A full URL is required. Relative URL (e.g. "/") is not supported. |
Development Studio |
Path to the iKnowBase Development Studio, including the trailing slash. For a default installation, use "/ikbStudio/". |
Static resources |
Path to the deployed resource directory. For a default installation, use "/ressurs/" |
Target to dimension page |
Target to the dimension selector popup, typically used when selecting dimensions for search or categorize. |
Target to archive page |
Target to the document archive page, typically used when selecting "related documents" during publishing. Default value should be set to null. |
Target to image page |
Target to the image archive page, typically used when selecting images during publishing. Default value should be set to null. |
Mail server : port |
The servername and port used when sending e-mail from this domain. |
Log time consuming queries |
When a viewer use longer time than the time entered here, the query will be logged to sql_logger automatically. The value should be in seconds e.g. (5 or 0.5). |
3.1.2. Document Type / Presentation Style Tab
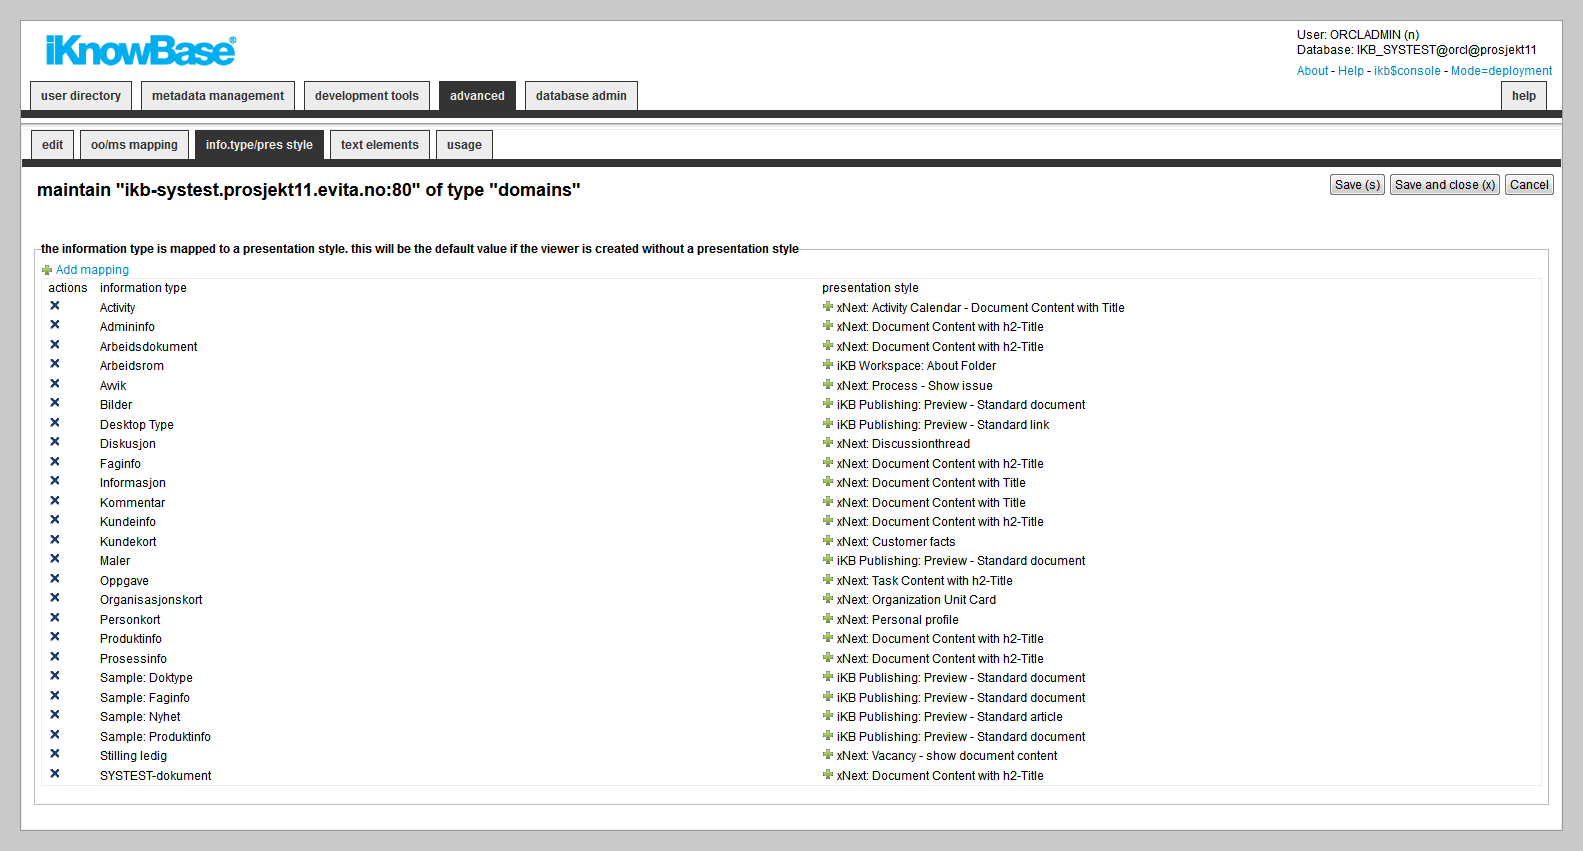
The info.type/pres.style tab contains information on the default presentation styles for the various document types. This information is used for viewers without a presentation style, normally for viewers presenting one single document.
| Property | Description |
|---|---|
Add mapping |
Selector of available document types. |
Document type |
List of all document types defined in the system. |
Presentation style |
Specifies which presentation style will be used for displaying information if a viewer does not specify a presentation style. |
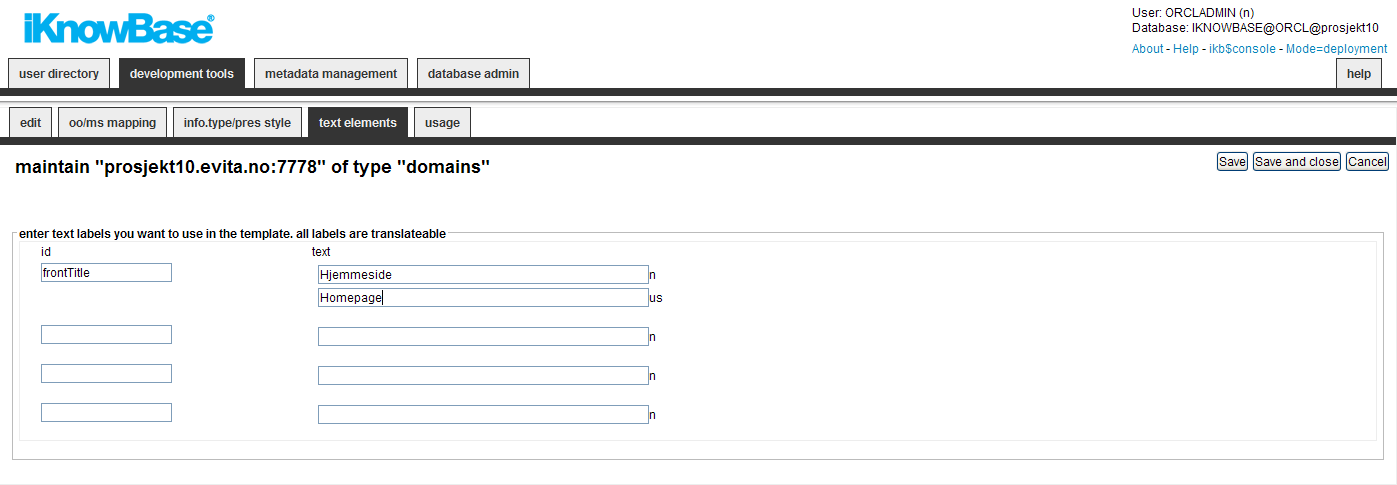
3.1.3. Text Elements Tab
The properties on this tab enable you to define texts to be used in the component. The texts are available as FreeMarker model objects. Multiple languages are supported.
| Property | Description |
|---|---|
Id |
Type an identifier for the text element. |
Text |
Type the text labels that you want to use in the template. If multiple languages are supported in the solution, clicking the text input item expands hidden input items for all the languages, the language codes are specified behind the input fields. |
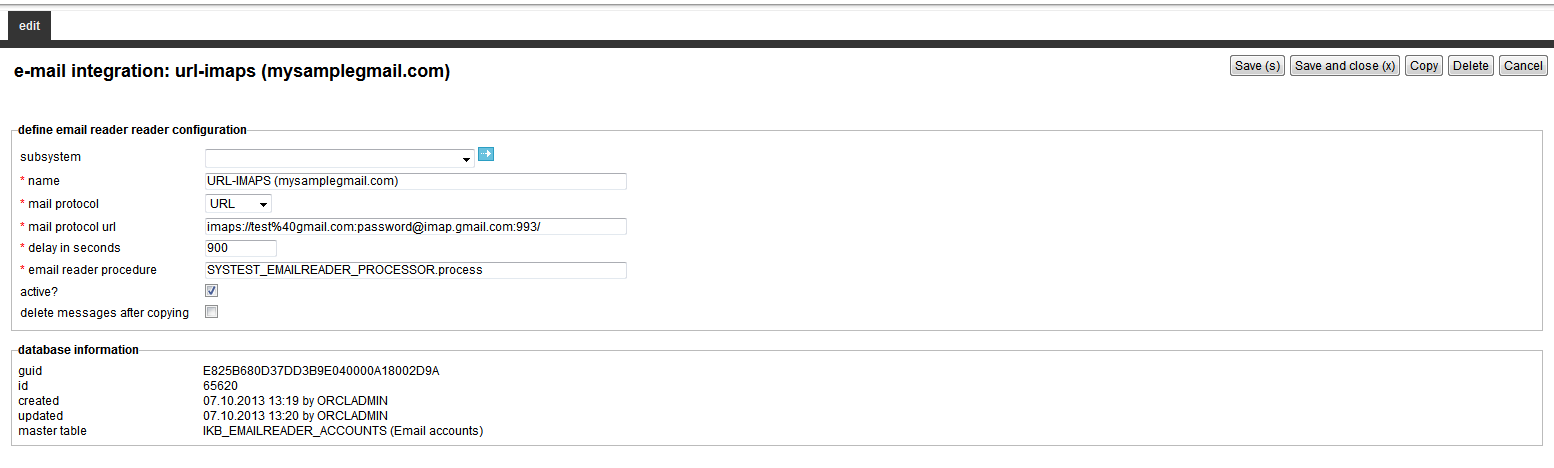
4. E-mail Integration
The iKnowBase E-mail Reader is a separate program that reads e-mails from an e-mail server and stores into the database, ready for further processing. The e-mail integration components defines e-mail accounts used by the iKnowBase E-mail Reader.
See Development Guide for further information.
4.1. Properties
This section describes the properties of an e-mail integration, as shown on the corresponding Edit pane.
| Property | Description |
|---|---|
Subsystem |
Select the appropriate subsystem. |
Name |
Type a name for the e-mail integration point. |
Mail protocol |
Select between POP3 (default), POP3S (secured), IMAP, IMAPS (secured) or URL. |
Mail server URL |
The full URL to the mail server from which you want to retrieve the e-mails. Only applicable when mail protocol is URL. |
Mail server |
The address of the mail server from which you want to retrieve the e-mails. Only applicable when mail protocol is different than URL. |
Username to mailserver. |
The username used to log in to the mailserver. Only applicable when mail protocol is different than URL |
Password |
The password used to log in to the mailserver. Only applicable when mail protocol is different than URL |
Delay in seconds |
Defines the time interval in seconds between each run of the emailreader |
Email reader procedure |
The name of the PL/SQL procedure/package used for processing the retrieved e-mail. |
Active |
A check box indicating whether this e-mail account is active, and should be processed by the e-mail reader. |
Delete messages after copying |
A check box indicating whether the e-mail reader shall delete e-mail from the server after storing it into the database. |
5. Event
Whenever iKnowBase stores or updates a document (an information object), file uploads or a metadata object (user, group, acl) in the content repository, it can send a notification about this to the outside world. Such a notification is called an event, and it is implemented by having iKnowBase to call a custom PL/SQL procedure.
The event definition specifies which procedure should be called and under what conditions the procedure should be called.
An event is an action performed when certain operations like insert and update are carried out on a given object. For document, in addition to the operations, the document can have some conditions that need to be satisfied in order to execute the event.
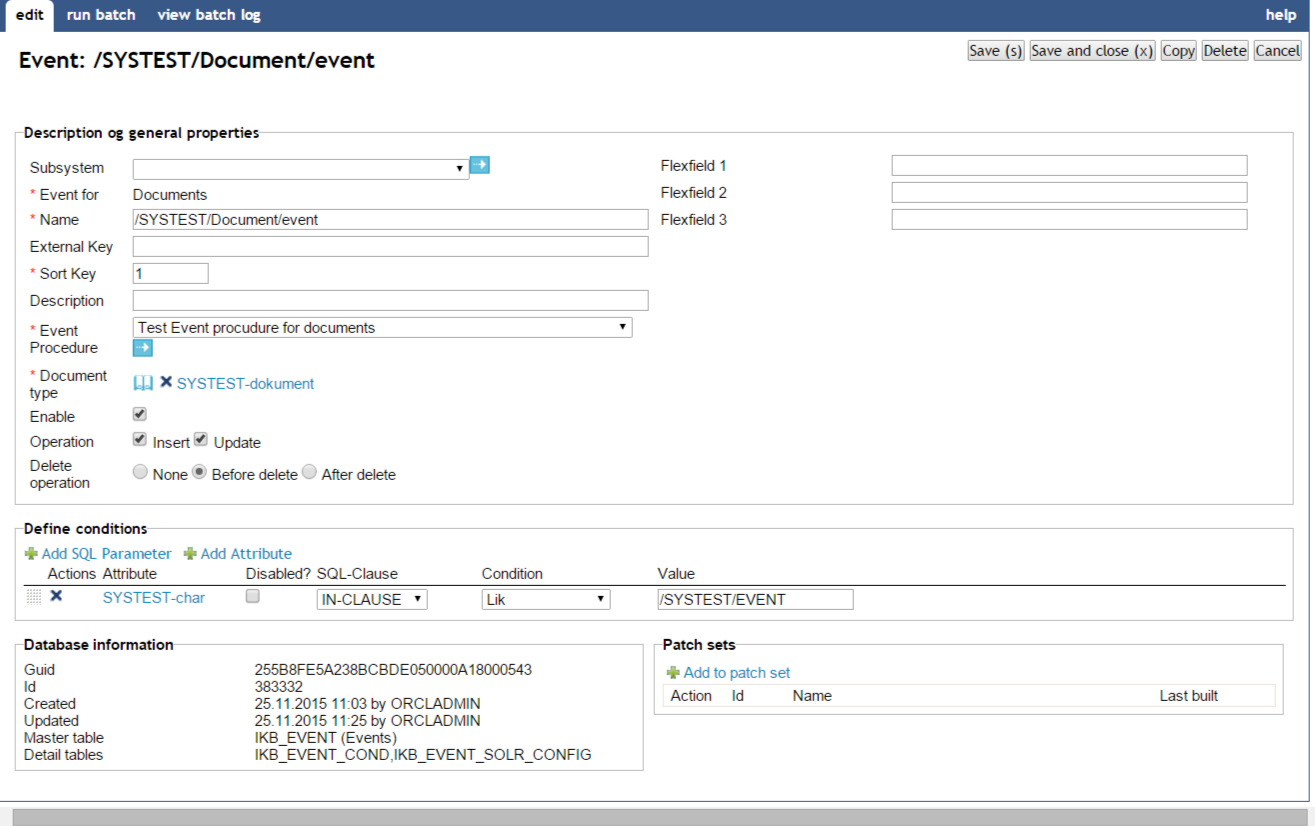
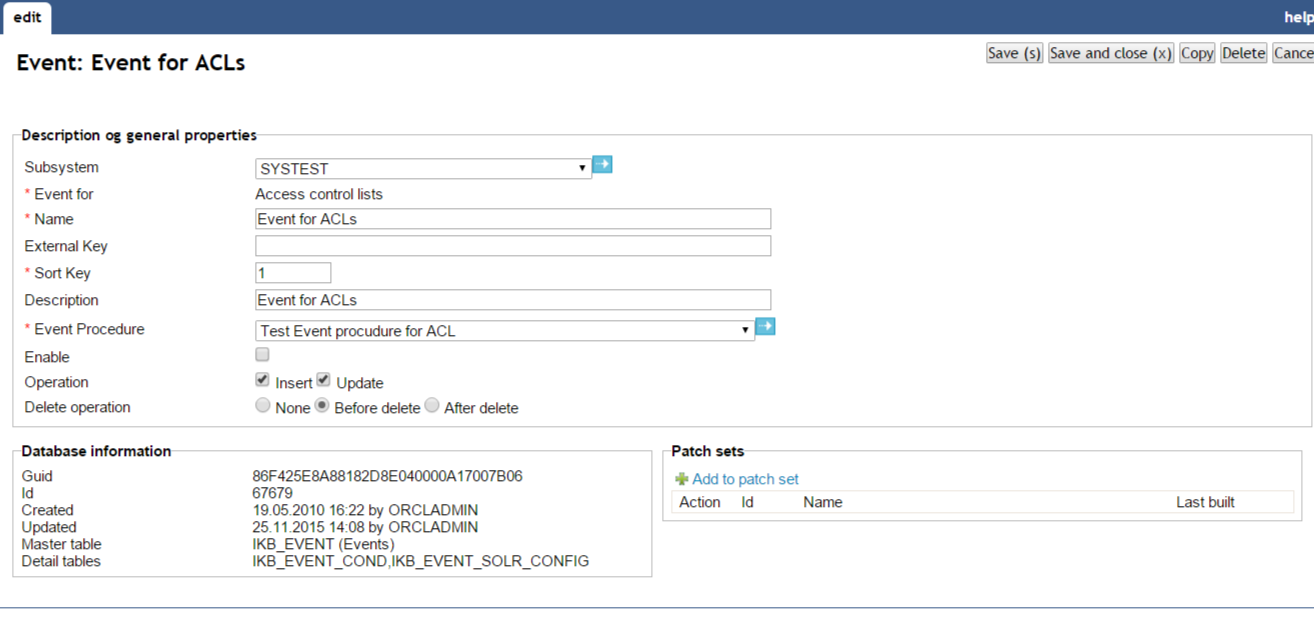
5.1. Document Event Properties
This section describes the properties of a document event, as shown on the corresponding Edit pane.
| Property | Description | ||
|---|---|---|---|
Subsystem |
The subsystem the profile belongs to |
||
Event for |
Set automatically to documents. |
||
Name |
Type a name for the event. |
||
Sort Key |
A number that defines the order in which several events are sorted. If a document operation triggers several events, the event with the lowest sort key value is executed first. |
||
Description |
Type a description of the event. |
||
Event procedure |
Select the database procedure that will be called when the event triggers. |
||
Document types |
Select the document types that this event applies to. |
||
Enable |
Enable applies to enabling or disabling a event |
||
Operation |
Select which operations this event applies to, and specify whether the event is enabled or not. The set of operations that this event applies to:
|
||
Delete operation |
Select if the event should run when deleting an object, and if it should be executed before or after the actual delete.
|
||
Flexfield 1, 2 and 3 |
A user selectable text value that is sent to the event procedure. |
||
Define condition |
You can choose between two types of parameters:
When the parameter is selected, you must save before you can set any values. |
||
Actions |
Delete the parameter by clicking the icon |
||
Attribute |
Displays the names of the selected attributes to use as conditions for the event. |
||
Disabled? |
You can for debugging reasons disable attributes. |
||
sql-clause |
For performance reasons and only for advanced users: Defines how the query condition is built (IN or EXISTS) |
||
Condition |
Select the appropriate conditions for the selected attributes. The conditions depend on the type of attribute.
|
||
Value |
Select or enter the appropriate values for the selected attributes. Available options depends on the attribute/parameter type. Not applicable to SQL parameters. |
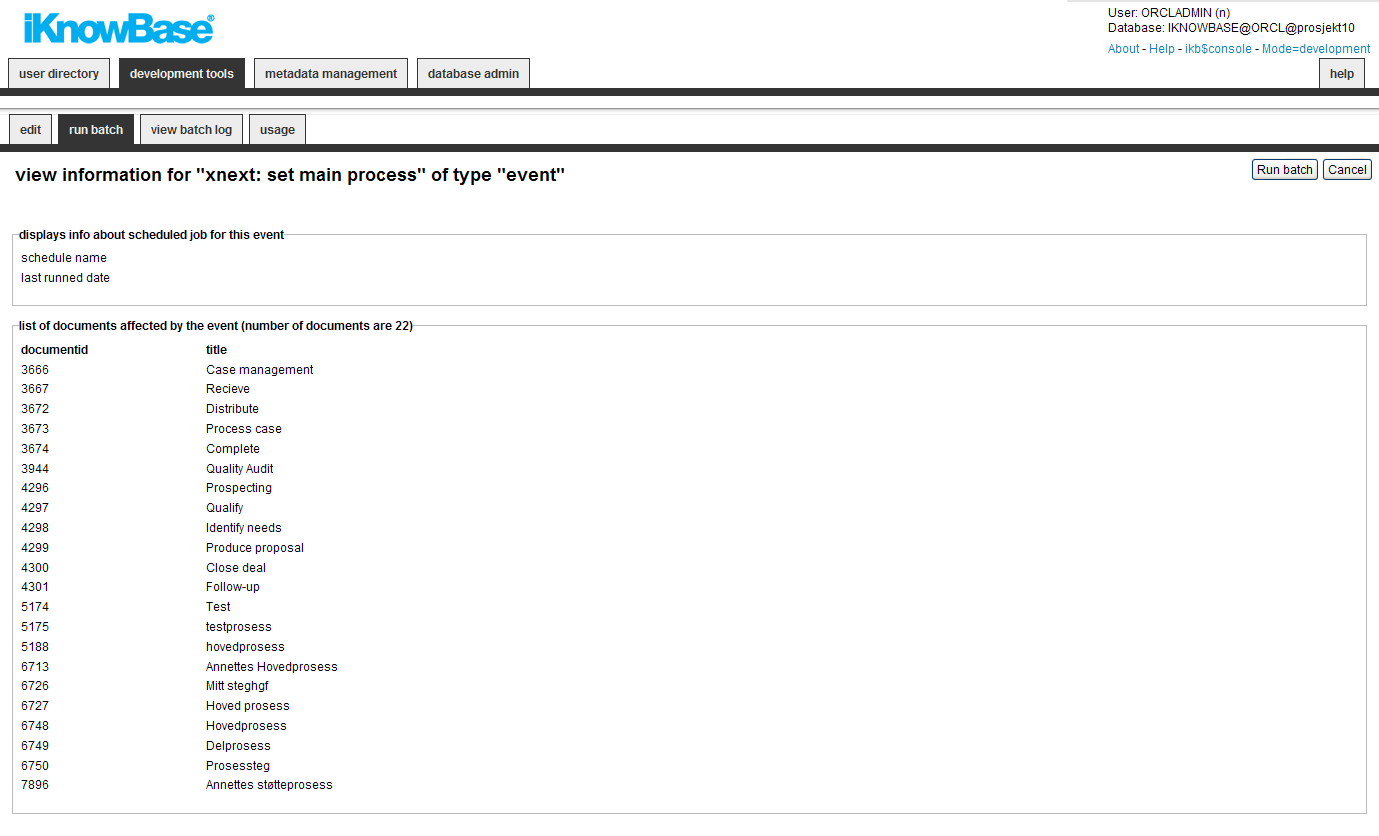
5.1.1. Run Batch
You can run an event in batch mode. It will select all documents matching the conditions set for the event. In your custom event procedure the eventmode will have the value 'BATCH'. Make sure you know the consequences before running an event as a batch job.
| Property | Description |
|---|---|
Schedule name |
If running, if will display the schedule name here. |
Last runned date |
Will display the last time it was runned as a batch job. |
DocumentId / title |
Displays a list of documents that corresponds to the conditions for the event. |
5.2. Metadata Event Properties
This section describes the properties of a metadata event, as shown on the corresponding Edit pane.
| Property | Description |
|---|---|
Subsystem |
The subsystem the profile belongs to |
Event for |
Enter what type of object you define the event for. You can choose between
|
Name |
Type a name for the event. |
Sort Key |
Type a sort key. A number that defines the order in which several events are sorted. If a document operation triggers several events, the event with the lowest sort key value is executed first. |
Description |
Type a description of the event. |
Event procedure |
Select the database procedure that will be called when the event triggers. |
Operation |
Select which operations this event applies to, and specify whether the event is enabled or not. The set of operations that this event applies to:
|
Guid |
Displays a globally unique identifier number for this component. This property appears after you save a component. You cannot update the information of this property. |
Id |
Displays a unique identifier number for this component. This property appears after you save a component. You cannot update the information of this property. |
Created |
Displays when the component was created and by whom it was created. |
Updated |
Displays when the component was last updated and by whom it was updated. |
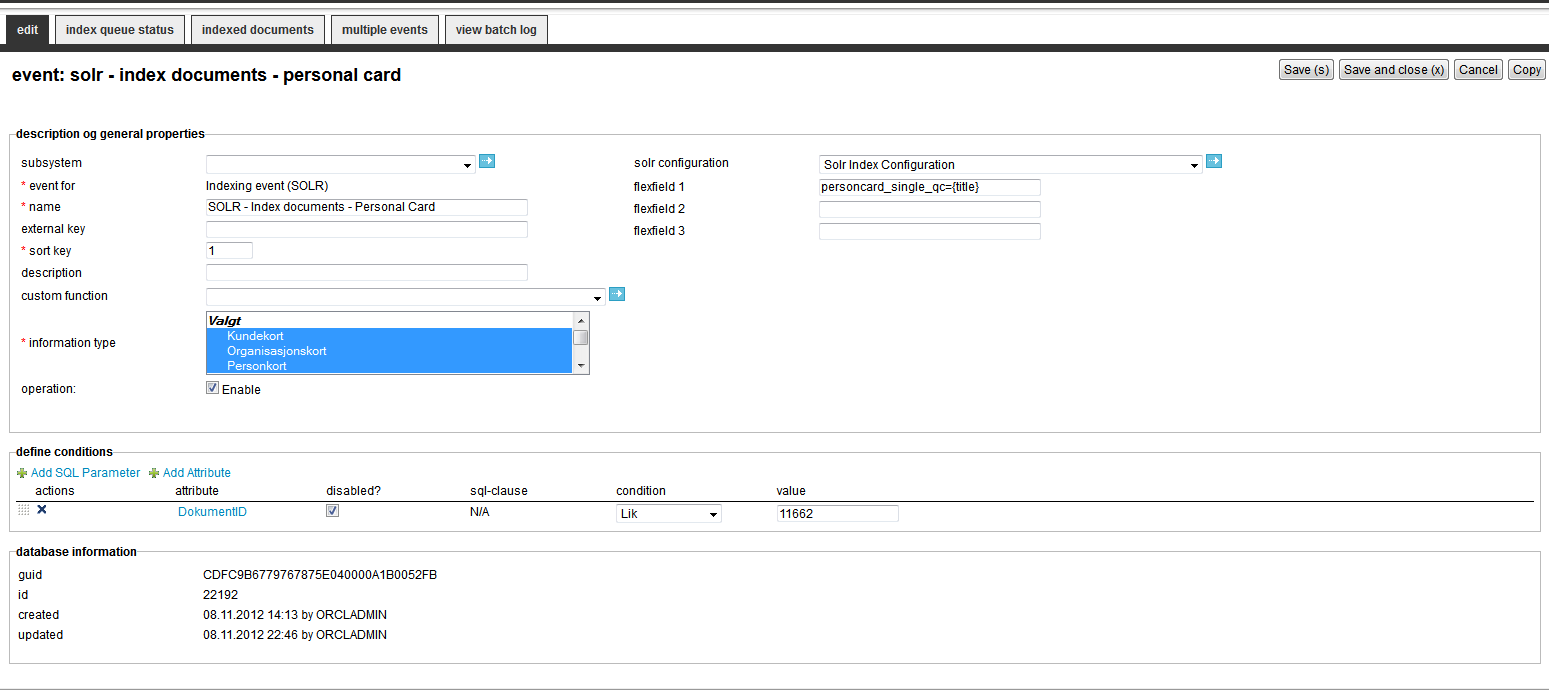
5.3. Indexing event(SOLR) Properties
This section describes the properties of a SOLR event, as shown on the corresponding Edit pane. The purpose of a SOLR event is to notify the content indexer about documents that should be indexed by Apache Solr search engine. In contrast to a regular document event, the result from a SOLR event will always be a AQ-message notifying the content indexer to either update or delete the document in Apache Solr. The event procedure will always be the same, but you can create a custom function as a replacement of ikb_solr.get_document function. A changelog is managed by the event and you do have administrative functions to maintain the message queue, exception queue, changelog and document list for the event.
| Property | Description | ||
|---|---|---|---|
Subsystem |
The subsystem the profile belongs to |
||
Event for |
Set automatically to Indexing Event (SOLR). |
||
Name |
Type a name for the event. |
||
External key |
Type a unique external key for the event. |
||
Sort Key |
A number that defines the order in which several events are sorted. If a document operation triggers several events, the event with the lowest sort key value is executed first. |
||
Description |
Type a description of the event. |
||
Custom function |
The content indexer calls an iKnowBase function to retrieve the document for indexing. This function can be replaced by a custom function instead if you need a specialized version of the function. |
||
Document types |
Select the document types that this event applies to. |
||
Operation |
Enable applies to enabling or disabling a event |
||
Solr Configuration |
Select the Solr configuration set. Try to use the same Solr configuration between different events. |
||
Flexfield 1, 2 and 3 |
A user selectable name=text syntax that is sent to the content indexer as a Solr field. The flexfields have these options/formats :
|
||
Define condition |
You can choose between two types of parameters:
When the parameter is selected, you must save before you can set any values. |
||
Actions |
Delete the parameter by clicking the icon |
||
Attribute |
Displays the names of the selected attributes to use as conditions for the event. |
||
Disabled? |
You can for debugging reasons disable attributes. |
||
sql-clause |
For performance reasons and only for advanced users: Defines how the query condition is built (IN or EXISTS) |
||
Condition |
Select the appropriate conditions for the selected attributes. The conditions depend on the type of attribute.
|
||
Value |
Select or enter the appropriate values for the selected attributes. Available options depend on the attribute/parameter type. Not applicable to SQL parameters. |
||
Guid |
Displays a globally unique identifier number for this component. This property appears after you save a component. You cannot update the information of this property. |
||
Id |
Displays a unique identifier number for this component. This property appears after you save a component. You cannot update the information of this property. |
||
Created |
Displays when the component was created and by whom it was created. |
||
Updated |
Displays when the component was last updated and by whom it was updated. |
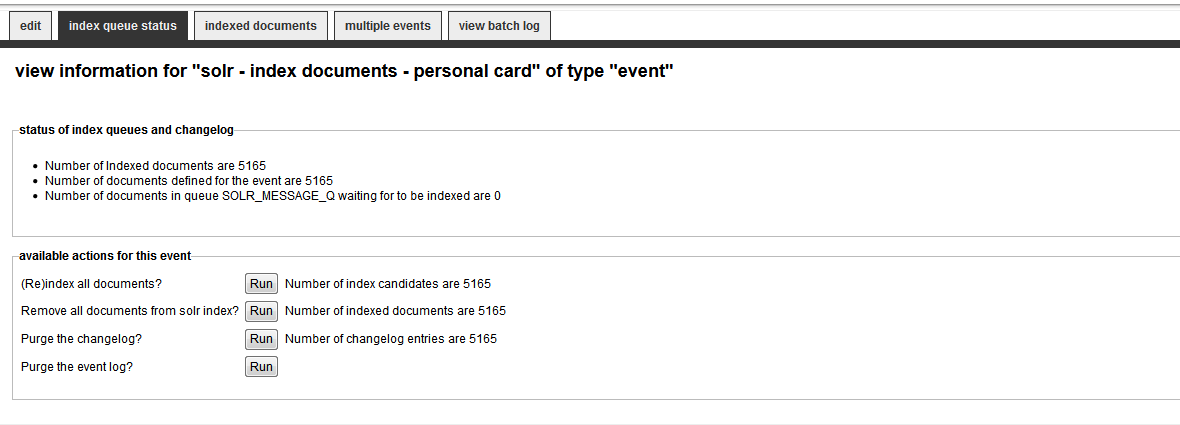
5.3.1. Index queue status
To administer the index process for the documents matching the event, you will find several functions to do bulk operations against Apache Solr. First part of the screen gives an overview over number of indexed documents, number of messages in queue/exception queue, number of documents in the changelog and a notification if metadata defined as part of the Solr configuration has changed for the document but not in the index. All of these notifications and more can be handled from here.
| Property | Description |
|---|---|
Status of index queue and changelog |
Prints info about the queue, changelog and running jobs for the event |
Available actions for this event |
The actions you can do will only available if it’s necessary. (e.g. no need for a Purge changelog if the changelog is empty):
|
Index failures - List of documents failed to index/reindex |
If the exception queue has any entries, they will be displayed here. You can resend or delete a single entry. |
5.3.2. Exceptions (index failures)
The Contentindexer can fail to index a document for some reasons (e.g invalid tika format). If so, it will end up in an exception queue.
| Property | Description |
|---|---|
Index failures - List of documents failed to index |
If any documents has failed during indexing, it will end up here. You can resend or delete a single entry. |
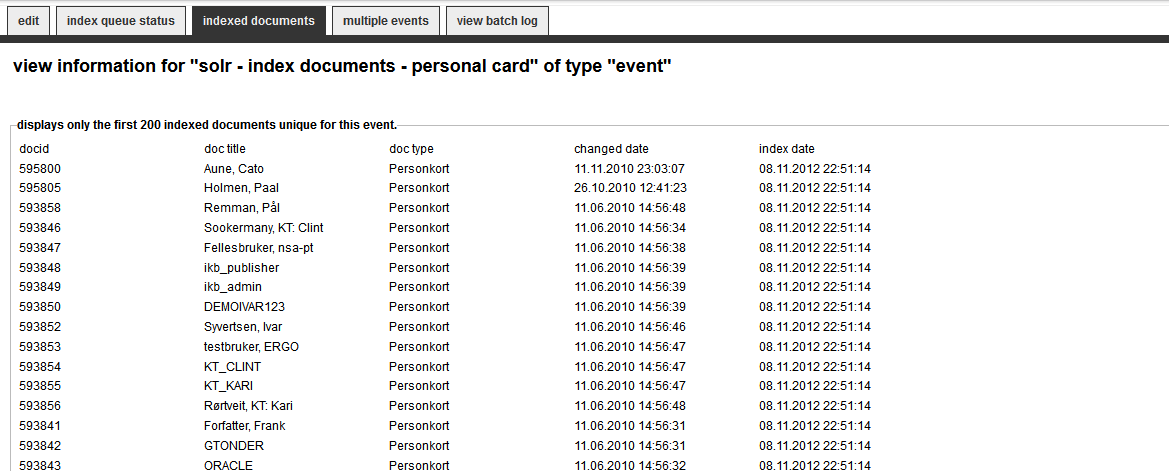
5.3.3. Indexed documents
Used for a SOLR event and displays the first 200 documents defined for the event.
| Property | Description |
|---|---|
Document field |
Will display Document ID, title, document type and changed date. |
Index data |
Will display index date. |
5.3.4. Multiple events
Used for a SOLR event and displays the first 200 documents defined for the event, but 'owned' by another event. You should try to avoid events matching the same documents. You can let this event take ownership over the documents.

| Property | Description |
|---|---|
Document field |
Will display Document ID, title, document type and changed date. |
Index data |
Will display index date, event ID and event name. |
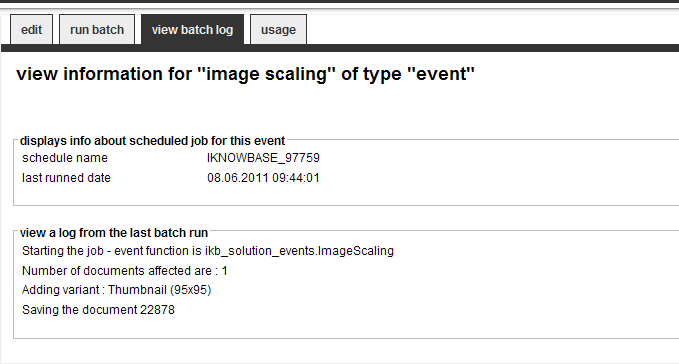
5.4. View batch log
You can create debug/warning messages in your custom event procedure.
Use the procedure portlet_manage_event.log_batch(<eventGuid>, ‘<text>’) to log messages. All messages are shown here.
| Property | Description |
|---|---|
Schedule name |
Displays the schedule name here. |
Last runned date |
Will display the last time if was runned as a batch job. |
View a log from the last batch run |
Will display the last time if was runned as a batch job. |
6. Export
The export feature is part of the export/import utility in iKnowBase. With the export feature you can define and build transport sets and export data. Components, metadata, and content can be exported. The import feature lets you import previously exported data.
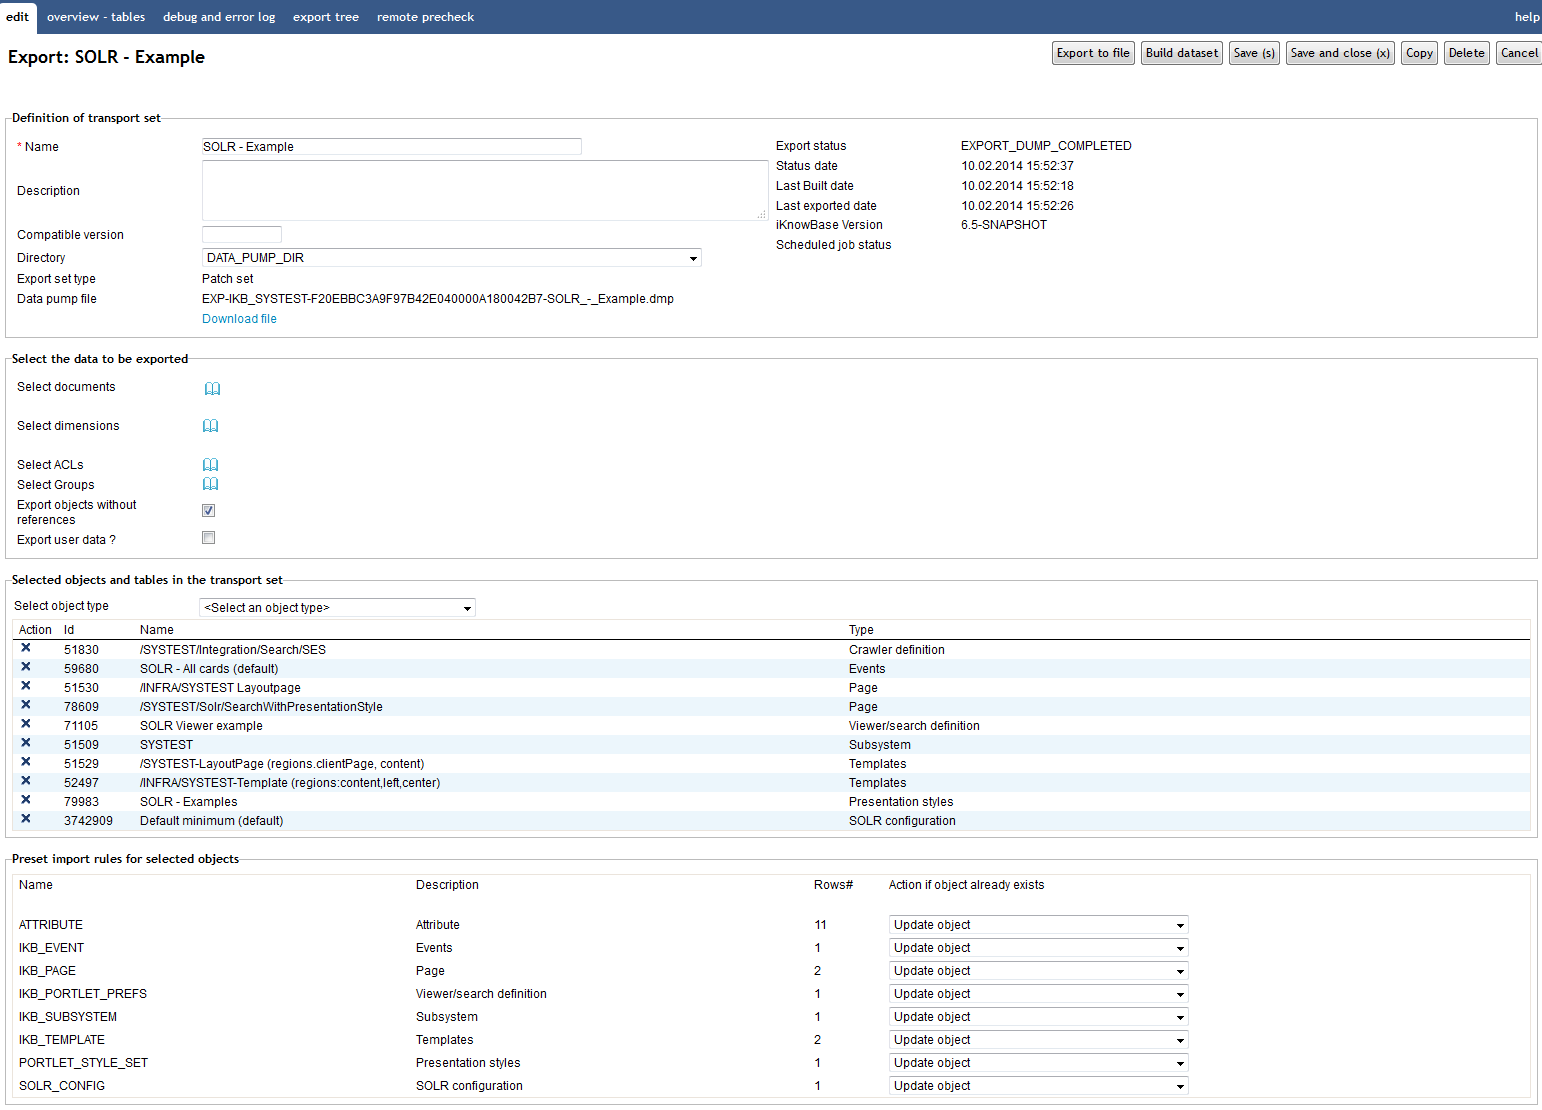
6.1. Properties
This section describes the properties of an export definition, as shown on the corresponding Edit pane.
6.1.1. Edit Tab
The Edit tab contains general information about the domain.
| Property | Description |
|---|---|
Name |
Type a name for the export. |
Description |
Type the description of the export. |
Compability version |
The version of the database you are importing to. Some objects are database version dependable and you might need to identify the target database version before exporting the data. Legal values for this parameter are as follows:
|
Directory |
Select a directory where to place the export file. |
Export set type |
When you create a new export definition you must select between Transport Set or Patch Set. A Patch set is available from all components where you can add an instance of the component directly to the patch set. Patch sets should also have Export objects without references checked so only the object itself is exported and not all the references. |
Data pump file |
Name of the created dump file and URL to download it. Only visible after running the export. |
Export status |
The status of the export transport set:
|
Date |
Date of the last status change |
Last built date |
Date of the last time the transport set was built (by pressing the button Build dataset) |
Last exported date |
Date of the last time the transport set was exported (by pressing the button Export) |
iKnowBase version |
Displays the iKnowBase repository version. Make sure the import side has the same version of iKnowBase before importing. |
Scheduled job status |
It the job is running in batch mode, the job status is displayed here. |
Select objects |
Display all object types possible to export. Select one, and you then can choose single instances of the object type. The table storing all selections is EXP_IMP_OBJ_SELECTION. A hint; if you are about to export loads of documents and you can identify these documents by a select, is to insert them into this table manually instead of selection one by one. The syntax will be like this: insert into exp_imp_obj_selection (export_guid, table_name, object_guid) select '<the export Guid>','DOCUMENT',document_guid from document where <condition>; |
Select document |
Use the picklist to select documents to export. |
Select dimensions |
Use the picklist to select dimensions to export. |
Select acls |
Use the picklist to select access control lists (ACL) to export. |
Select groups |
Use the picklist to select groups to export. |
Export object without references |
Select this check box if you want to export the object itself without all references, only the ones owned by the object (like detail data, labels and template text) |
Export user data |
Select this check box if the export should include members in acls and groups. |
Exclude data from subsystem |
Select subsystems you do not want data from. If the export set contains data from a excluded subsystem it will be skipped and expected to exist on the target site. |
Exclude data without subsystem |
Select this check box if you want to ignore data without any subsystem set. |
Preset import rules for selected objects |
When the dataset is built, you can add import rules for each object before you export the dataset. The values can be changed on the import side. |
Name |
Displays names of the database tables which are included in the import. |
Description |
Displays descriptions of the database tables which are included in the import. |
Rows# |
Displays the total number of rows in the transport set. |
Action if object already exists |
The valid operations if an object exists on target are:
|
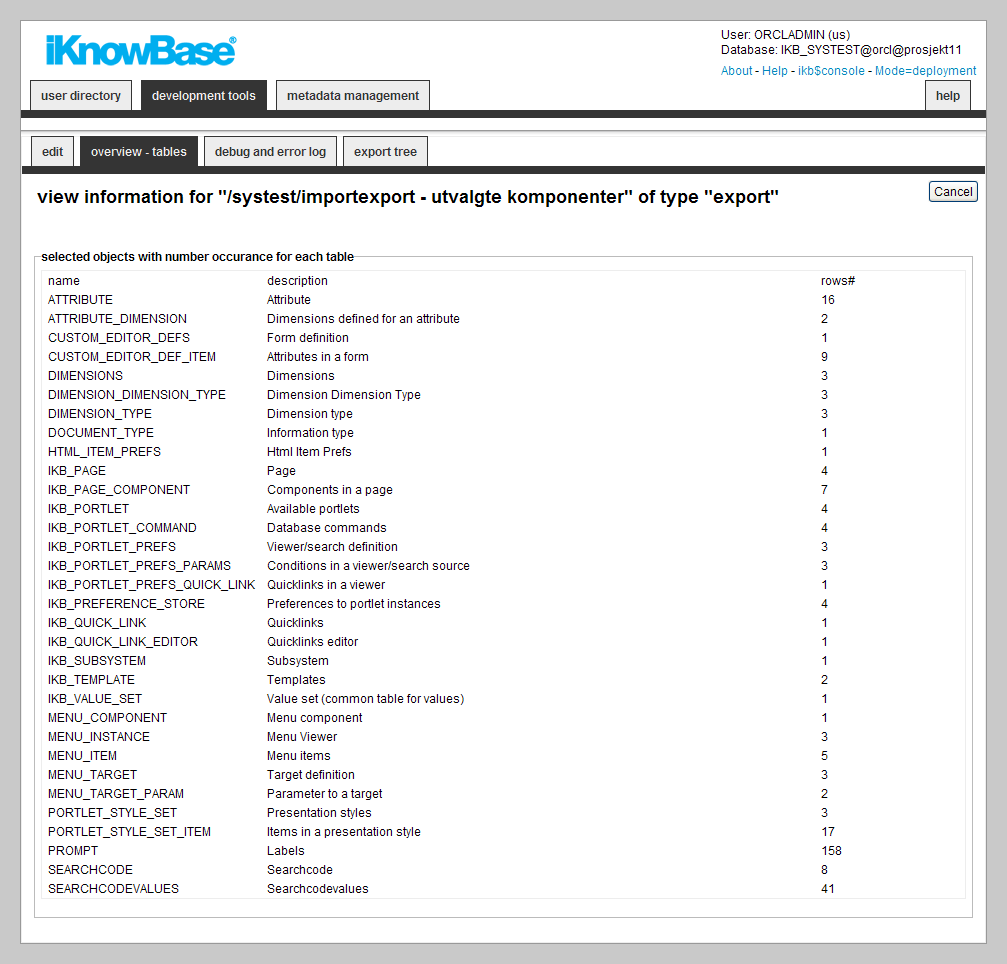
6.1.2. Overview - tables Tab
The Overview - tables tab contains information on tables chosen for export. The content of this tab is available after the transport set is built or data is exported.
| Property | Description |
|---|---|
Name |
Displays the name of the tables which holds data to be exported for the selected objects (with dependencies). |
Description |
Displays the descriptions for the tables. |
Rows# |
Displays the number of rows to be exported per table. |
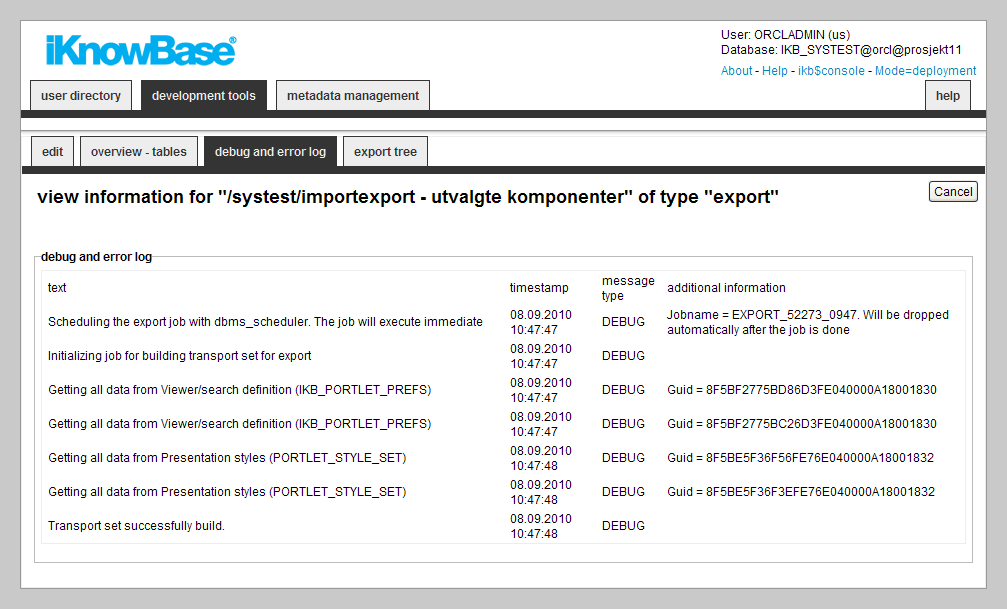
6.1.3. Debug and error log Tab
This tab contains information on actual export process. The content of this tab is available after the building of the transport set or export of data is started.
| Property | Description |
|---|---|
Text |
Displays the messages generated during the last build or export. |
Timestamp |
Displays the timestamp for the messages. |
Message type |
Displays the message types. |
Additional information |
Displays additional information. |
6.1.4. Export tree Tab
This tab contains information on all exported objects. The content of this tab is available after the building of the transport set or export of data is started.
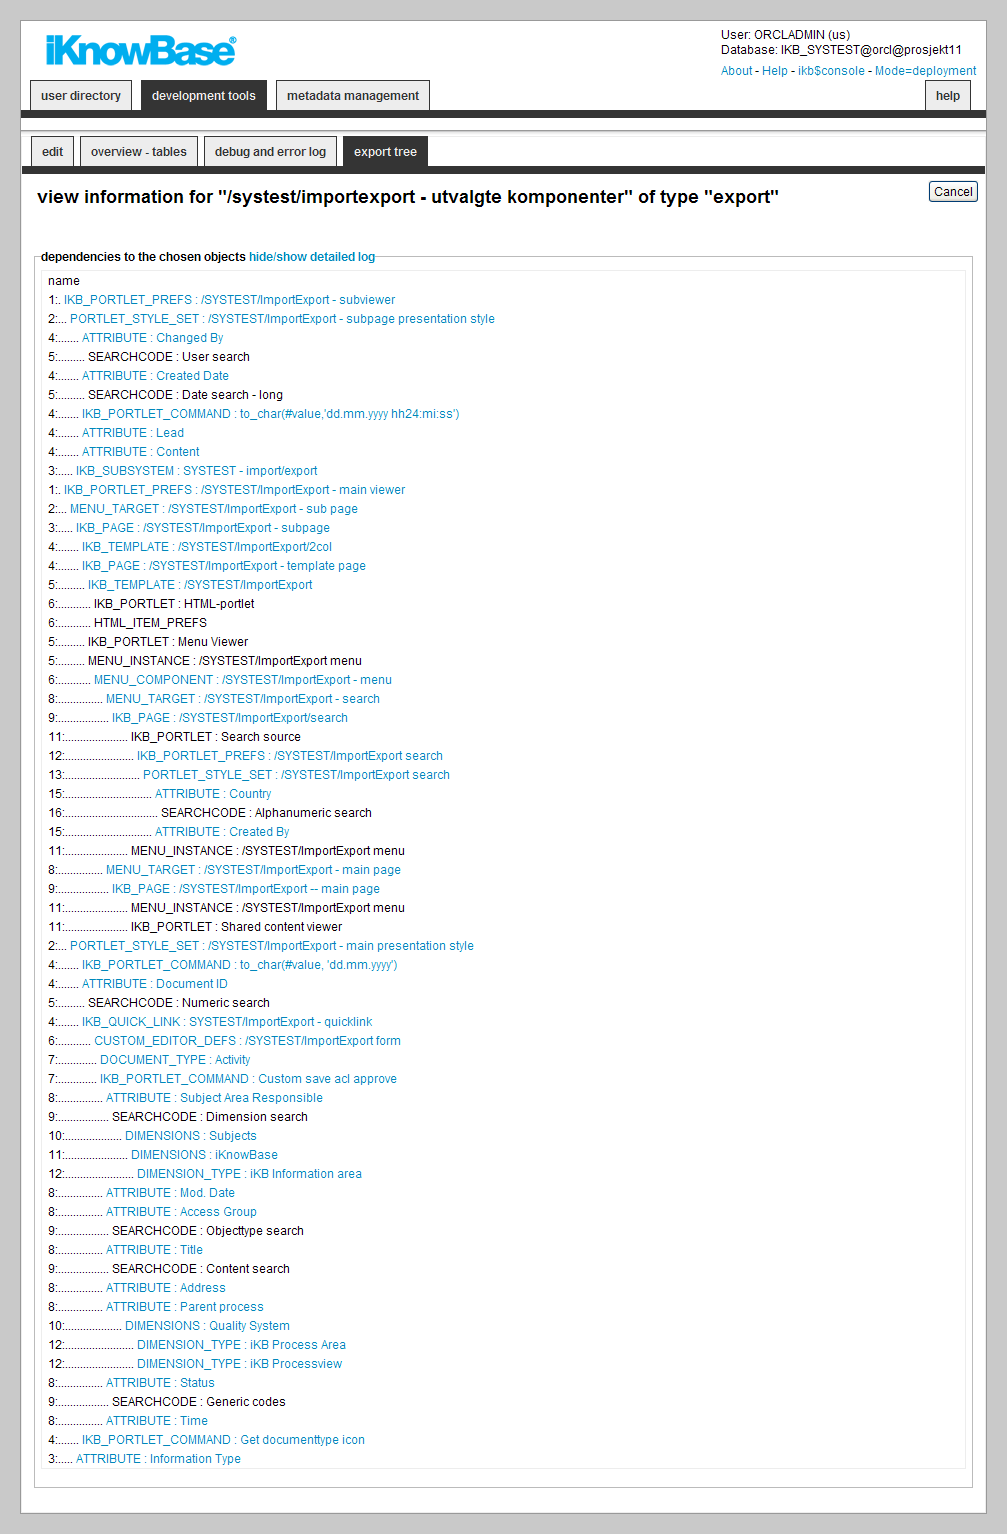
| Property | Description |
|---|---|
Name |
Displays a graph of all the objects included in the export, including all objects that the selected objects are dependent of. |
Export target Tab
This tab lets you verify a transport set at the target side. It depends on a database link where the iKnowBase version must be the same on both sides. A typical use case is deploying new functionality from a development site to test site.
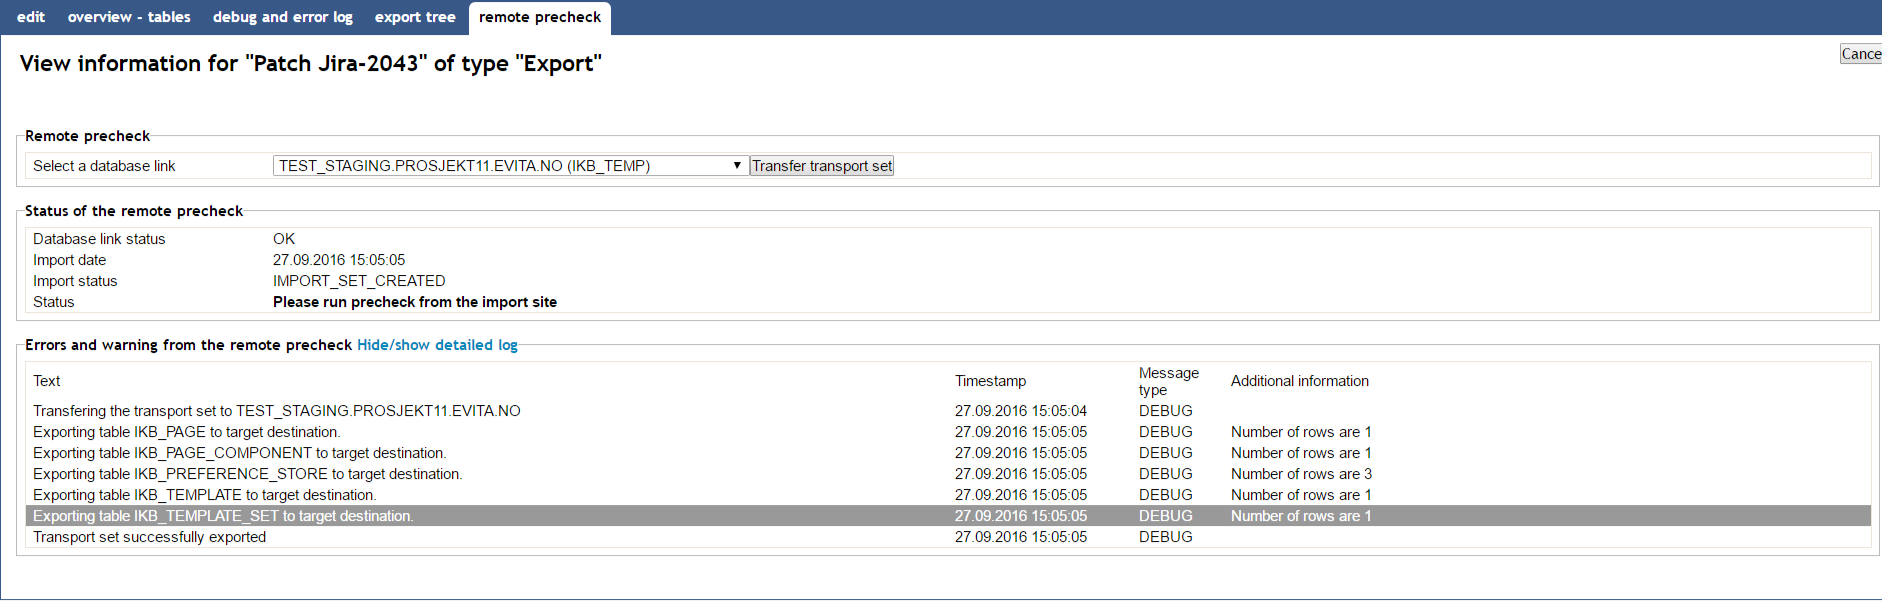
| Property | Description |
|---|---|
Select a database link |
Select a database link to a defined target. The iKnowBase version has to be the same on both sides. |
Transfer transport set |
By pressing this button you first build the transport set locally, than tranfer it to the target. The precheck has to be executed on the destination. |
Status of the remote precheck |
Displays the validity of the database link and if the transport set has been imported on the destination. If precheck has been executed, you can then download the log from the destination. If any missing references are discovered, a list will be produced where you can manually add each object and then try again. If any of the data in the transport set contains XML-data, you need to download the export set as a file and import if on target side because XMLDATA is not transferable over database links. A warning about this will be given. |
Errors and warning from the remote precheck |
This is the report from the precheck on the target instance. |
6.2. Tasks
6.2.1. Adding Objects to an Export Tab
To add objects (e.g. components configured in Development Studio or database tables) to an export, perform the following steps:
-
On the edit tab of the Edit pane for the export, select the appropriate object type in the select objects dropdown. The region select objects, which displays a list of all existing objects of the given type, appears.
-
In the select objects region, select the objects that you want to include in the export.
-
Click Apply or OK. The selected objects are added to the export definition, and will appear as selected objects in the region selected objects and tables in the transport set in the Edit pane.
|
Note
|
You can add objects of multiple object types to an export. After you have added objects of one object type and saved the export, you can repeat the steps above for a different object type. |
To remove an object from an export definition, perform the following steps:
-
On the Edit pane for the export, click on the checkbox for the object you want to remove in the region selected objects and tables in the transport set.
-
Click Save. The object is removed from the list.
6.2.2. Adding Documents to an Export
To add documents to an export, perform the following steps:
-
On the Edit tab of the Edit pane for the export, click the document archive link next to select documents. The document archive opens in a new browser window.
-
In the document archive, find and select the documents to be included in the export.
-
Click OK. The list of documents to include in the export will appear next to select documents in the Edit pane. Note: It is possible to remove a document by clicking on the X icon in front of the document.
-
On the Edit pane for the export, click on Apply. The selected documents are added to the export definition, and will appear as selected objects in the region Selected objects and tables in the transport set in the Edit pane.
To remove a document from an export definition, perform the following steps:
-
On the Edit pane for the export, click on the checkbox for the document you want to remove in the region Selected objects and tables in the transport set.
-
Click Save. The document is removed from the list.
6.2.3. Exporting Data for iKnowBase PageEngine use
-
Create an export definition, defining which data you want to export.
-
Click on the Build dataset button on the Edit pane of the export definition. The dataset is built, and a debug and error log become available on the Debug and error log tab. An overview of how many rows from which tables will be exported becomes available on the Overview — tables tab and a graphical overview of object dependencies becomes available on the Export tree tab.
-
If you want to define import rules for each table (replace on import/delete details) you can preset values before you export the file.
-
Check the Debug and error logs tab.
-
When the dataset is built, click on the Export button on the Edit pane of the export definition. The specified data is exported to the server data pump directory. The exported data file will be named EXP-SchemaName-ExportDefGuid-ExportDefName.dmp, where SchemaName is the name of the database schema, ExportDefGuid is the guid of the export definition, and ExportDefName is the name of the export definition. An iKnowBase document with the document type "iKnowBase Transport Set" with the dump file will be created. It will be given the title Export(DMP), where Export is the name of export definition. A debug and error log becomes available on the Debug and error log tab. An overview of how many rows from which tables are exported becomes available on the Overview - tables tab and a graphical overview of object dependencies become available on the Export tree tab.
-
Download the dump file through the web interface, or retrieve it directly from the database server.
7. External Data sources
The iKnowBase Viewer, the component responsible for presenting information from iKnowBase, is capable of displaying content not only from the iKnowBase content store, but also from other database tables. The mechanism for this is the external data source.
You define an external data source with the source table(s), columns, permanent conditions, and potential parameters. You define it as a standalone data source, or as dependent data source, e.g. a data source which is joined with the iKnowBase document table.
In order to use an external data source, you must first create a presentation style. In this presentation style you select the external data source, which will give you access to the columns defined in the external data source. These columns will be available as attributes and can be presented with the same flexibility as iKnowBase attributes. Then you must create a viewer or a search source, and set it up to use the presentation style for the external data source. This will give you access to the parameters defined for the external data source. The parameters will be available as attributes which you may use to build the where condition. The extracts made by using this viewer or search source will be based on the external data source.
7.1. Properties
This section describes the properties of an external data source, as shown on the corresponding Edit pane tabs.
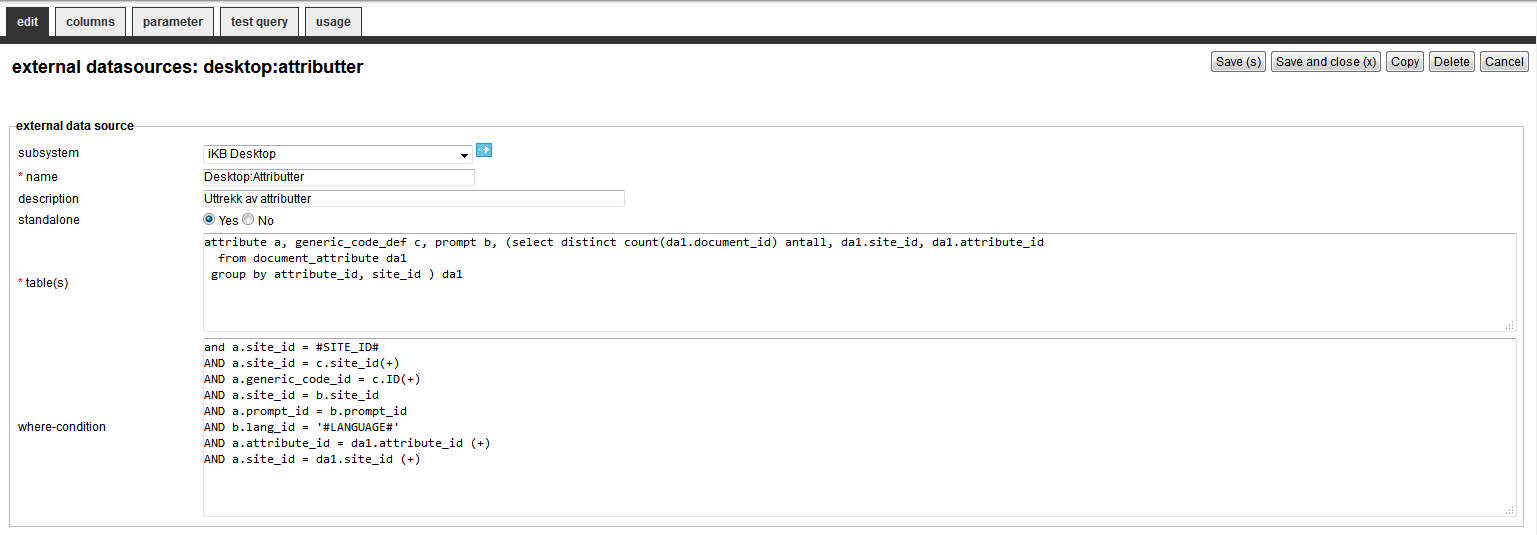
7.1.1. Edit tab
| Property | Description |
|---|---|
Subsystem |
Select the appropriate subsystem. |
Name |
Type a name for the external data source. |
Description |
Type a description for this external data source. |
Standalone |
Click the appropriate option to join the search source with the iKnowBase table document or make it independent. For example, if you want a list that shows how many times a document has been read, you can join it with the document table. You are then dependent on specifying a value in tables and where-condition that joins with the document table. If you want a list outside a document context, for example a list of all users, you can click Yes and specify the table for users in the table-field. |
Table(s) |
Type the names of the tables that are a part of the external datasource. If you select more than one, you have to join these with each other in the Where-condition. You can also define functions that are executed within the condition. The function must return a value. Functions are specified within curly brackets: {functionName}. Note: The execution is done only once, rather than one time per document that are extracted, and might be smart regarding performance. For example: ikb_user iu1, (select count(*) number, site_id, user_id, document_id from log_documents ld1 where ld1.action=3 group by site_id, user_id, document_id ) ld1 |
Where condition |
Type the where condition to join the tables that are selected for extraction. If you select the Standalone option as No, join the document table with the prefix oi1. You can enter SITE_ID, LANGUAGE USER_ID with the meta tags #SITE_ID#, #LANGUAGE# and #USER_ID#/#USERID# . You can also define functions that are executed within the condition. The function must return a value. Functions are specified within curly brackets: {functionName}. Note: The execution is done only once, rather than one time per document that are extracted, and might be smart regarding performance. For example: and ld1.document_id = oi1.document_id and ld1.site_id = oi1.site_id and iu1.id = ld1.user_id and iu1.id = #USER_ID# These where-conditions are in synchronization with the example stated in the Table(s) property. |
7.1.2. Columns Tab
| Property | Description |
|---|---|
Create new |
Click the Create new link to create a new column. The list below the Create new link displays the links corresponding to existing columns. To view and edit a column, click on the respective link. To remove a column, click on the respective icon. |
Type |
Displays the type as Columns. |
Name |
Type a name of the column. When this external data source is used with a presentation style component, the columns defined for the external data source will be available as attributes in the presentation style. |
Description |
Type a description for this column. |
Data type |
Select the datatype for the column. Choose between Alphanumeric, Numeric, Date or Clob. |
External column or function |
Type the database name of the column or function. Remember to prefix the names. |
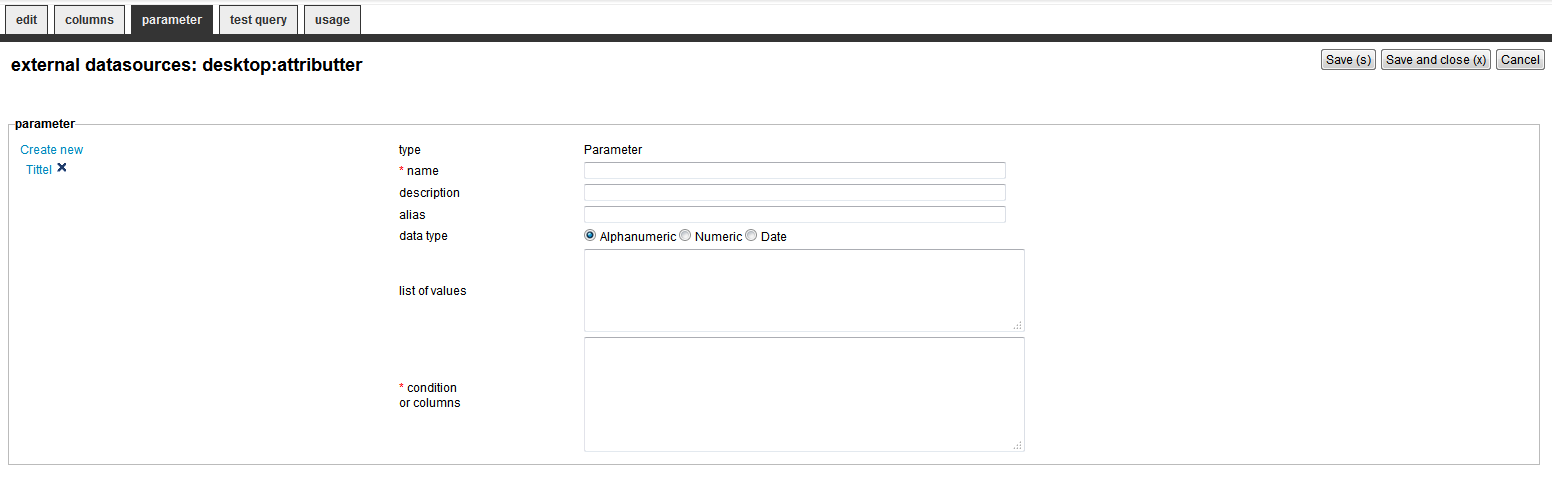
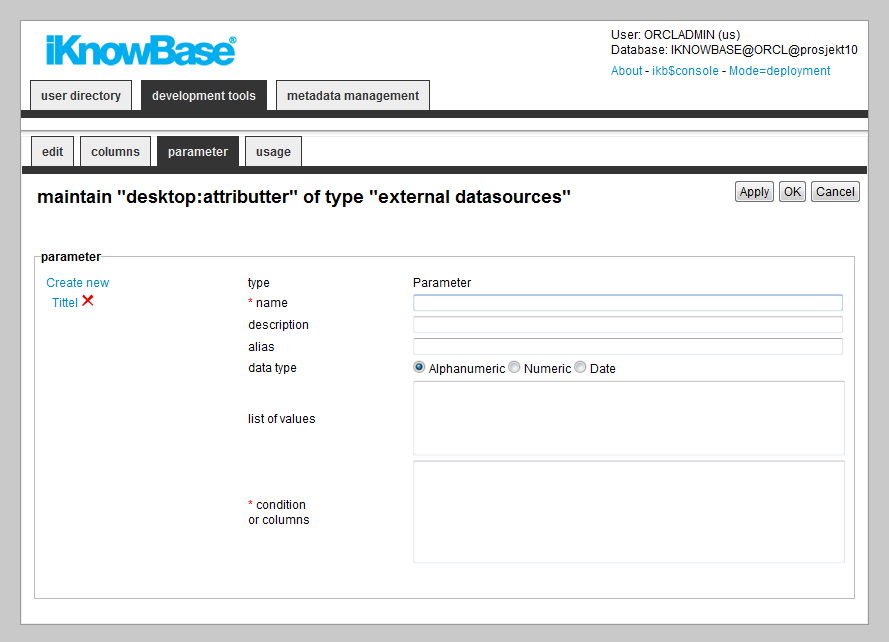
7.1.3. Parameter Tab
| Property | Description |
|---|---|
Create new |
Click the Create new link to create a new parameter. The list below the Create new link displays the links corresponding to existing parameters. To view and edit a parameter, click on the respective link. To remove a parameter, click on the respective icon. |
Type |
Displays the type as Parameter. |
Name |
Type a name of the parameter. The parameters defined for the external source will be available as attributes in viewers and search sources that are configured to use a presentation style which uses this external data source. |
Description |
Type a description for this parameter. |
Alias |
Type a name that is used in the URL. |
Data Type |
Click the appropriate data type. |
List of Values |
Type the SQL expression to build up value lists in a search filter. Use the following syntax for the SQL expression: Select <idfield>, <description> from <table> Example: select msg1.name, msg1.display_name from owf_mgr.wf_messages_tl msg1 where msg1.type = 'KT' and msg1.language = 'N' order by msg1.display_name |
Condition or Columns |
Type the condition to be built. #COND# is used when the user want to choose which condition (such as equal or different from) the search will be run as, while #PARAM# specifies the value the user enters.
The condition must start with Example: and not1.message_name \#COND# \#PARAM# |
7.1.4. Test query tab
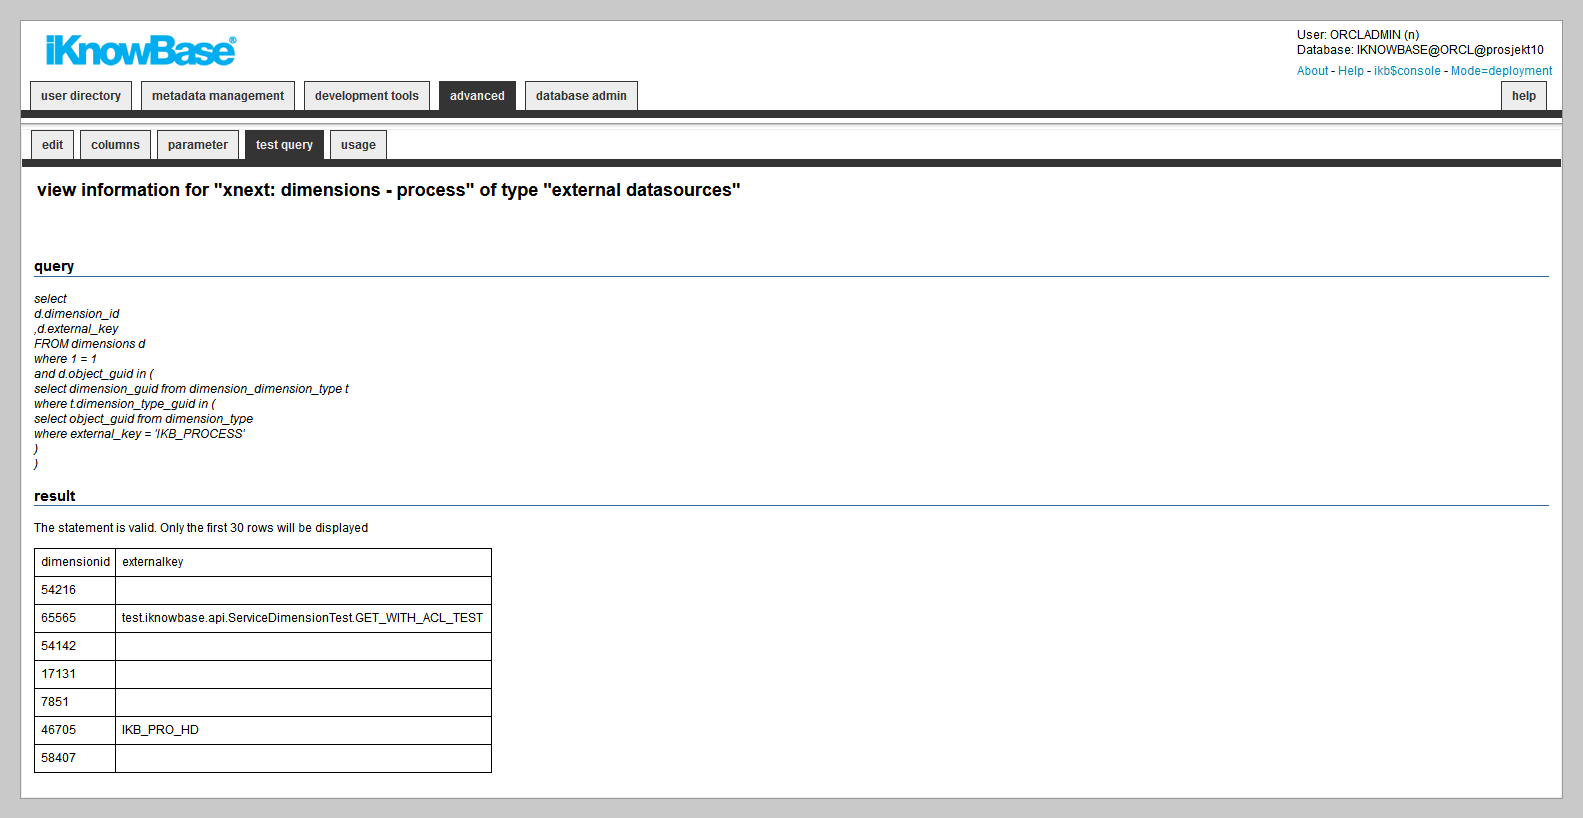
This page will run the query defined for the external datasource. If it succeeds it will display the first 30 rows. If if fails, it will display the error message so you can fix the errors.
| Property | Description |
|---|---|
Query |
Displays the query. |
Result |
Displays the result of the query. |
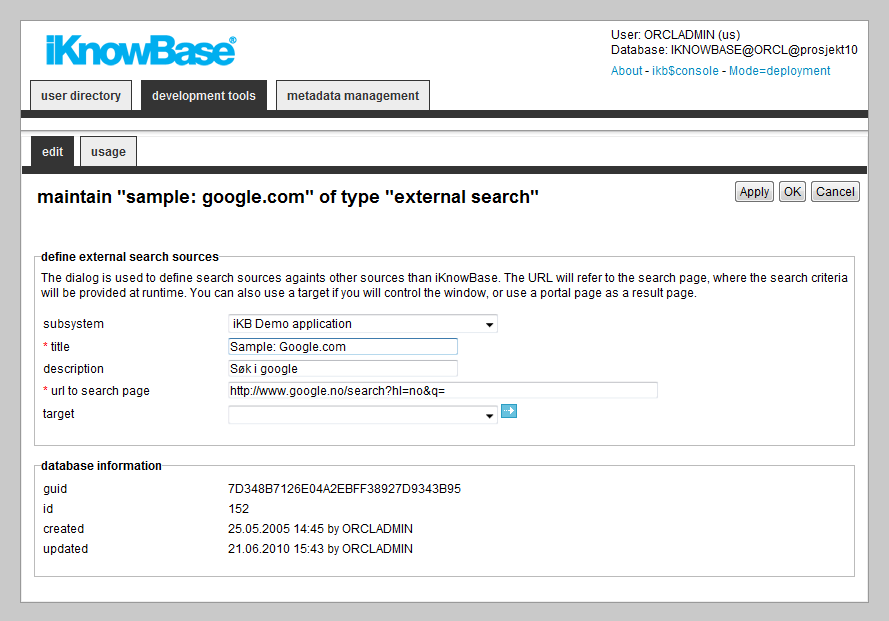
8. External Search
An external search defines the interface used to perform a query in an external system, either a public search engine such as Google or Yahoo!, or a private internal search engine.
You can use the Build search dialog portlet to expose the external search feature.
8.1. Properties
This section describes the properties of an external search, as shown on the corresponding Edit pane.
| Property | Description |
|---|---|
Subsystem |
Select the appropriate subsystem. |
Title |
Type a name for the external search. |
Description |
Type a description for this external search. |
URL to search page |
Type the URL for the search page without the search string. At runtime, when executing the search, the search criteria will be appended at the back of this URL. For example, for Google the search URL is: |
Target |
When the end user performs an external search, the search result is displayed in a new browser window. Select a Popup target to specify properties of the new window, such as height and width. |
9. Forms
Forms enable you to add, modify, and delete content in the iKnowBase portal. You use the form component to configure the forms to use in your iKnowBase application. At run time an advanced form generator builds forms as required based on the configured form components.
Forms are used for publishing and editing content, such as documents or other information objects, in the iKnowBase content store. A form must be associated with one document type. You will need at least one form per document type that should be available for publish and maintenance in your iKnowBase application. Default behavior of a form is to write its form identification to the information object upon saves. The next time the information object is opened for edit, the form which was last used to edit it will be used.
In order to use a form, you must create a page with a Form portlet and a Target for this page. Configure the form to use this target (target on show). Note: This target may be reused for different forms.
There are two types of forms:
-
Classic form: all configuration is done within this component
-
External form: developed in java
9.1. Properties
This section describes the properties of a form, as shown on the corresponding Edit pane tabs.
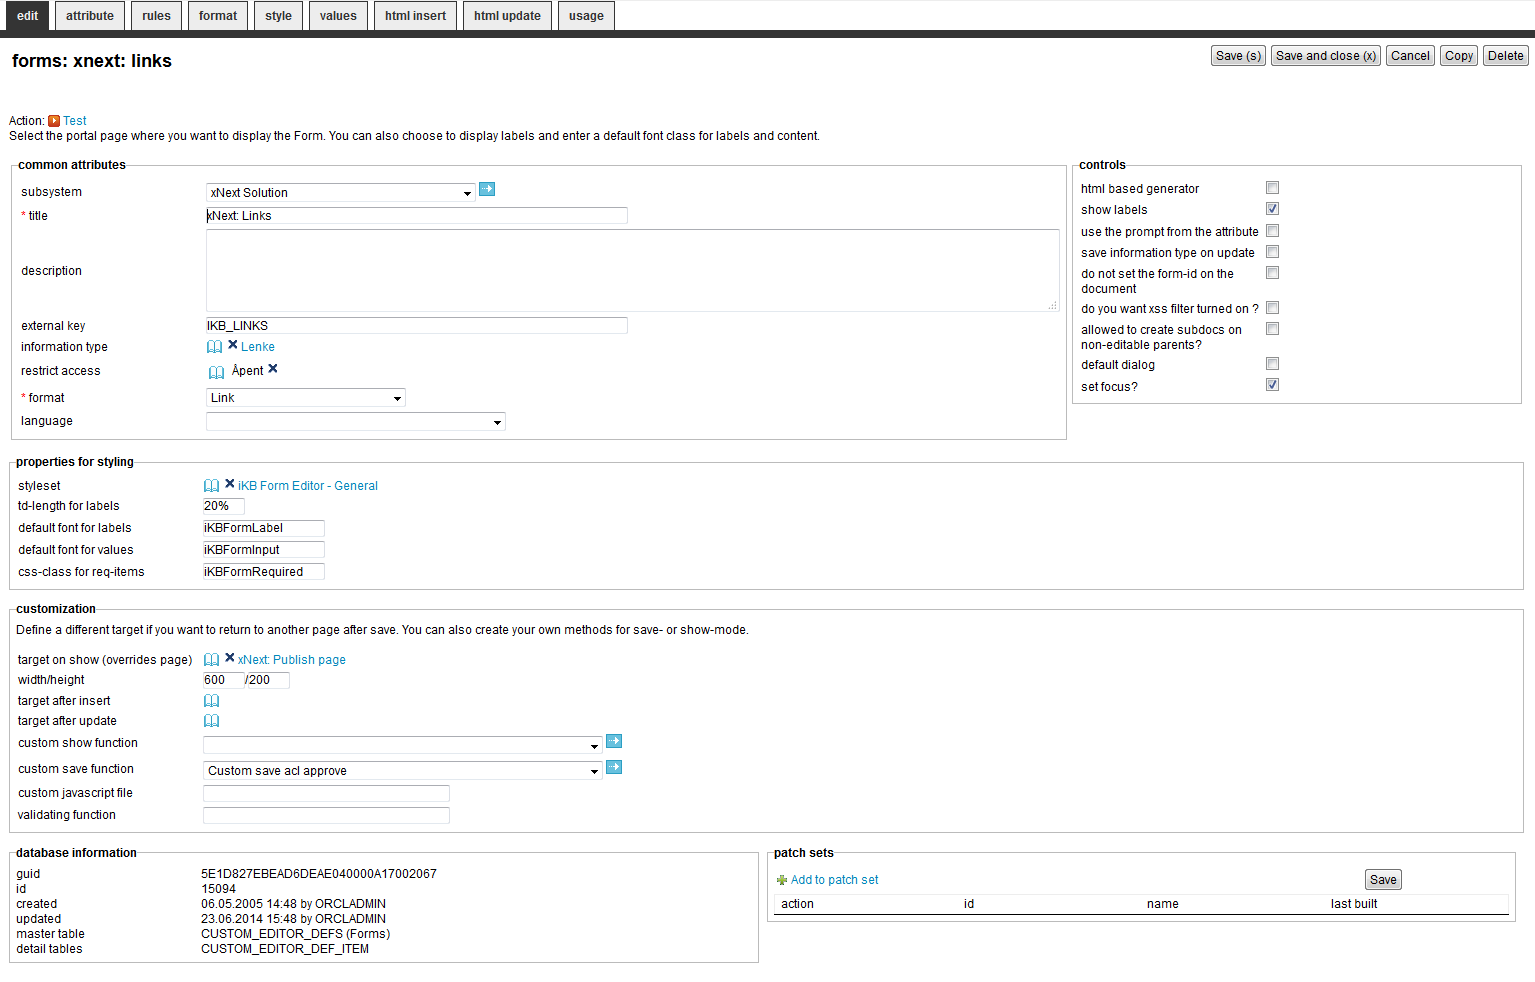
9.1.1. Edit Tab Classic form
| Property | Description |
|---|---|
Subsystem |
Select the appropriate subsystem. |
Title |
Type a title for this form. |
Description |
Type a description for this form. |
External key |
Enter an unique external key if you need to refer to the form in code. |
Document type |
Select the document type to use for documents created using this form. |
Restrict access |
Select the appropriate access control list. To access and use the form, the user must be a member of this access control list, and must also have the permission to publish content. If you do not specify an access control list, everyone can access the form. |
Format |
Select the appropriate content format.
|
Language |
Select the appropriate language for the form. If you do not select a language, it is automatically set according to: a) the user language, b) the browser language, c) the domain language in the given order. |
HTML based generator |
Select the appropriate form generator for generating the form at run time.
|
Show labels |
Select this check box to make the labels of the attributes visible in the form. If you do not select this check box, only the input field appears. |
Use the prompt from the attribute |
Select the check box to retrieve the labels from the attribute definitions. |
Save document type on update |
Select this check box if you want to update the document type of the document when the document is modified. Otherwise, the document type is only set for new documents. This feature enables you to change document type for an existing information object. |
Do not set the form-id on the document |
Select this check box, if you don’t want to save the form identification together with the document. Default behavior is to write the form identification to the document upon each save. |
Enable XSS filter? |
Select this check box to specify the use of a cleaning routine which deactivates all attempts on cross site scripting (XSS). Primarily for forms to be used in an open solution such as response forms. XSS is used by hackers to enter an executable JavaScript code that executes after a period of time. |
Allowed to create subdocs on non-editable parents? |
Select this check box to override the edit permissions for the parent document. This will enable the end user to create a sub document for a parent document he doesn’t have edit permissions for. If not selected, the security model in iKnowBase validates the new sub-document to ensure that you have edit permissions for the parent document (the document that becomes the master document). |
Default dialog |
Select this check box to edit the documents that have no forms associated with them. iKnowBase searches for forms with the same document type or format, and selects the first form with this property set. |
Set focus |
Select this check box if you want the cursor placed in the first available input field. |
Styleset |
Select styleset to use for this form. For all form generators the header- and footer text apply. The following tags apply just for the rule-based generator:
|
TD-length for labels |
Displays the default width of the |
Default font for labels |
Type the standard font classes for the labels. You can use this value when you create a new form or insert new attributes. If you change this value, none of the existing attributes for the form are affected. |
Default font for values |
Type the standard font classes for the value field. You can use this value when you create a new form or insert new attributes. If you change this value, none of the existing attributes for the form are affected. |
CSS-class for req-items |
Type the CSS class that is used in the mandatory fields in the form. |
Target on Show or select a page |
Select an iKnowBase target . This is used as the location for displaying a form, when the form is opened as a separate page or as a popup page. |
Width |
Enter the width of the popup window used when the form is opened as a popup page. |
Height |
Enter the height of the popup window used when the form is opened as a popup page. |
Target after insert |
Select the iKnowBase target that will be opened when a document has been inserted from this form. You can also override the default behavior if you want a JSON object as a return value when you save the document. This is ideal for forms opened with EXT where you programatically keep the control of the windows. To do this, you need to add a hidden input control to the HTML insert form (p_return_type = JSON) |
Target after update |
Select the iKnowBase target that will be opened when a document has been updated from this form. You can also override the default behavior if you want a JSON object as a return value when you save the document. This is ideal for forms opened with EXT where you programatically keep the control of the windows. To do this, you need to add a hidden input control to the HTML update form (p_return_type = JSON) |
Custom show function |
For advanced use only, you can create a specific PL/SQL procedure to generate the iKnowBase form. Select the appropriate Database function if you want to override the default. Note: The default database function for generating a form is ikb_ce_custom_editor_portlet.run_show. You can copy this as a starting point for you own custom show function, and then customize it. You must register you new procedure as a Database function. |
Custom save function |
For advanced use only, you can create a specific PL/SQL procedure to handle saves through this form. Select the appropriate Database function if you want to override the default. Note: The default database function for save through Form is ikb_ce_custom_editor_portlet.save_document. It handles the save and navigation after the save. You can copy this as a starting point for you own custom save function, and then customize it. You must register you new procedure as a Database function. |
Custom JavaScript file |
Enter the URL for a custom JavaScript file, which will be included in the form by the iKnowBase forms engine. The URL will be passed on to clients without conversion, and must be accessible from any web client. |
Validating function |
Type the name of the JavaScript function that you want to use for the additional validating functions. Use the complete URL or relative path that is known to the application server such as /resource/file.js. Default validating function validates required fields and input-format for date fields. The function does not take any parameters and returns either TRUE (Validating OK, continue) or FALSE (Validating not OK, terminate). Example: function test()
{
if (checksomething) {
alert(writeanerror);
return false;
}
else {
return true;
}
}
|
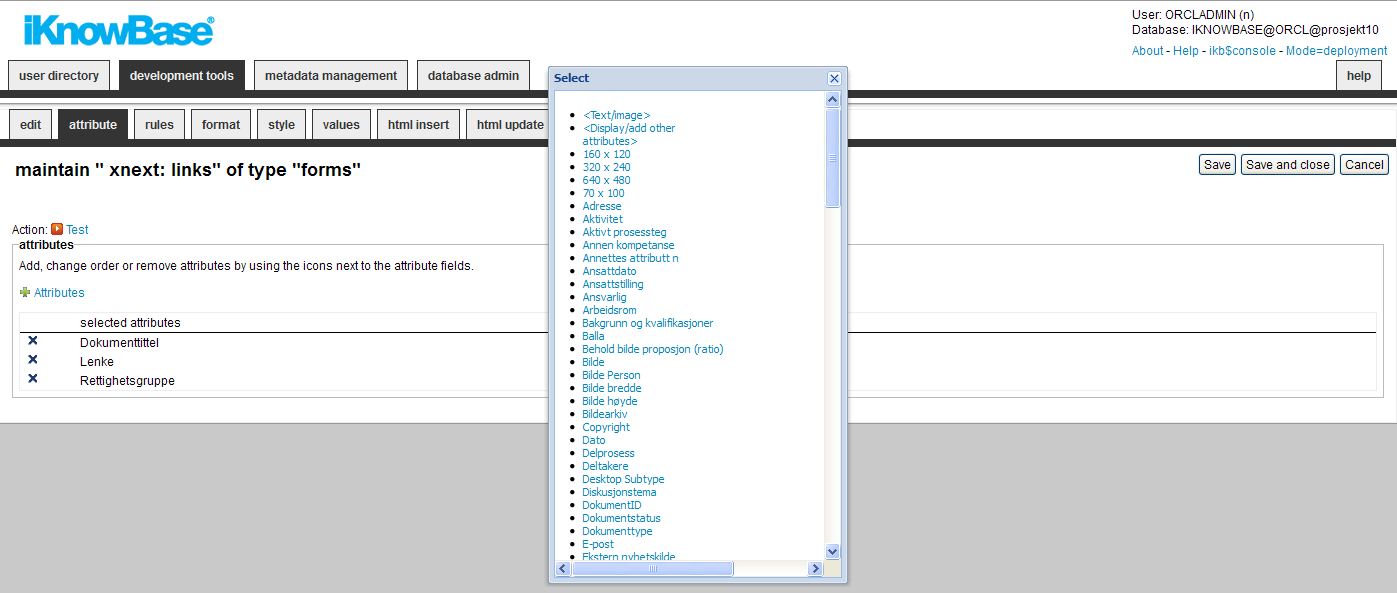
9.1.2. Attributes Tab
You can add, change the order of, or remove attributes from the form. When you create a form, all the attributes related to the document type selected for the form are added as suggestive values.
| Property | Description |
|---|---|
Attributes |
Defines the attributes included in the form. Select new attributes by clicking the link Attributes. You can reorder the attributes by drag/drop functionality. If you want to remove an attribute, click the delete-icon and the press Save. The The
This mechanism makes it possible to allow custom attribute combinations on a document, without having to create forms for every possible combination of attributes. The "Format" attribute is available if you select Optional format for the form. This attribute enables the end user to select the content format at runtime. Remember that you also need to select the content attributes (file, link or content) that you will let the user choose from. The Folder attribute enables the end user to change the parent document. |
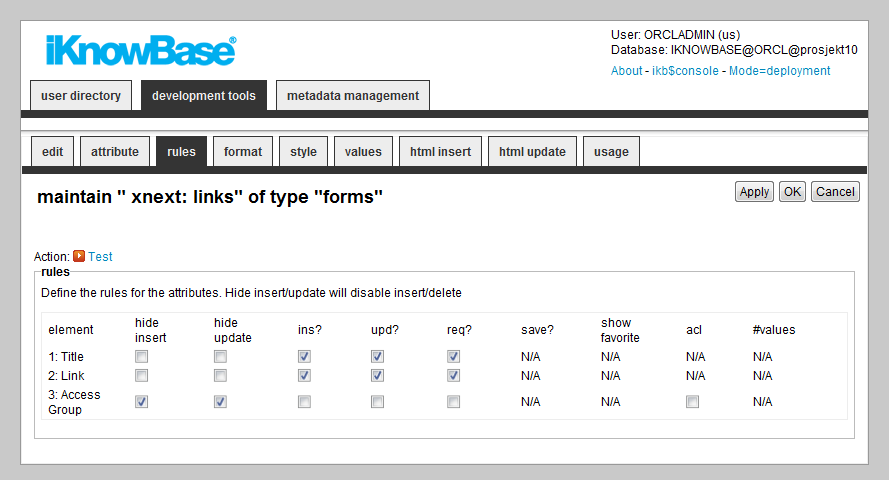
9.1.3. Rules Tab
The Rules tab enables you to define behavior and validation rules that apply to each attribute.
| Property | Description |
|---|---|
Element |
List of all attributes in the form. |
Hide insert |
Select this check box to hide this field, when new documents are created. |
Hide update |
Select this check box to hide this field, when existing documents are updated. |
Ins? |
Select this check box to allow the user to enter values while creating documents. Does not apply if If unchecked, the field will display, but no be editable. For the special attribute |
Upd? |
Select this check box to allow the user to enter values while updating documents. (Does not apply if If unchecked, the field will display, but no be editable. For the special attribute |
Req? |
Select this check box to specify if the attribute is mandatory (required) while creating a new document. |
Save? |
Select this check box to save this attribute in iKnowBase. In some cases, an attribute is used only during forms processing, and may be processed by a custom save function. An example would be a checkbox indicating whether to send an e-mail: The custom save function will use the value, but it should not be saved on the document. |
Show favorite |
Used for dimension attributes only, select this check box to display the favorite values for dimension attributes in a list. The list displays the last ten values that the user used for an attribute. |
Acl |
Used for the ACL attribute only, select this check box to enable the user to create access control lists. |
#values |
Displays the number of values a user can enter for this attribute. The value is retrieved from the attribute definitions, but can be overridden. |
9.1.4. Edit Tab External Form

| Property | Description |
|---|---|
Subsystem |
Select the appropriate subsystem. |
Title |
Type a title for this form. |
Description |
Type a description for this form. |
External key |
Enter an unique external key if you need to refer to the form in code. |
Path to external form |
Enter a relative path to the external form |
Target on Show (overides page) |
Select an iKnowBase target . This is used as the location for displaying a form, when the form is opened as a separate page or as a popup page. |
Document type |
Select the document type to use for documents created using this form. |
Restrict access |
Select the appropriate access control list. To access and use the form, the user must be a member of this access control list, and must also have the permission to publish content. If you do not specify an access control list, everyone can access the form. |
Default dialog |
Select this check box to edit the documents that have no forms associated with them. iKnowBase searches for forms with the same document type or format, and selects the first form with this property set. |
9.1.5. Attributes Tab
You can add, change the order of, or remove attributes from the form. When you create a form, all the attributes related to the document type selected for the form are added as suggestive values.
| Property | Description |
|---|---|
Attributes |
Defines the attributes included in the form. Select new attributes by clicking the link Attributes. You can reorder the attributes by drag/drop functionality. If you want to remove an attribute, click the delete-icon and the press Save. The The
This mechanism makes it possible to allow custom attribute combinations on a document, without having to create forms for every possible combination of attributes. The "Format" attribute is available if you select Optional format for the form. This attribute enables the end user to select the content format at runtime. Remember that you also need to select the content attributes (file, link or content) that you will let the user choose from. The Folder attribute enables the end user to change the parent document. |
9.1.6. Rules Tab
The Rules tab enables you to define behavior and validation rules that apply to each attribute.
| Property | Description |
|---|---|
Element |
List of all attributes in the form. |
Hide insert |
Select this check box to hide this field, when new documents are created. |
Hide update |
Select this check box to hide this field, when existing documents are updated. |
Ins? |
Select this check box to allow the user to enter values while creating documents. Does not apply if If unchecked, the field will display, but not be editable. For the special attribute |
Upd? |
Select this check box to allow the user to enter values while updating documents. (Does not apply if If unchecked, the field will display, but not be editable. For the special attribute |
Req? |
Select this check box to specify if the attribute is mandatory (required) while creating a new document. |
Save? |
Select this check box to save this attribute in iKnowBase. In some cases, an attribute is used only during forms processing, and may be processed by a custom save function. An example would be a checkbox indicating whether to send an e-mail: The custom save function will use the value, but it should not be saved on the document. |
Show favorite |
Used for dimension attributes only, select this check box to display the favorite values for dimension attributes in a list. The list displays the last ten values that the user used for an attribute. |
Acl |
Used for the ACL attribute only, select this check box to enable the user to create access control lists. |
#values |
Displays the number of values a user can enter for this attribute. The value is retrieved from the attribute definitions, but can be overridden. |
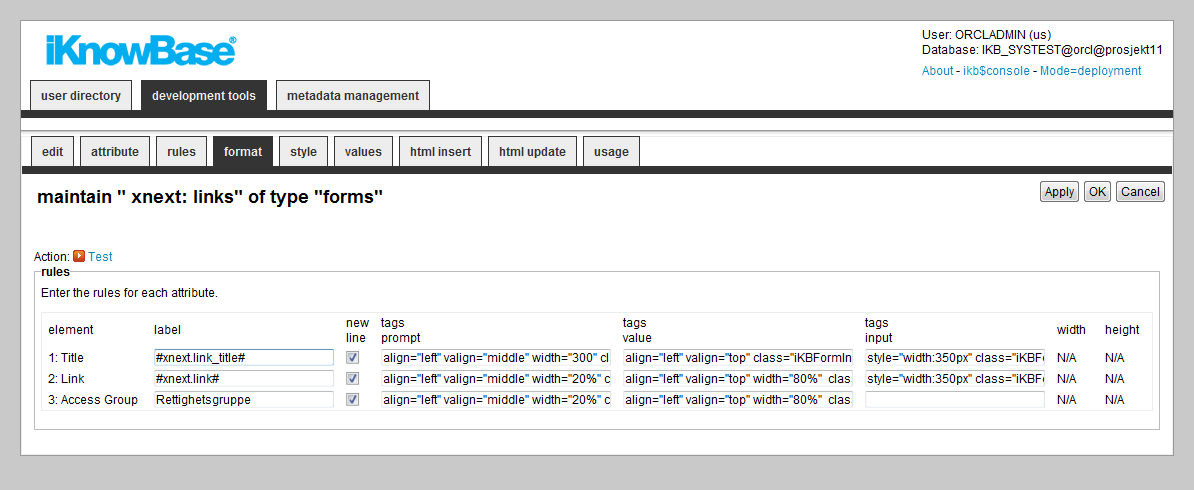
9.1.7. Format Tab
The format tab lets you enter formatting rules for each form item.
| Property | Description |
|---|---|
Element |
Displays the name of the attribute. |
Label |
Type a label for the attribute. This property will be used when you have selected the Show label property and deselected the Use the prompt from the attribute property on the Common attributes tab. You may use HTML codes in this field. This property does not have language support. You may use labels stored in the NLS tables to achieve this. The syntax is #ObjectId.StringId#, where ObjectId is the value in the IKB_NLS_STRING.OBJECT_ID column and StringId is the value in the IKB_NLS_STRING.STRING_ID column. The NLS tables may be overwritten in case of an upgrade. |
New line |
Select this check box to add the attribute to a new line. |
Tags prompt |
Type the HTML tags that display the labels. If the code does not have the correct syntax, there can be an error when the form is generated. By default, the field gets the values from Default font for labels and TD-length for labels property. Using this format value: align="left" valign="middle" width="20%" class="PortletText1" renders this HTML-code: <td align="left" valign="middle" width="20%" class="PortletText1">MY PROMPT</td> |
Tags value |
Type the HTML tags that display the value field. If the code does not have the correct syntax, there can be an error when the form is generated. By default, the field gets the values from Default font for labels and TD-length for labels property. Using this format value: align="left" align="TOP" width="80%" class="iKBFormInput" renders this HTML-code <td align="left" align="TOP" width="80%" class="iKBFormInput"><input > </td> |
Tags input |
Type the HTML tags that are used within input fields that are generated. For example, the size of a select box that can be specified with a font class or a style tag directly (style="width:249px") Using this format value: class="iKBEditorInput" renders this HTML-code <input class="iKBFormInput" ...> ... </input> |
Width and Height |
Type the width or Height of the text field for CLOB attributes (ingress and body text). The selected style decides the measuring unit that you must use.
|
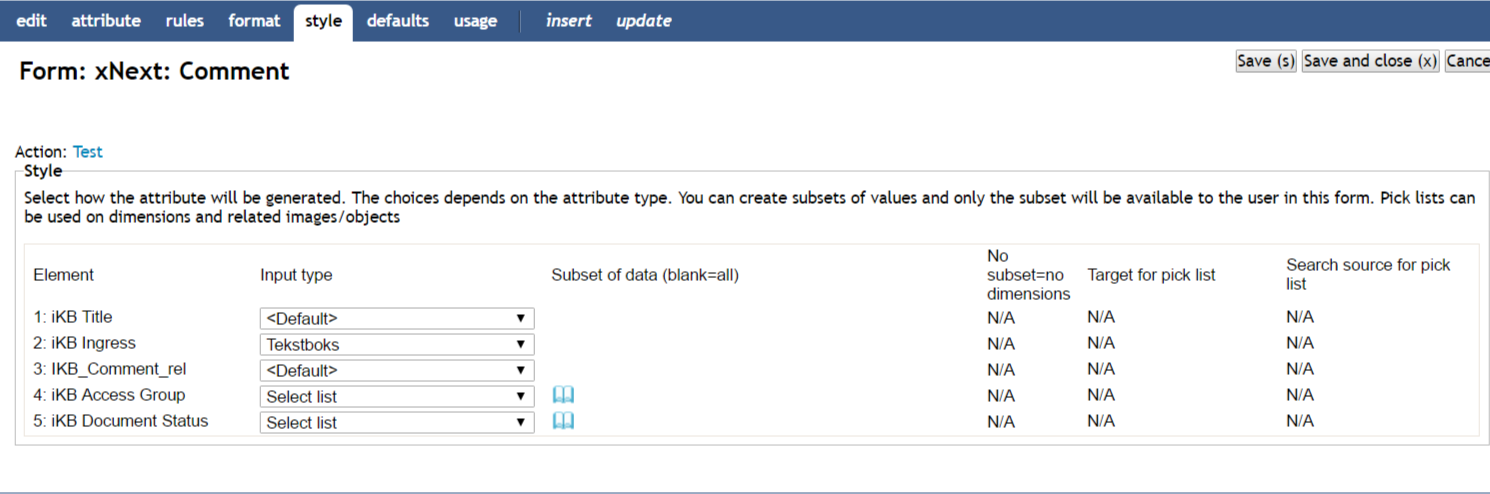
9.1.8. Style Tab
The Style tab lets you select the input type of the selected attributes.
| Property | Description |
|---|---|
Element |
Displays the name of the attribute. |
Style |
Select the appropriate style. This property specifies how the input field is generated. The available options depend on the attribute type.
|
Subset of data (blank=all) |
Define a subset of values for an attribute to limit the values that a user can choose. You can define subsets for the following attribute types: value lists, dimension, status codes, access control lists and templates. Note: For dimensional attribute, if the style is checkbox, radio or select-box, a blank subset will generate all nodes for the attribute. Only do this if the size of the dimensional structure is limited. For dimensional attributes you can select a subset with the dimension navigator. For the other attribute types you can select a subset of values from the list box. |
No subset=No dimensions |
For dimension attributes, if no subset is choosen, you must decide to show all (default) or none of the dimensions for the attribute. Is you select none (checked), only already stored values (on update) will be displayed. |
Target for pick list |
Select the target where your pick list is placed. This target is used when you select the pick list as a style (only for Dimensions, Folder, and Related objects or images). |
Search source for pick list |
Select the pick list that is used to select dimensions or documents. This search source is used where you have selected a pick list as a style (only for Dimensions, Folder and Related objects or images). Note: For related objects or images, the picklist must return document IDs. For dimensions, the picklist must return dimensions. |
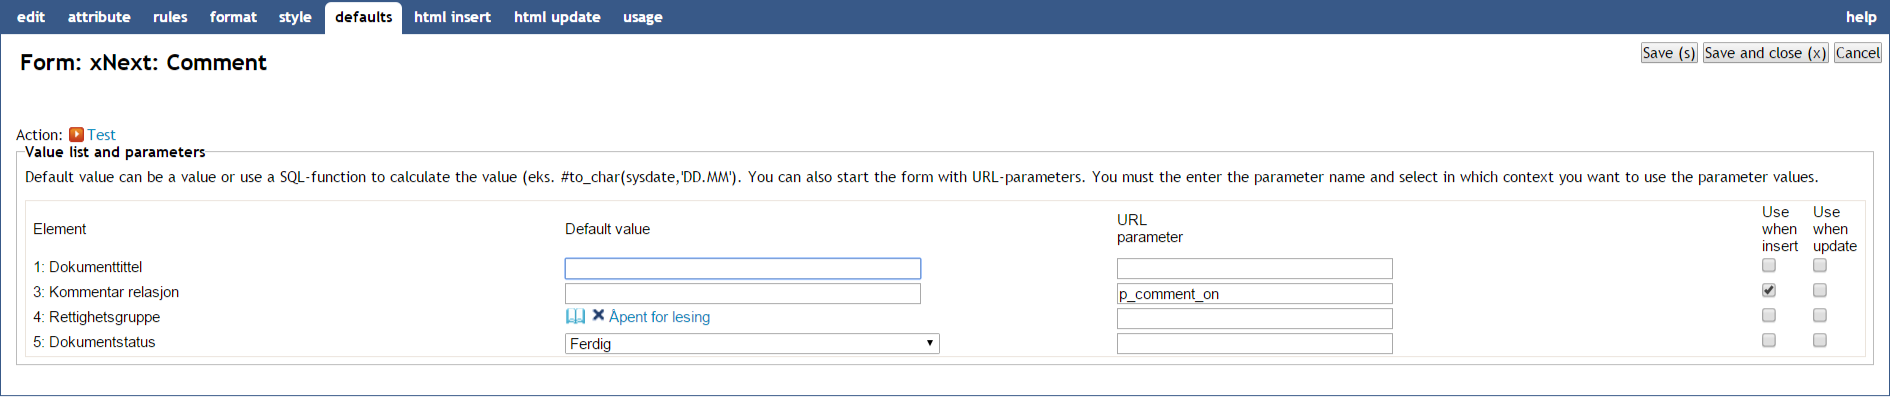
9.1.9. Values Tab
It is possible to specify default values for the various form attributes.
Per attribute you can create a subset of values that will be available for the end user during categorization, as well as defining a default value which will be prefilled in the form when the user opens it to create a new document.
Note: You can use SQL functions to calculate values. Example:
#to_char(sysdate,'DD.MM')
Parameters are used to receive values from a URL that calls the form. You can choose if you want to use a parameters while creating a document or updating a document through a form, or in both modes.
| Property | Description |
|---|---|
Element |
Displays the name of the attribute. |
Default value |
Type the default value for the attributes when a document is created. For text fields, type a value in the field. For dimension values, select the desired value. If the style is different from the dimension navigator, you must select a value from the subset. These values are available when the subset is created. If the dimension navigator is available, you can select the values from the dimension selector. For lists, select the appropriate value in the drop down box. You can also specify a function to retrieve a dynamic default value. You must always specify functions with the character # before the function name. The function can be either an SQL function such as TO_CHAR or a stored PL/SQL function. You can also send context-based parameters. Available variables are:
Examples: To return today’s date: #to_char(sysdate,'dd.mm.yyyy') To run the function "get_process_state", sending the current document’s parent_id as the parameter: #get_process_state(:PARENT_ID) |
URL parameter |
Type the URL parameter to set the suggested value to the current field over the URL string. The value differs between parameters that are active when documents are created or updated. The URL parameters override any default values. The URL is built upon the quick link where the parameter is given a value. It is available for selection on the Parameters tab on the Edit pane of a quick link. |
Use when insert |
Select this check box to insert the URL parameter when documents are created. |
Use when update |
Select this check box to insert the URL parameter when documents are updated. |
Attachment |
The Attachment attribute lets you attach subdocuments to the document being edited in the form. At run time, users can upload multiple files as attachments to the current document. They will not use a separate form to edit the metadata for the attachments. At design time, you need to select the form to use for later editing of the attachment. This form also defines the document type (document type) and possible attributes of the attachments. You can also choose to display already existing attachments by checking "display existing attachments". All sub documents created with the form provided in "select form for attachments" will be displayed. If you want to remove the "delete"-link, simply create the form as a HTML-form, generate HTML code for update and remove the tag "DELETE_ATTACHMENT". |
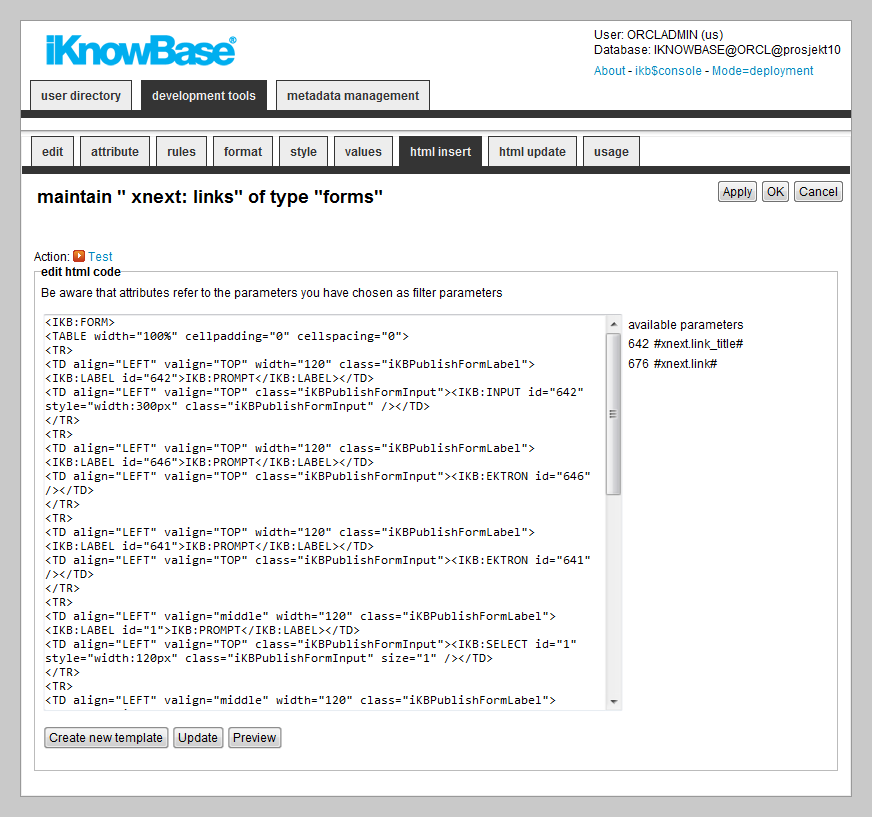
9.1.10. HTML Insert and HTML Update Tabs
iKnowBase enables you to design and create the form layout using your own HTML markup, rather than using the automatically generated forms. The notation in the setup is based on HTML with several extensions to generate dynamic fields for iKnowBase. See chapter 1.108 HTML Template support for further information.
You can write the HTML template code in the HTML Insert and HTML Update tabs. The HTML Insert code is used to generate the form for a new document, the HTML Update code is used to generate the form for an existing document.
Note: If you update the selected attributes in the form, you must also update the HTML templates to reflect the changes. You can generate a new template or manually update the template, and insert IKB tags for new attributes or delete old tags.
There are three action buttons available:
-
Create new template: Click this button to generate a default template, with placeholders for the attributes in the form. You may then change this template as needed. If you do in fact not need to change this template, then a rule-based form is generally a better choice.
-
Update: Click this button to update your template with new attributes. iKnowBase will scan the existing template, and find attributes that are missing. Then, it will generate default template code to edit these attributes, and add to the bottom of the template. Move this code around as required.
-
Preview: Click this button to open a popup window showing the template code as it will look from the client browser.
| Property | Description |
|---|---|
HTML code |
Type the HTML template code. Use the action buttons |
Available attributes |
A list of available attributes and their IDs available for use in the HTML template code. |
9.2. Using a custom WYSIWYG-editor
To edit ingress, body text, and clob attributes in a form you can either use a textarea or a WYSIWYG-editor. Which one to use is configured on the Form Style tab. Available options are textarea and predefined TinyMCE profiles. If you would like to use the TinyMCE 3 editor you can choose a TinyMCE profile. If you would like to use a newer version of TinyMCE or another editor choose textarea and follow the instructions in this chapter.
To use a custom WYSIWYG-editor for a form element, do the following:
-
Specify textarea style for the element on the Form Style Tab
-
If you want to use different editor configurations for different elements, specify a css class for the input tag for the element on the Form Format Tab
-
Add the necessary Javascript to the iKnowBase page running the form; this can be done in several ways, e.g. by adding it to a Template viewer on the page
|
Note
|
Standard iKnowBase includes TinyMCE plugins for the iKnowBase link and image picklists. |
9.2.1. Example: TinyMCE 4 editor
This example illustrates how to use the TinyMCE 4 editor for the body text of a form.
Prerequisites:
-
an iKnowBase Form configured with an ingress
-
an iKnowBase Page with a Form portlet configured with the form above
First you must configure the form to use style textarea for the ingress element (Style Tab). Then you must add an Template Viewer to the page with the following Javascript:
<script src="//tinymce.cachefly.net/4.0/tinymce.min.js"></script>
<script type="text/javascript">
    tinymce.init({
        selector: "textarea"
    });
</script>
9.2.2. Example: TinyMCE 4 editor with different configurations and iKnowBase Plugin
This example illustrates how to use the TinyMCE 4 editor for both the ingress and the body text in a form. The editor should be configured differently for the two elements. For the ingress element, an editor with a simple toolbar should be used. For the body text, an editor with a more complex toolbar, containing the iKnowBase image and link buttons, should be used.
Prerequisites:
-
an iKnowBase Form configured with an ingress and a body text
-
an iKnowBase with the form
First, you must configure the form to use style textarea for both the ingress and the body text element (Style Tab). Then you must add css classes for the input tags for the ingress and body text elements, class="tinySimple" and class="tinyFull" respectively (Format Type). Finally, you must add an Template Viewer to the page with the following Javascript:
<script src="//tinymce.cachefly.net/4.0/tinymce.min.js"></script>
<script src="/ressurs/iknowbase/libs/tinymce4-plugins/iknowbase/plugin.js"></script>

<script type="text/javascript">
    tinymce.init({
        selector: "textarea.tinySimple",
                menubar: false,
        toolbar: "bold italic underline strikethrough | undo redo | bullist numlist"
    });

    tinymce.init({
        selector: "textarea.tinyFull",
        plugins: "searchreplace code iknowbase",
        toolbar1: "bold italic underline strikethrough | styleselect  formatselect fontselect fontsizeselect",
        toolbar2: "cut copy paste | searchreplace | bullist numlist | outdent indent | undo redo | code | iknowbase.link iknowbase.image"
    });
</script>
9.3. Testing your Form
To test your form, either click the Test action for the form on the List pane, or click the Test action link on the Edit pane tabs for the form.
|
Note
|
The Test actions become available for a form after you specify the target Target on show for the form. |
10. Homeplaces
A homeplace is a mechanism used to dynamically decide the destination of navigation when you click on a document. Using a homeplace, it is possible to have a single link go to different destinations depending on the document context. The purpose is to view a document in the proper context.
A homeplace comprises the following information:
-
A single target (destination), typically a page or a URL.
-
A set of criteria that must be satisfied to use this particular target selector.
-
Parameters that will be passed to this target selector.
If you specify the target for the homeplace as an an iKnowBase target of type Page or Parameter, parameters may be transmitted as URL parameters.
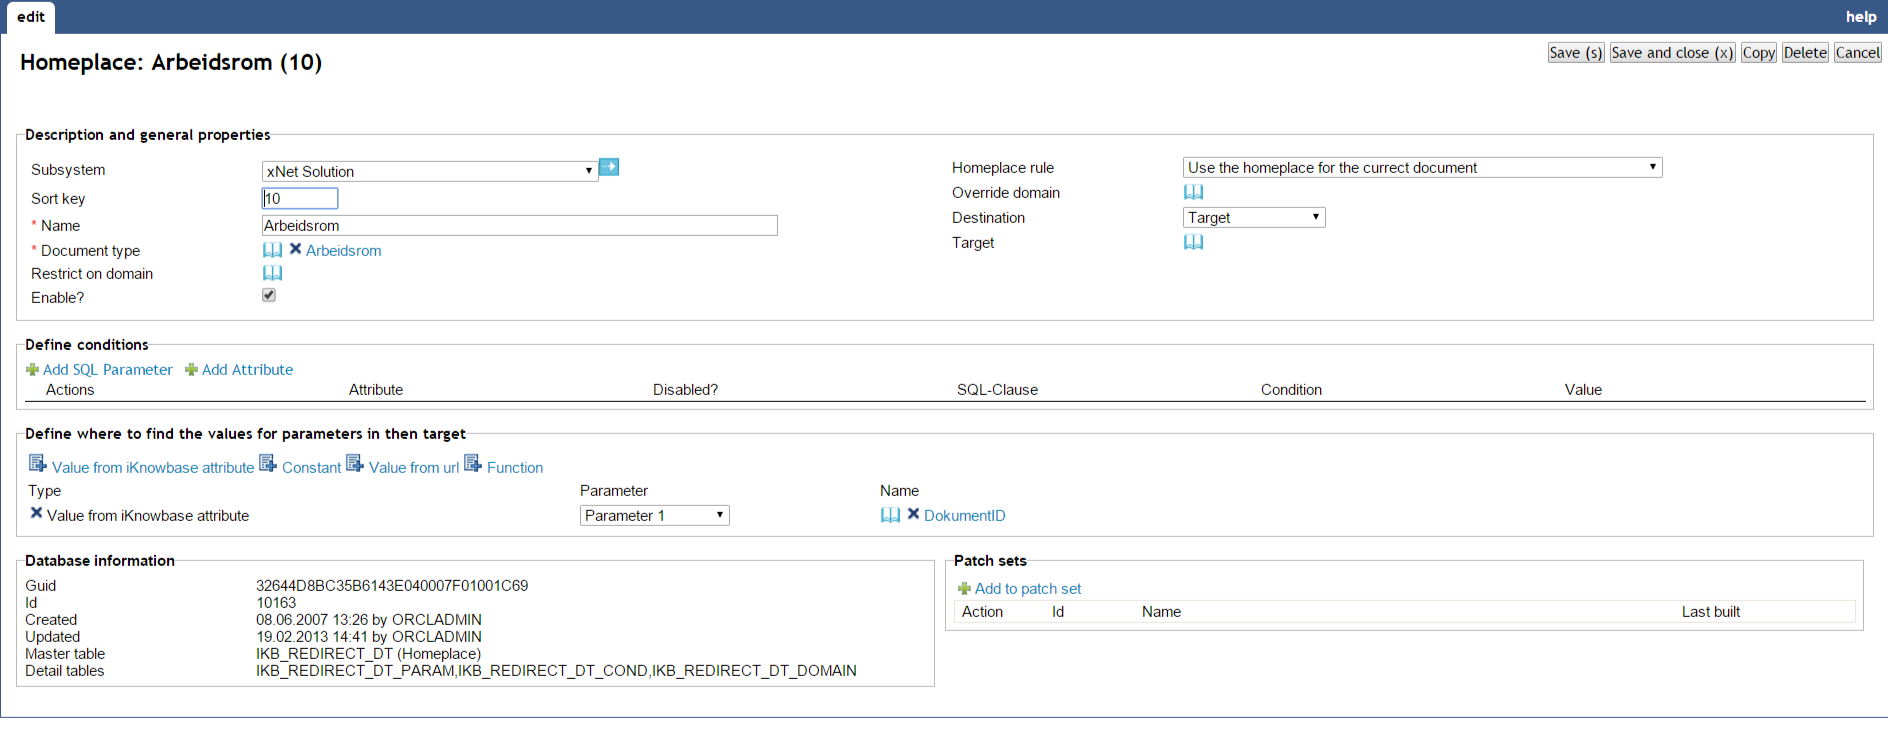
10.1. Properties
This section describes the properties of a target selector, as shown on the corresponding Edit pane.
| Property | Description |
|---|---|
Subsystem |
Select the appropriate subsystem. |
Sort key |
Type the relevant sort key that is used to sort the target selectors so that the system evaluates the target selectors in the order that you want. If the sort key is not specified then, the system uses the first target selector it hits in no specific order. |
Name |
Type a name for this target selector. |
Document type |
Select the document types the target selector applies to. |
Restrict on domain |
If you want the target selector to apply only to a single domain, select this domain here. If no domain has been selected, the target selector will apply to all domains. |
Enable? |
Define if the homeplace is enabled. Disabled homeplaces are considered as non-active homeplaces. |
Homeplace rule |
Select the appropriate target selector rule. This specifies whether to traverse upwards in the document structure, or not, when deciding which target selector to use. This may be relevant if you want to display a subdocument using the target selector for its parent document. Available options:
|
Override domain |
Used to create URLs to a different domain. e.g. a document link displayed on intranet.com should be opened in internet.com |
Destination type |
Select destination type for the homeplace. You can choose between target, iKnowBase Page, constant url or menu. |
Target |
If you want the target selector to point to a iKnowBase target, select this target here. |
iKnowBase page |
If you want the target selector to point to a iKnowBase page, select this page here. |
Url |
If you want to go to a specific URL, type the URL here. You can specify the URL in three ways:
|
Menu |
If you want to go to the destination specified by a menu, select the menu used to lookup the destination here. Note that you must also select an attribute for the property Attribute to specify menu item, to be used for looking up the destination. At runtime, when looking up the destination for a document, iKnowBase will find the value of the specified attribute, and find the menu item for that attribute value in the specified menu, and go to the specified destination. |
Attribute to specify menu item |
If you want to go to the destination specified by a menu, select the attribute that you want to use for menu lookup. |
Define conditions |
|
Add SQL Parameter |
A selector for SQL parameters. Select the appropriate attribute by clicking the link. |
Add attribute |
A selector for document attribute. Select the appropriate attribute by clicking the link. You can deselect by clicking the x-arrow infront of the attribute. |
Actions |
Clickable icon for deleting the attribute |
Attribute |
Displays the names of the selected attributes to use as conditions for the target selector. |
Disabled? |
If set, the condition is not used in the validation. Normally used for debugging issues. |
Sql Clause |
Used for performance reasons for advanced users. Will generate a SQL with either IN or EXISTS. |
Condition |
Select the appropriate conditions for the selected attributes. The conditions depend on the type of attribute. |
Value |
Select the appropriate values for the selected attributes. |
Define where to find the values for parameters in then target |
|
Type |
Displays the type of parameters selected for the target selector. The following parameter types are supported:
|
Parameter |
Define the order of the parameters. You can define up to nine parameters. |
Name |
This property depends upon the parameter type:
|
10.2. Validate and test
This section describes how to discover which homeplace is selected for a document
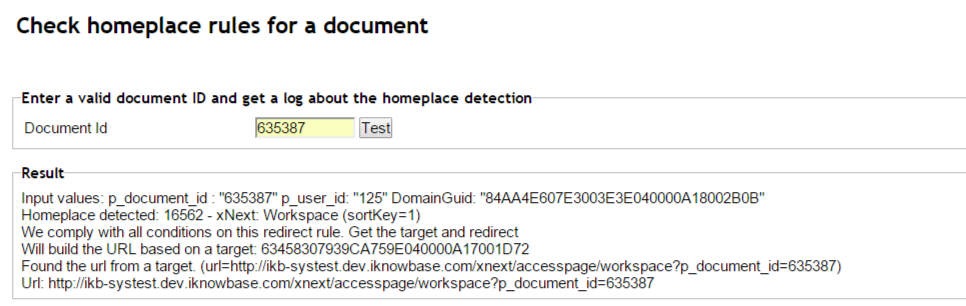
| Property | Description |
|---|---|
Document ID |
Enter a valid document and press Test or return. The result section will contain a debug log from the homeplace detection function. Useful for debugging reasons. |
11. Image Metadata
Image metadata can be used to extract image information directly from an image in a presentation style. To see available properties for an image, use tools to show image metadata and use the same metadata name as given there.
11.1. Properties
This section describes the properties of an image metadata, as shown on the corresponding Edit pane.
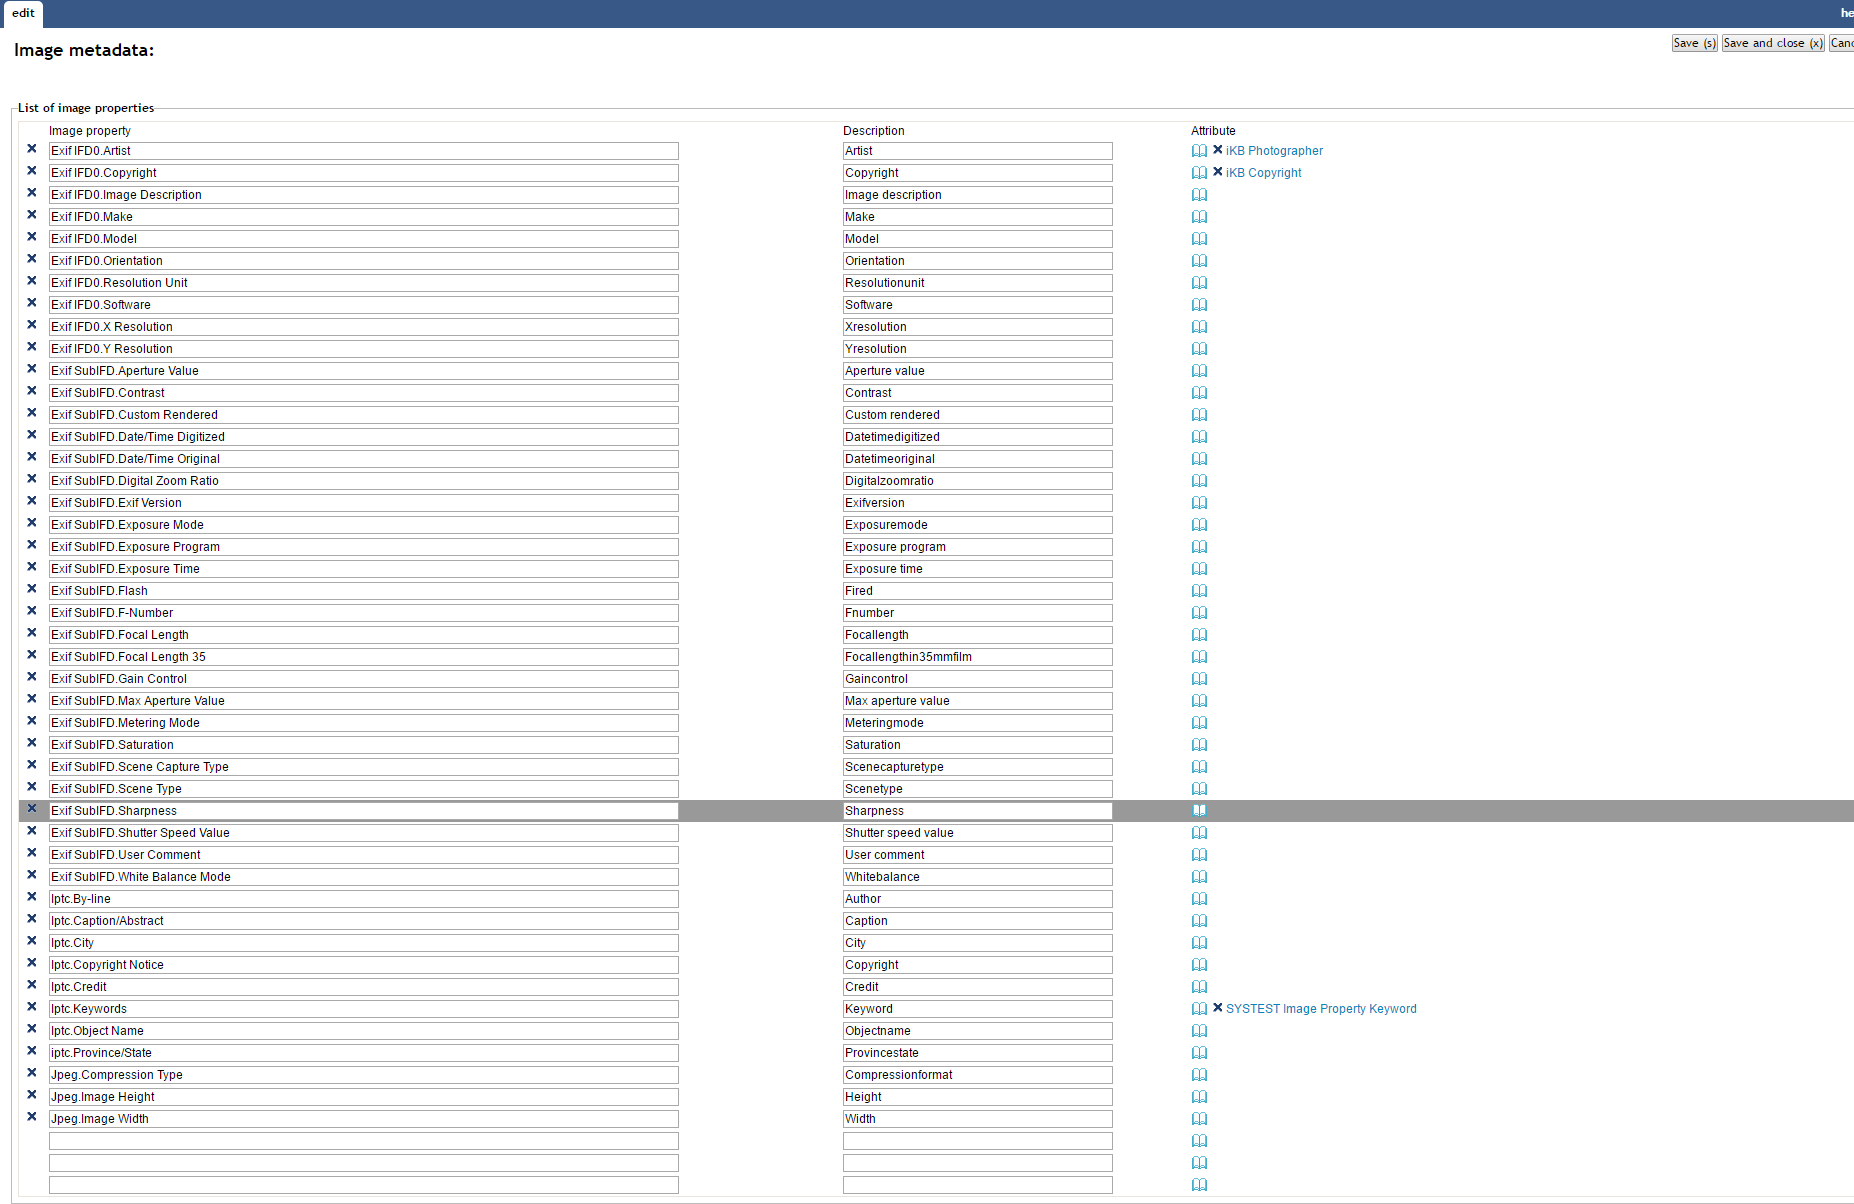
| Property | Description |
|---|---|
Image property |
The given name for an image property |
Description |
Short description of the property. |
Attribute |
When you save an image, you can automatically extract information from the image and store it as a regular attribute on the document.This information can later be used in viewers and presentation styles. Define the attribute use will use to store this image attribute. |
12. Import
The import feature is part of the export/import utility in iKnowBase. With the import feature you can upload a dump file previously exported from an iKnowBase instance, and import it into this iKnowBase instance.
12.1. Properties
This section describes the properties of an import, as shown on the corresponding Edit pane tabs.
12.1.1. Upload a new file

| Property | Description |
|---|---|
Upload a new file |
Upload a new datapump file exported by iKnowBase Export utility. Select a directory where you want to place the file. After the file is successfully loaded into the database, you will be redirected to the configuration screen. |
12.1.2. Edit tab
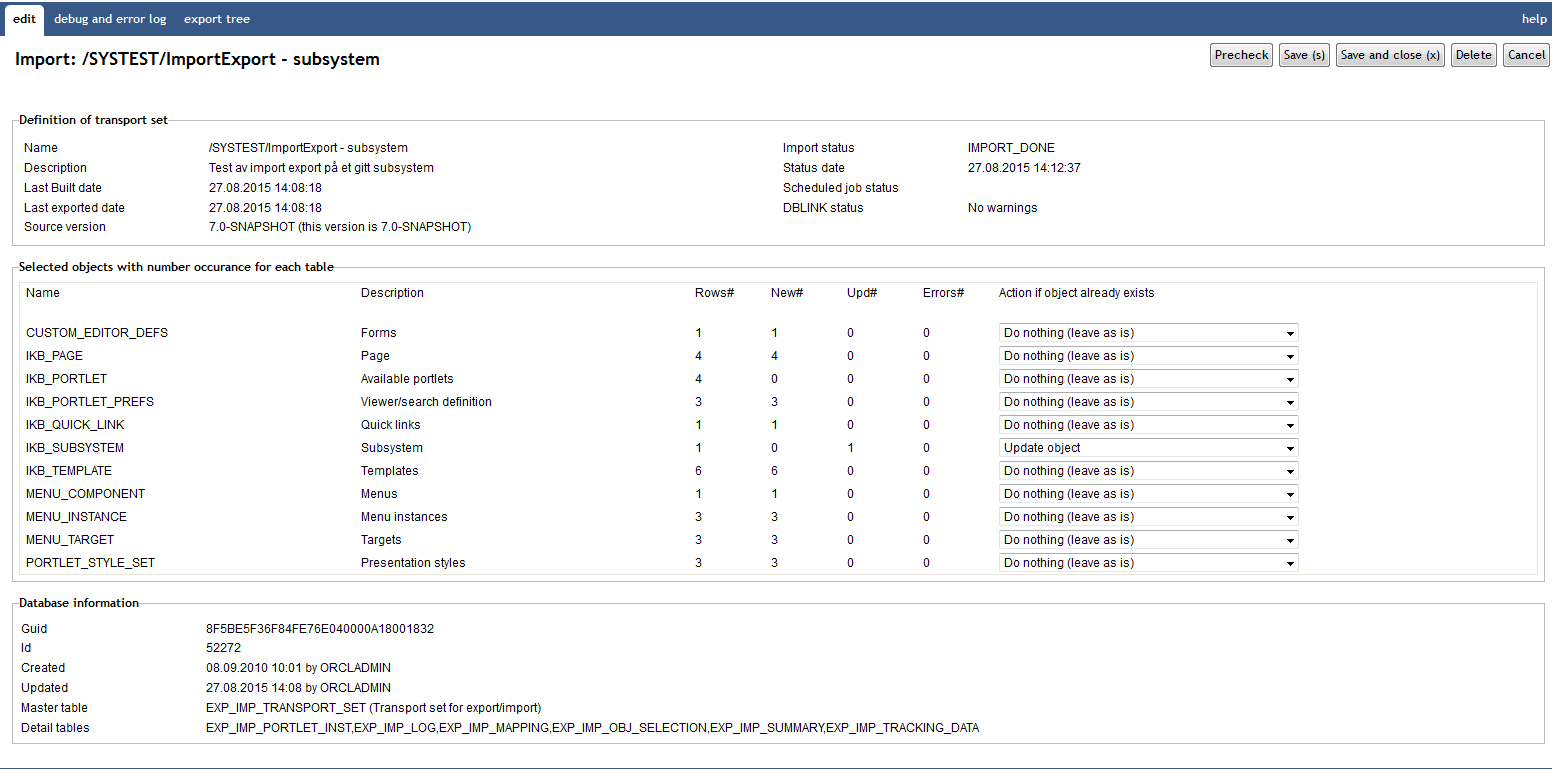
| Property | Description |
|---|---|
Name |
Displays the name of the transport set. |
Description |
Displays the description of the transport set. |
Last built date |
Date of the last time the transport set was built. |
Last exported date |
Date of the last time the transport set was exported. |
Source version |
Displays the iKnowBase repository version from the source of the transport set. Make sure the import side has the same version of iKnowBase before importing. |
Import status |
Displays the import status:
|
Status date |
Displays the time of the last precheck or import, alternatively the import creation time. |
Scheduled job status |
It the job is running in batch mode, the job status is displayed here. |
DBLINK status |
If the transport set was uploaded by the remote precheck option in the export routine, a status of the completeness of the transport set is shown here. The message "No warnings" is displayed if the transport set is ready for import. Otherwise you need to download the file from the exporting side and upload the file on the import side. The reason for this is XML-data, which cannot be uploaded over a database link. |
Selected objects with number occurrence for each table |
|
Name |
Displays names of the database tables which are included in the import. |
Description |
Displays descriptions of the database tables which are included in the import. |
Rows# |
Displays the total number of rows in the transport set. |
New# |
Displays the number of rows to be inserted (rows that don’t already exist) per table. |
Upd# |
Displays the number of rows to be updated per table. |
Errors# |
Displays the number of rows that failed during pre-check or import. |
Action if object already exists |
The valid operations if an object exists on target are:
|
12.1.3. Debug and error log Tab
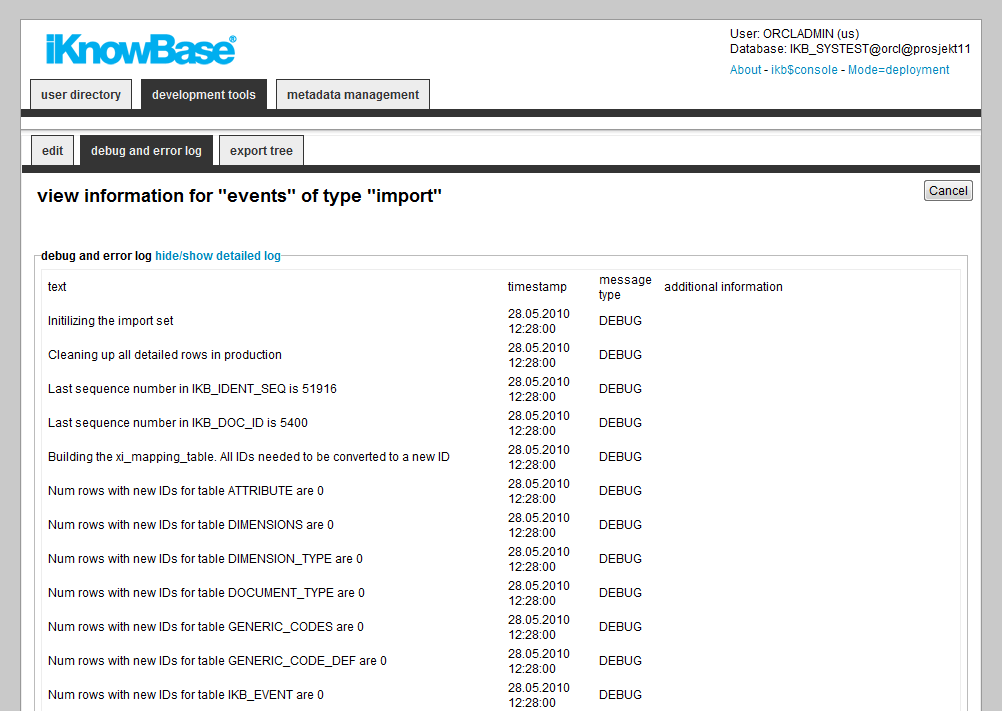
| Property | Description |
|---|---|
Text |
Displays the messages generated during the last pre-check or import. |
Timestamp |
Displays the timestamp for the messages. |
Message type |
Displays the message types. |
Additional information |
Displays additional information. |
|
Note
|
The content of this tab is available after pre-check of the transport set or import of data is started. |
12.1.4. Export tree Tab
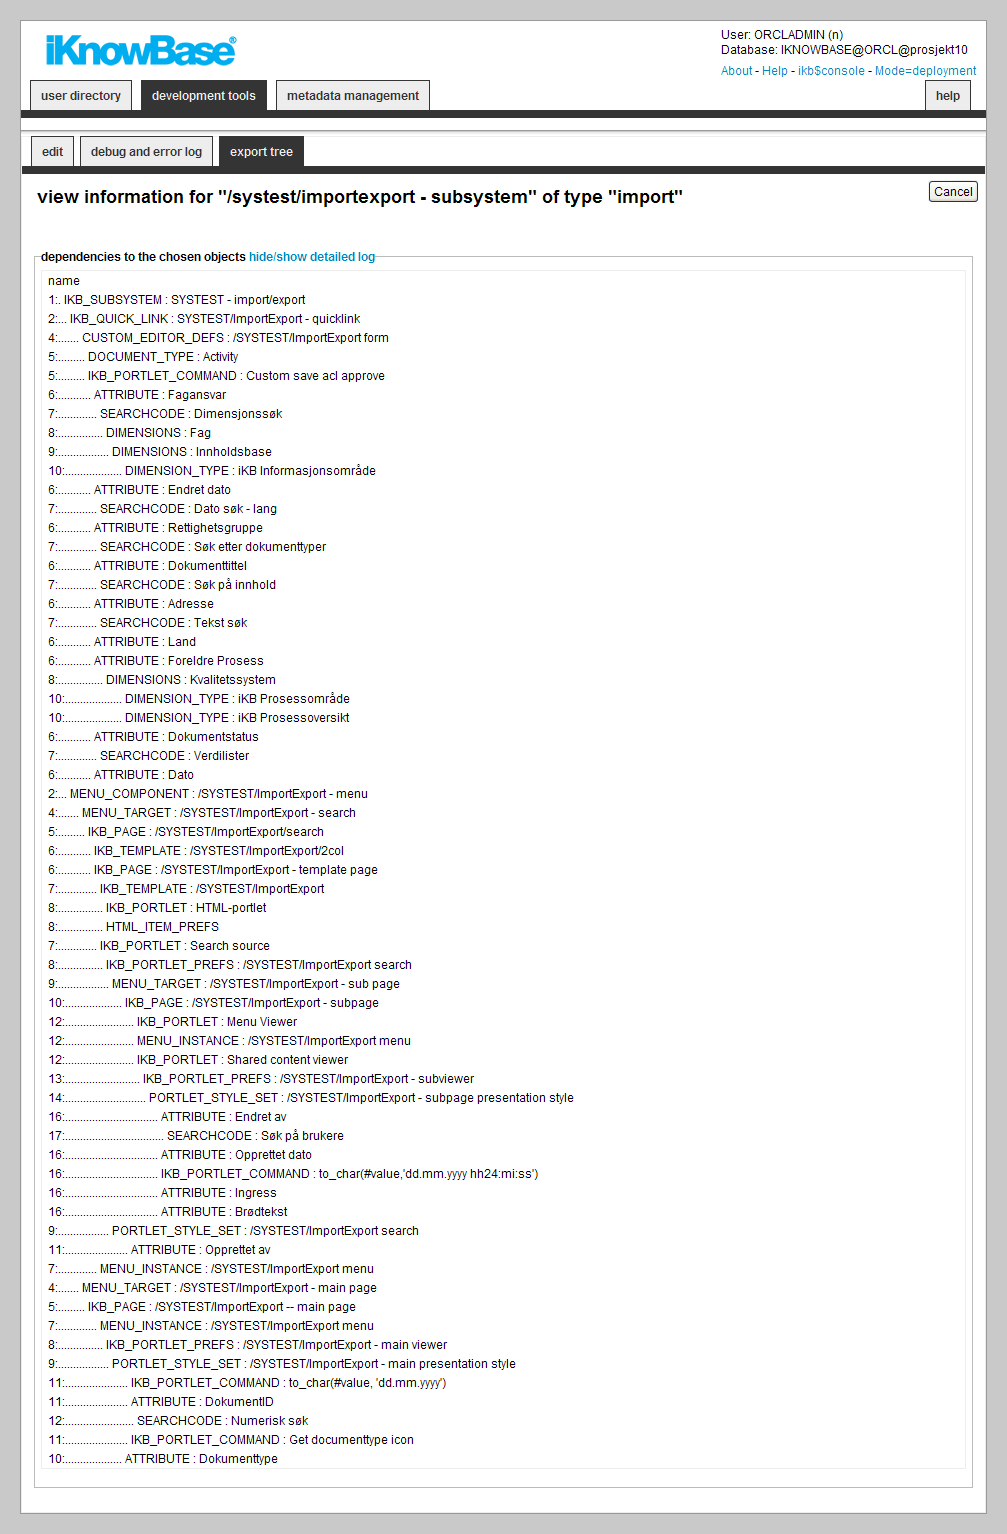
| Property | Description |
|---|---|
Name |
Displays a graph of all the objects included in the import. |
12.2. Creating an Import definition
Before you can create an import definition, you must create the appropriate dump file by exporting data.
To create an import definition, perform the following steps:
-
On the List pane for import, click on the Upload new file action.
-
Select the file to upload.
-
Click the
Upload filebutton. The import definition is created, and displayed in the Edit pane.
12.3. Importing Data
-
Create an import definition. If the import definition already exists, it will be overwritten.
-
Per table, define whether you will do a merge, or an insert. To do a merge, select the Replace on import? check box. To do an insert, with no update, deselect the Replace on import? check box.
-
Per table, define whether you will do a delete and upload, or not. To do a delete, select the Delete details and load again check box. To not do a delete, deselect the Delete details and load again check box.
-
After you have created the import definition, make sure to clean both the web cache (http://www.example.com:9400/) and the iKnowBase Java cache (http://www.example.com/ikb$developer/admin.do) before you validate the new import definition.
-
Click on the Precheck button on the Edit pane of the import definition. The import is validated, and a debug and error log becomes available on the Debug and error log tab. A graphical overview of object dependencies becomes available on the Export tree tab.
-
Check the debug and error logs.
-
When the import definition validates, the Merge to iKnowBase button becomes available on the Edit pane. Click on this button to import data. The uploaded data is imported as specified in the import definition. A debug and error log becomes available on the Debug and error log tab. An overview of how many rows from which tables are exported becomes available on the Overview — tables tab and a graphical overview of object dependencies becomes available on the Export tree tab.
13. Installation properties
This screen is used to administer system properties for the environment of iKnowBase. They are typically given a default value during installation. As one of the first step after installation you should verify the values here.
13.1. Properties
This section describes the properties of an installation property, as shown on the corresponding Edit pane.
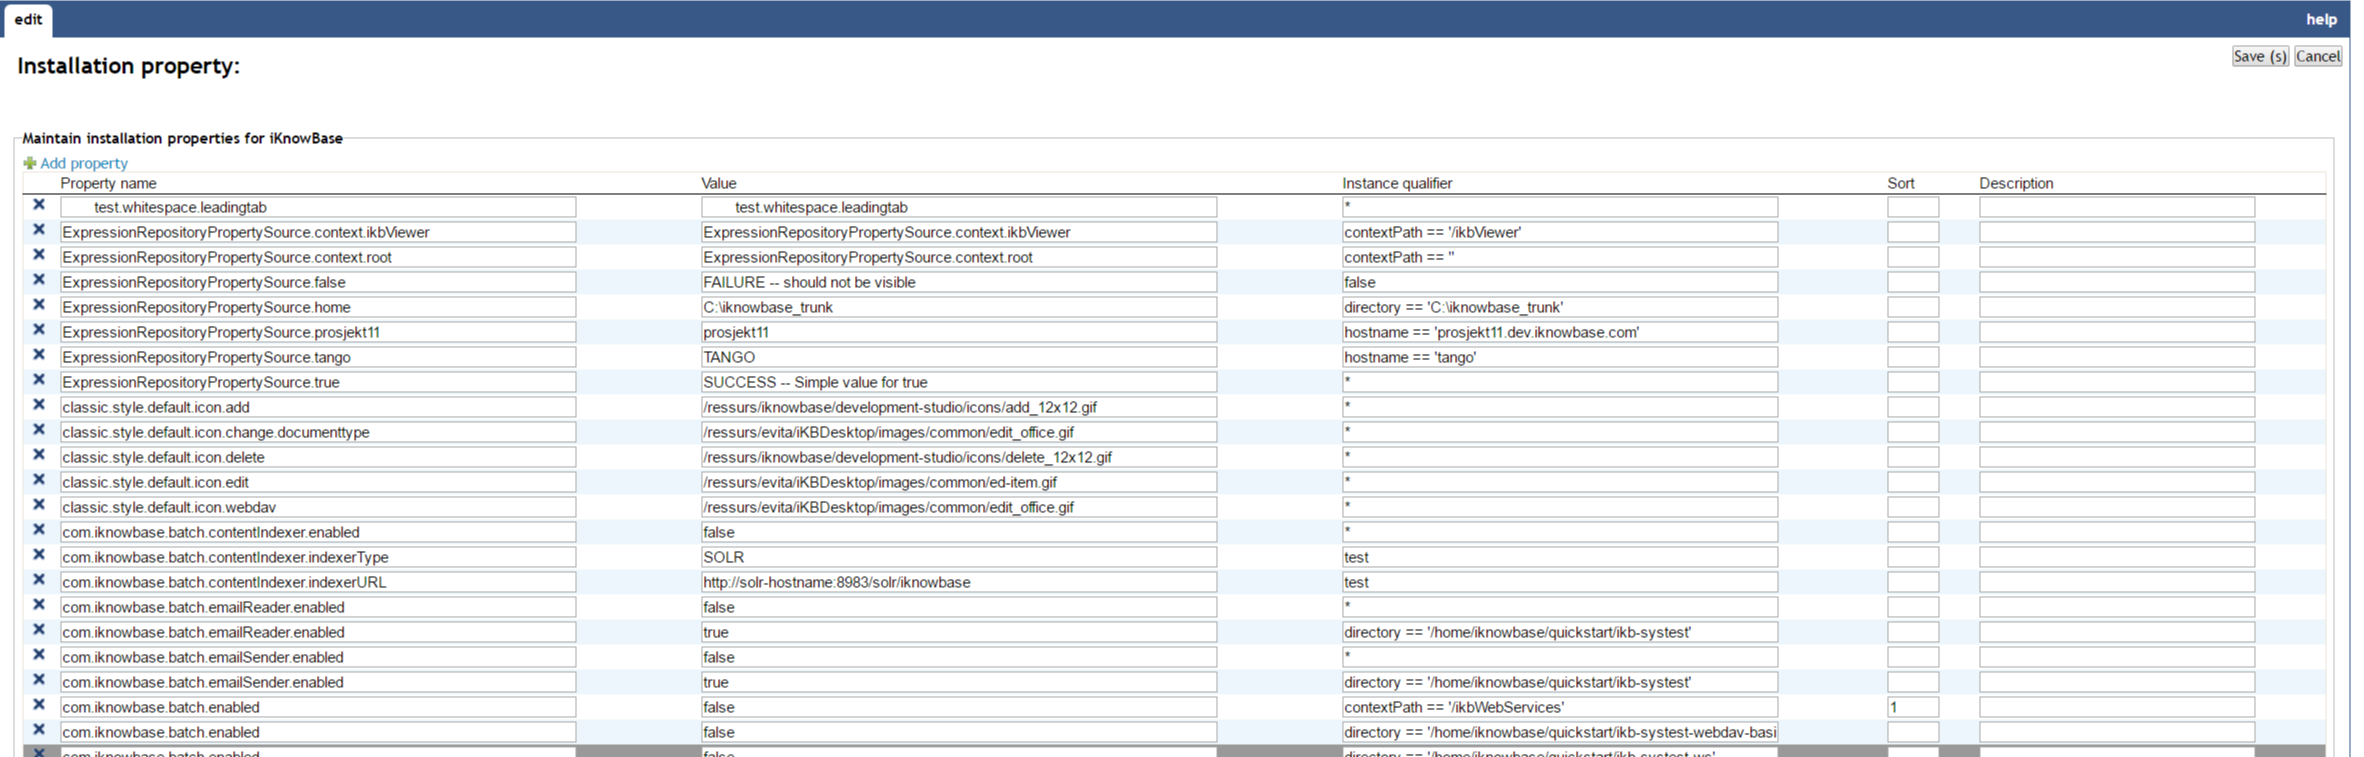
| Property | Description |
|---|---|
Property name |
Name of the corresponding property. The value is typical defined during installation of iKnowBase (or upgrade where new properties are introduced). |
Value |
Defines the current value of the property. You are allowed to change the value here. |
Instance qualifier |
Define the instance qualifier; see the "Configuration" chapter in the Installation Guide for more information. |
Sort |
Define the priority if there are more than one instance of a property name. |
Description |
Define a short description of the property. |
14. Java SDK portlets
Java SDK portlets are standalone java components available from an iKnowBase page. To add a Java SDK portlet you first
add a page component portlet of the type Java SDK and then select one of the registered JavaSDK portlets.
Maintain Java SDK portlets; add, edit or delete portlet definitions.
14.1. Properties
This section describes the properties of a Java SDK portlet, as shown on the corresponding Edit pane.
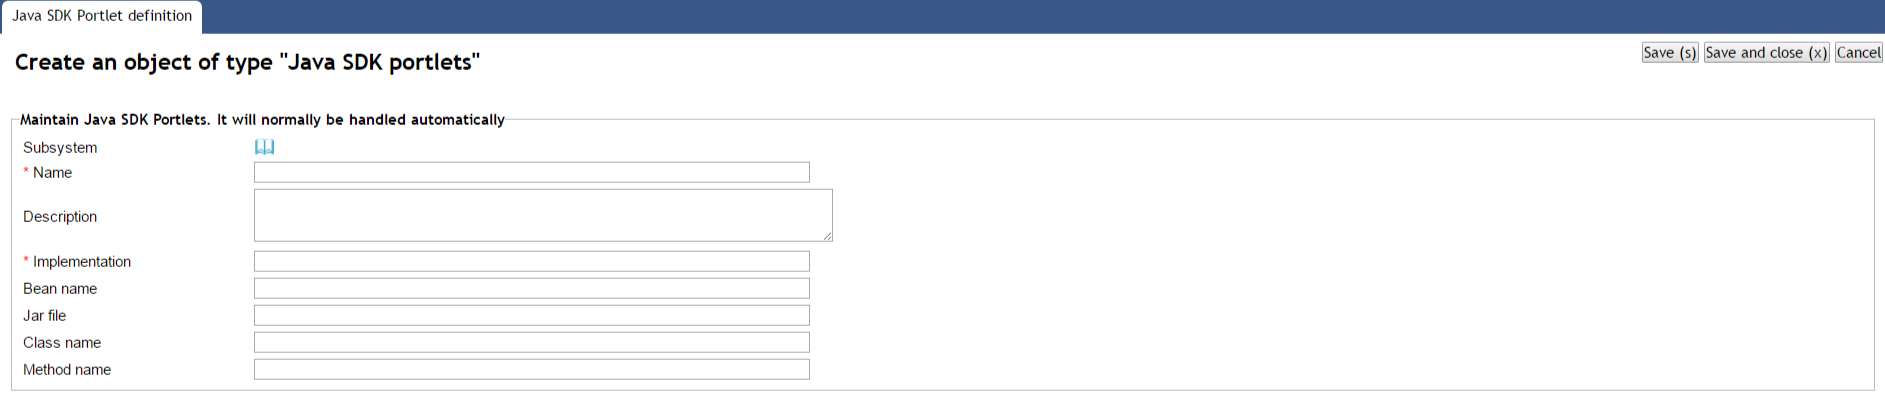
| Property | Description |
|---|---|
Subsystem |
Select the appropriate subsystem. |
Title |
Type a display name for the portlet. |
Description |
Type a description. |
Mapping key |
The unique @PortletMapping key used on the implementation method. |
Class name |
Last seen class name of the portlet |
Jar file |
Last seen jar file containing the portlet |
Method name |
Last seen name of the implementation method |
Bean name |
Last seen name of the java bean |
15. Language
Use the language component to enable language support for multiple languages in your portal. This enables you to create and maintain language texts, and mapping between the languages defined in iKnowBase and web browser languages.
There are two key items to understand the iKnowBase language properties:
-
iKnowBase uses the defined languages to enable a wide variety of language features. By defining a new language, you make it possible to enter texts and translations for that new language.
-
Different browsers and web technologies have different concepts of a language. For example, the language formally known as "Norwegian Bokmaal" is identified by several language codes by different browsers, with "no", "no_nb", "no-nb" and "nb" being the most common.
Language texts are stored in the IKB_NLS_* tables in the database.
|
Note
|
The text elements defined on various components, such as pages and presentation styles, are not available through this component. |
15.1. Properties
This section describes the properties of a language, as shown on the corresponding Edit pane tabs.
15.1.1. Edit tab
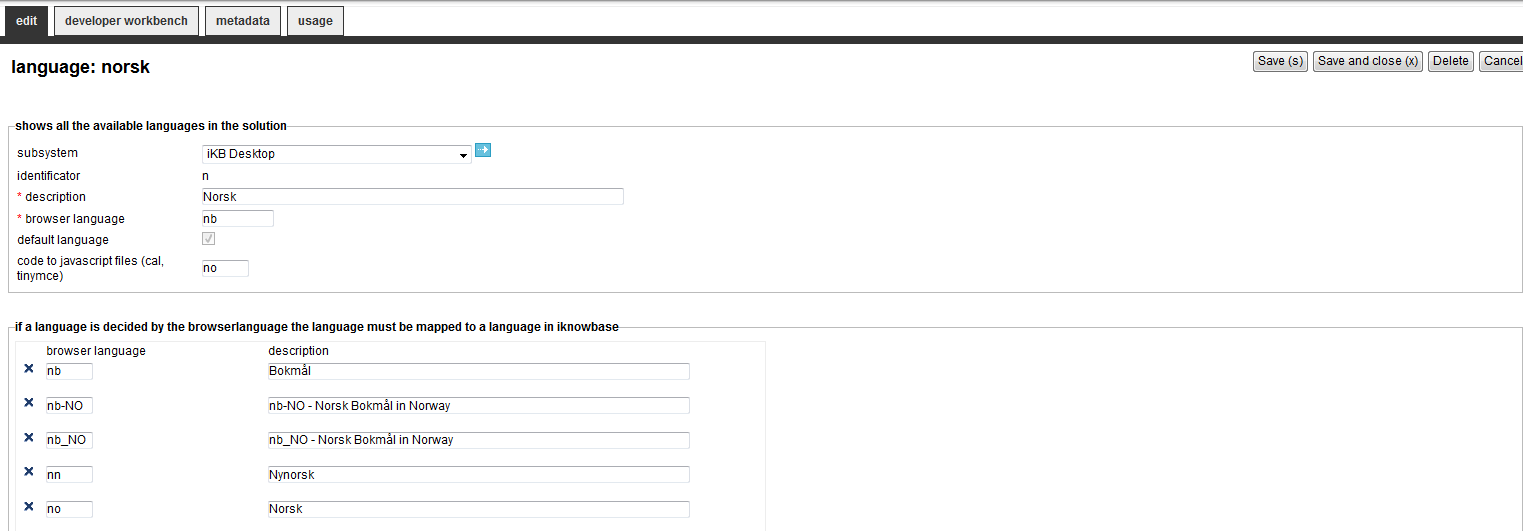
| Property | Description |
|---|---|
Sub system |
Select the appropriate subsystem. |
Identifier |
Type the iKnowBase language code. This language code must be given in lowercase. It is not possible to update this property after creation. |
Description |
Type a description of this language. |
Browser language |
Type the code of the web browser locale-language for which this iKnowBase language should be used. For example, type "nb" for "Norwegian Bokmål". |
Default language |
Set this language as default language. Only one language can be the default language. |
Code to JavaScript files (cal, tinymce) |
Type the extension/prefix of language-specific JavaScript files. |
Browser language |
Type the codes of all the web browser locale-languages for which this iKnowBase language should be used. |
Description |
Type a description for these language codes. |
15.1.2. Developer Workbench Tab
iKnowBase enables you to translate the language of the labels for all the components defined in the Development Studio. This is easily done from the metadata tab in the Edit pane.
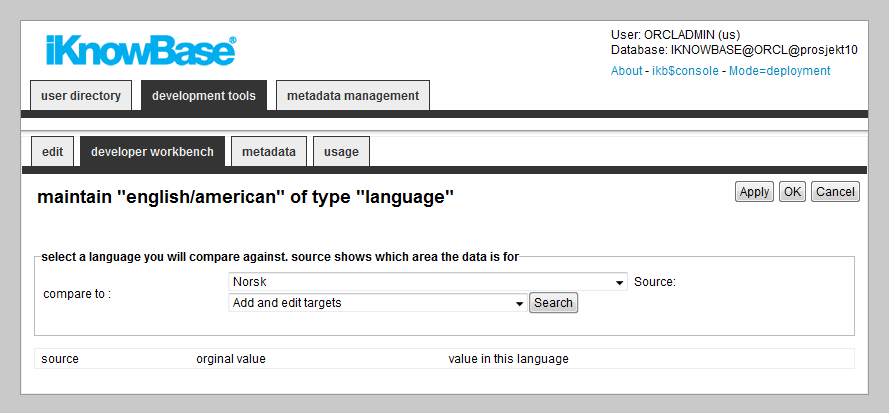
| Property | Description |
|---|---|
Compare to |
Select the language to compare the texts with. |
Source |
Select the source of the texts that you want to maintain. Fetched from the database table IKB_NLS_DEFINITION. |
Source |
Displays the identifications of the source texts in the database table IKB_NLS_STRING. |
Original value |
Displays the texts for the language you are comparing this language to. |
Value in this language |
Displays the texts for the language being edited. You can type or change the value if desired. |
15.1.3. Metadata Tab
iKnowBase enables you to translate the language of the labels for all the metadata in the information model. This is easily done from the metadata tab in the Edit pane.
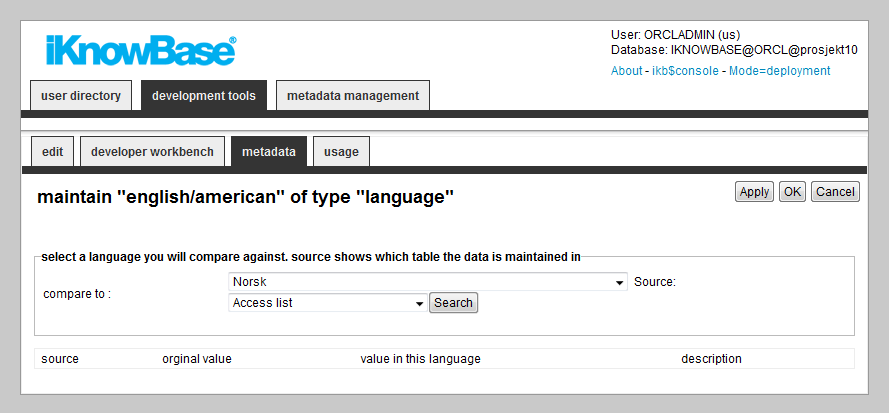
| Property | Description |
|---|---|
Compare to |
Select the language to compare the texts with. |
Source |
Select the source of the texts that you want to maintain. |
Source |
Displays the name of the database tables in which the texts are stored. |
Original value |
Displays the texts for the language you are comparing this language to. |
Search result : Value in this language |
Displays the texts for the language being edited. You can type or change the value if desired. |
Search result : Description |
Displays the descriptions for the texts for the language being edited. You can type or change the value if desired. |
15.2. Create a new language set
iKnowBase enables you to create new language sets. You will always start the job by copying a language set from a existing language.
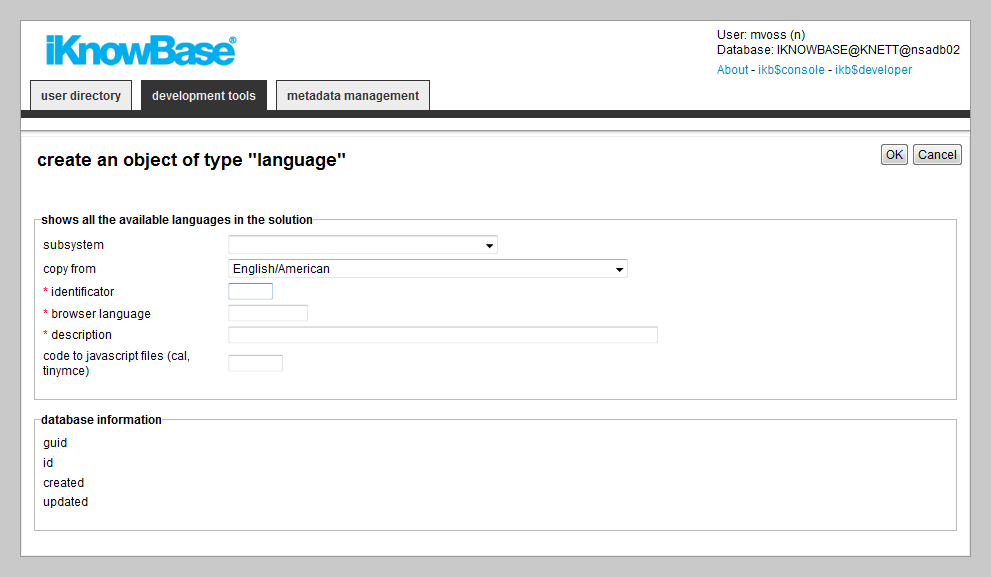
To create and copy a language, perform the following steps:
-
On the List pane for languages, click on the
Add Languageaction. An empty Edit pane, without any tabs, opens. -
On the Edit pane, select the appropriate language to copy from in the Copy from drop down box, and enter the appropriate information in each field. It is not possible to create a new language without making a copy from an existing language.
-
Click Apply. iKnowBase creates the language and saves all the information that you provided for the new language. If you chose to copy from another language, all the texts defined for this language will be copied to the new language. The Edit pane remains open, now split into tabs with all the properties of the language available.
16. LDAP Profiles
An LDAP profile is used for login and extraction of information from an LDAP directory. Tested LDAP-servers includes Oracle Internet Directory, OpenDJ and Microsoft Active Directory (AD).
16.1. Properties
This section describes the properties of an LDAP profile, as shown on the corresponding Edit pane tabs.
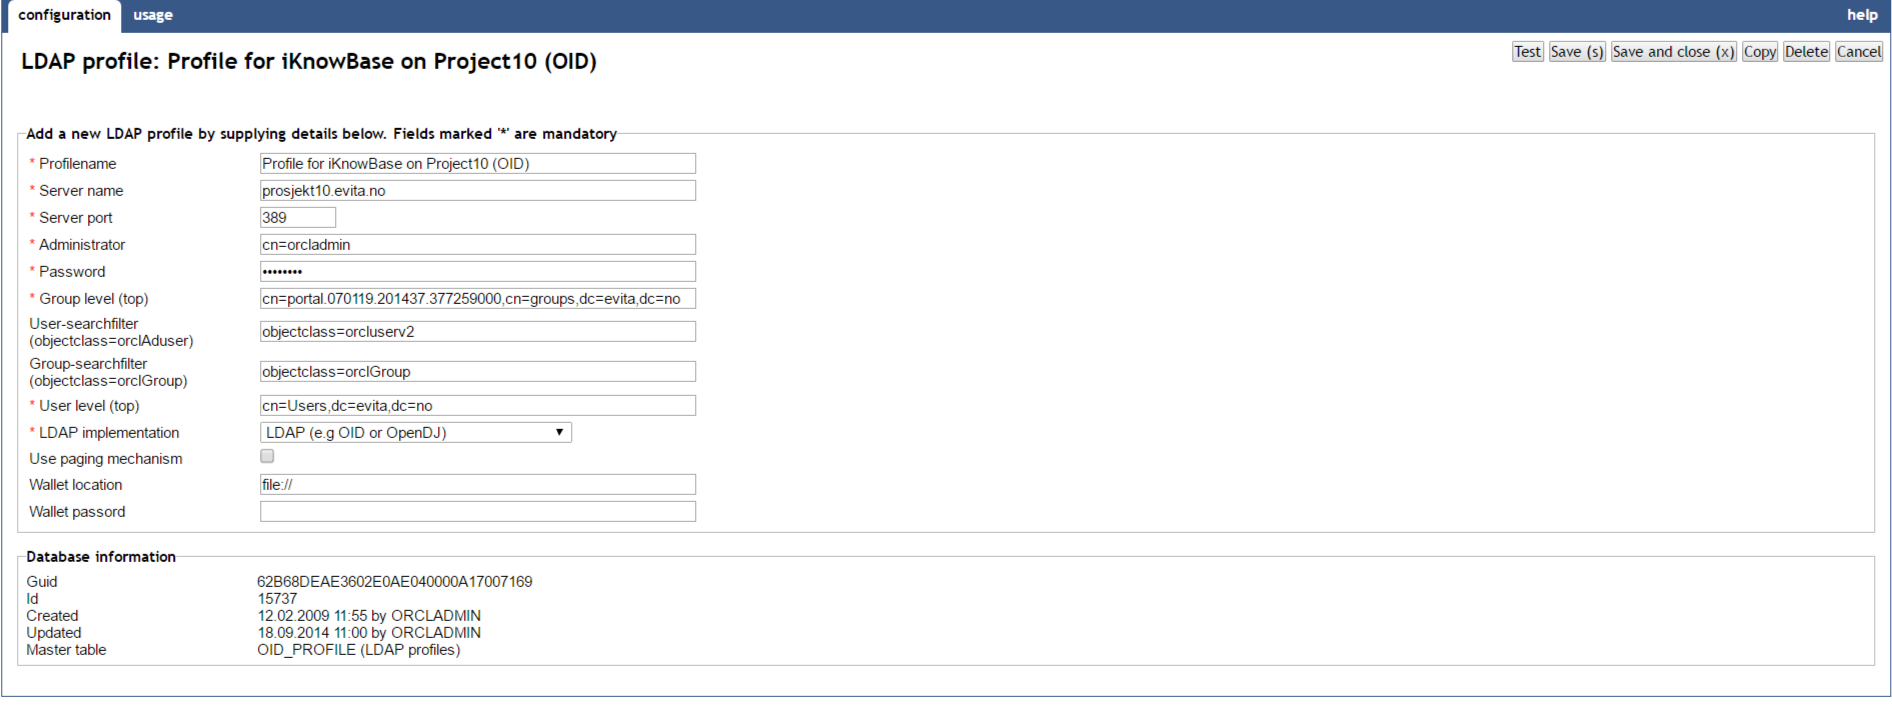
| Property | Description |
|---|---|
Profilename |
Type the name of the profile. |
Server name |
Type the name or the IP of the remote directory from which the user information will be synchronized. |
Server port |
Type the port number the remote directory is listening on. The default LDAP port is 389. |
Administrator |
Specify the super-user of the remote directory. In Oracle Internet Directory this is cn=orcladmin but there might be other users as well. This user will need extended privileges. It must be given privileges to read the change log of the remote directory, and the privileges to create new objects (groups) in the remote directory, since this is a choice in the configuration. |
Password |
Type the password of the administrator. |
Group level (top) |
Specify the top level of the remote directory. A typical top level would be |
User-searchfilter |
Specify a filter to use when searching for users to synchronize. There might be cases where not all objects placed under the LDAP user top level should be used. This can be accomplished by providing a filter here. By default the filter is |
Group-searchfilter |
Specify a filter to use when searching for groups to synchronize. There might be cases where not all objects placed under the LDAP user top level should be used. This can be accomplished by providing a filter here. By default the filter is |
User level (top) |
Specify the top level of the remote directory where the objects to be synchronized are placed. These objects are referred to as users, but they might be other type of LDAP objects as well. |
ldap implementation |
Select between LDAP/AD (Microsoft Active directory) or LDAP (e.g. OID or OpenDJ). |
Use paging mechanism |
Can be used when the number of users are high. When bootstrapping, the number of users returned can be limited to e.g. 20000 (in LDAP). If the result set exceeds this limitations, it fails. You can then use this flag to let the bootstrap function fetch sets of users instead. Note : using this flag might have an impact on the performance. |
Wallet location |
Enter the location of the wallet file |
Wallet password |
Enter the password to the wallet file |
17. LDAP Sync
Many organizations have established a central repository (a directory service) for user and group information, making it possible to edit that information independently from all the different systems that need it. However, iKnowBase needs a local copy of that information in order to support security and context operations.
Use the LDAP Sync profile to set up a replication link, which enables information to automatically flow into iKnowBase when it is changed in the source user directory.
iKnowBase comes with a PL/SQL procedure, oid_sync.synchronize_users, which you can run to perform the synchronization based on the configured LDAP Synchronizing profiles. Typically you will create a Schedule which executes the synchronization job at given times and at given intervals. Every time the synchronization job runs, it will read the LDAP change log to understand what kind of changes have happened in the source user directory. The change log will contain entries indicating that users, groups or group memberships have changed. The synchronization job will copy these changes into the corresponding iKnowBase objects as specified in the LDAP Synchronizing profiles.
See the Development Guide for further information.
17.1. Properties
This section describes the properties of an LDAP Sync profile, as shown on the corresponding Edit pane tabs.
17.1.1. Configuration Tab
The configuration tab contains general information on the LDAP Sync profile.
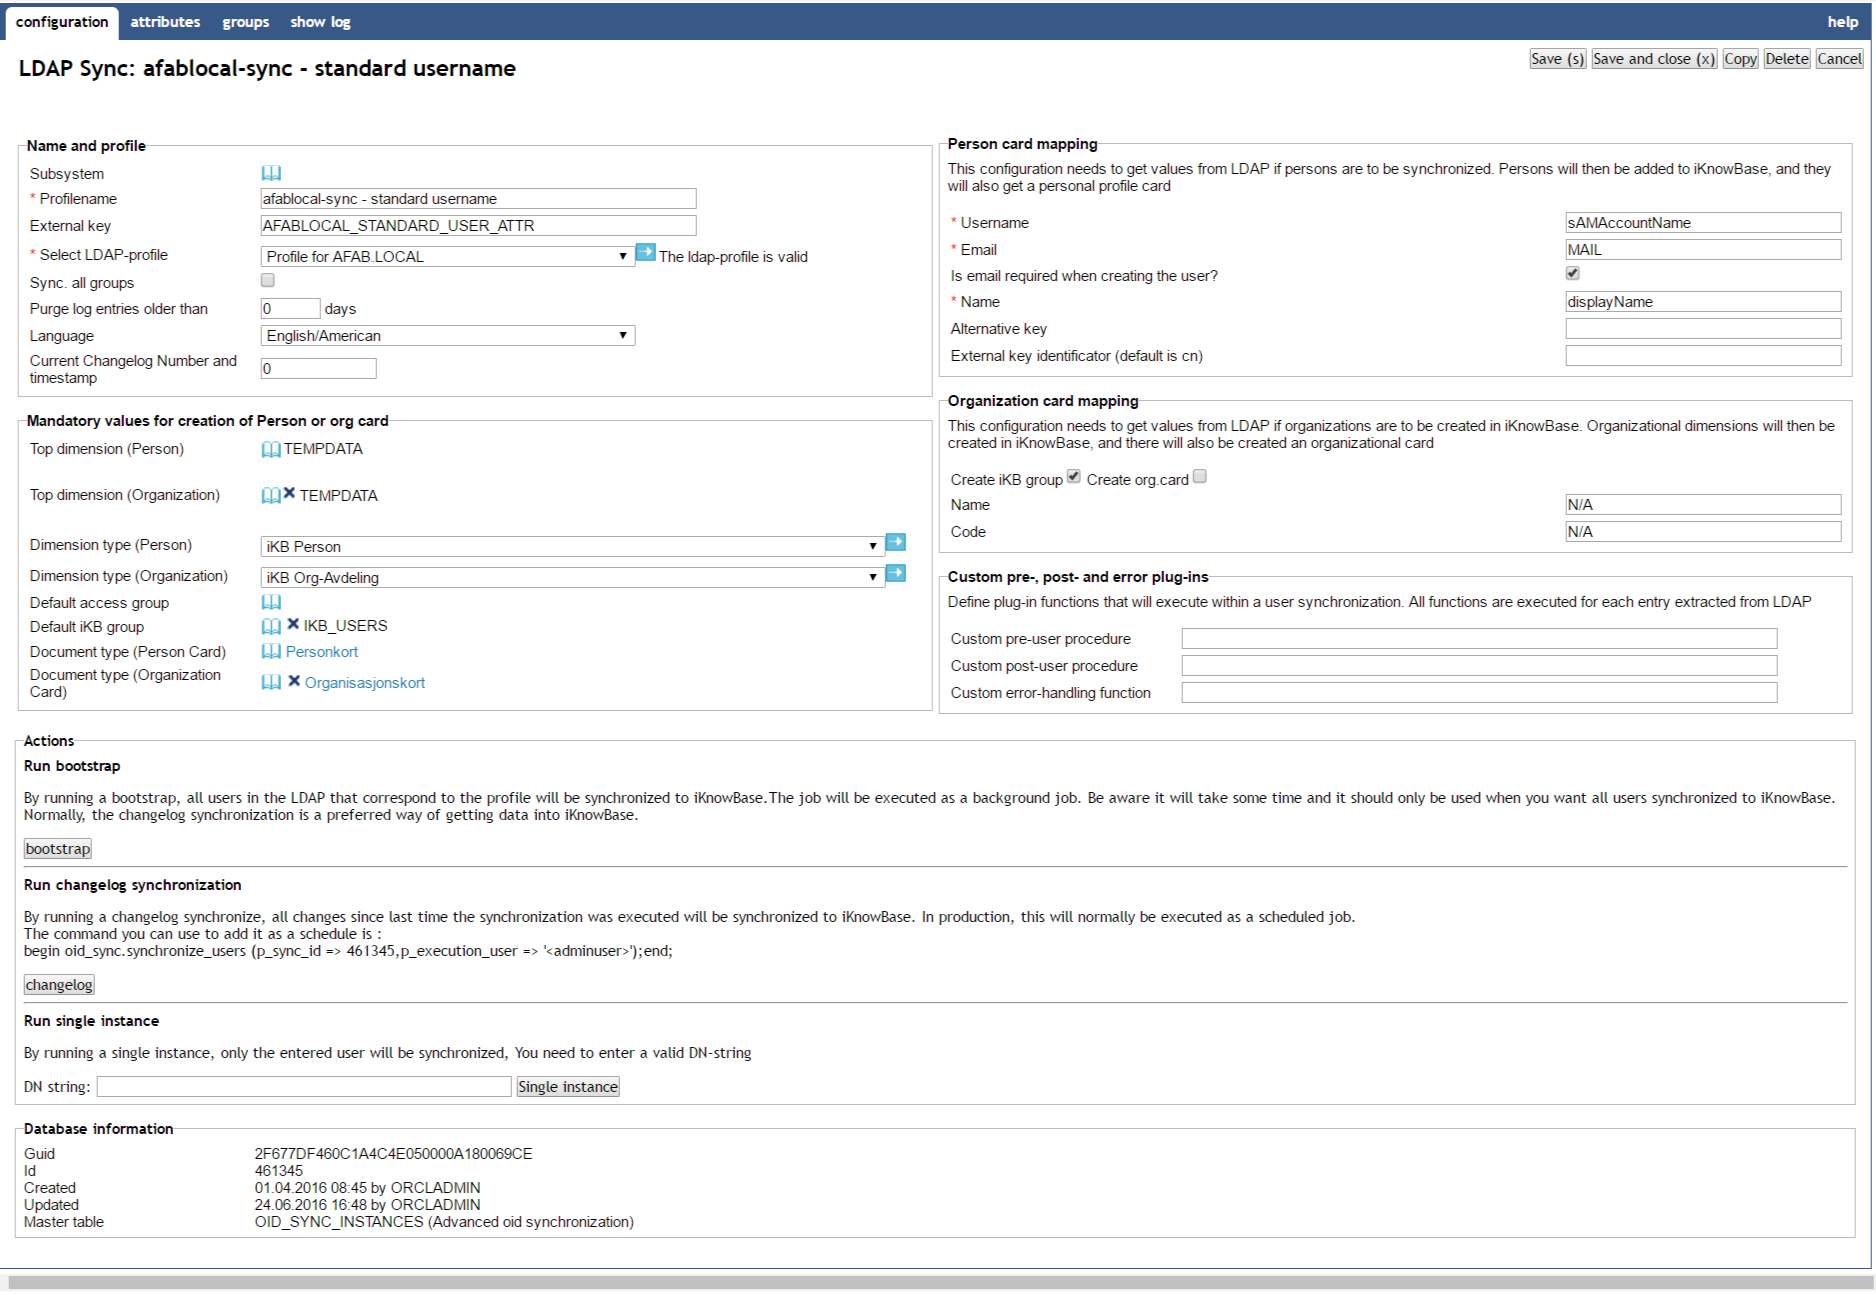
| Property | Description |
|---|---|
Subsystem |
Select the subsystem the profile belongs to. |
Profile name |
Type the name of the profile. |
External key |
Type the external key of the profile. This can be used as the id when you start the synchronization. |
LDAP-profile |
Select the LDAP-profile which manages access to the LDAP-server to use. To the right, the connection status will be shown. It the profile is a valid one, the message "The ldap-profile is valid". |
Sync. all groups |
Select this check box to map synchronize all groups automatically. |
Purge log entries older than xx days |
Enter the number of days you want to keep log entries for. Use 0 if you not want an automatic purge of old log entries. |
Language |
Specify the language that will be set on the user when its created. |
Current Changelog Number and timestamp |
This is the last known change number from the LDAP server. All updates will start after this change number. The LDAP sync engine will automatically update this number after each run, to avoid having to redo many updates. It will also update the last successful run time. If required, you can type a change number yourself, to redo changes or to skip corrupt entries. |
Top dimension (Person) |
Select the top dimension for user dimensions. Dimensions with an external key are available in the drop down box. By default, the objects that are retrieved from the remote directory are organized in a dimension structure in iKnowBase. Dimensions representing the synchronized user objects will be placed under this top dimension. |
Top dimension (Organization) |
Select the top dimension for organization dimensions. Dimensions with an external key are available in the drop down box. You can configure the user synchronization to create organization information based on information in user objects. Dimensions for the synchronized organization information will be placed under this top dimension. |
Dimension Type (Person) |
Click the appropriate dimension type. In iKnowBase, a dimension can be associated with a dimension type. This type segments the dimensions in iKnowBase. Dimensions representing users will be associated with the dimension type given in this field. |
Dimension Type (Organization) |
Click the appropriate dimension type. In iKnowBase, a dimension can be associated with a dimension type. This type segments the dimensions in iKnowBase. Dimensions representing organizations will be associated with the dimension type given in this field. |
Default access group |
Select the access control list to be used for the person and organization cards that are created when synchronizing user objects. |
Default ikb group |
Select the group to be used as the default group for synchronized users. When a user is created in iKnowBase, it is provided with a default group. The value of this property is the name of the default group. |
Document type (Person Card) |
Select the document type to be used for person cards. When a user is synchronized, iKnowBase creates a person card for this user that has some standard attributes. This person card is a placeholder for the attributes and dimensions that a developer chooses to transfer from the external user directory to iKnowBase. The value of this property is the document type that will be used for these is the external key of this document type. |
Document type (Organization Card) |
Click the appropriate document type. You can create an organization card that is a placeholder for the information that the developer chooses to synchronize from the remote user directory as organizational information. This field provides an external key that represents an document type given to this document. |
Person card mapping |
To create a user profile, some information has to be extracted from LDAP in order to create a valid account. The user account will then be added to iKnowBase, and they will also get a personal profile card. The mandatory attributes are:
|
Organization card mapping |
|
Custom pre- and post and error procedures |
Its possible to create plug-ins that will execute during a user syncronization. There are three different types:
PROCEDURE <package>.<procedure name> (
  sync_id in number,
  ldap_entry in varchar2,
  session_id in DBMS_LDAP.session,
  changetype in varchar2,
  entrytype  in varchar2,
  cn         in varchar2,
  do_continue out number,
  do_create_card out number
);
PROCEDURE <package>.<procedure name> (
  sync_id in number,
  ldap_entry in varchar2,
  session_id in DBMS_LDAP.session,
  userId in number,
  PersonCardId  in number,
  OrgCardDocId         in number,
  changetype in varchar2,
);
FUNCTION <package>.<function name> ( sync_id in number, person_record in ot_ldap_person_rec, session_id in DBMS_LDAP.session, sqlerrm in varchar2, sqlcode in number ) return number; |
Run bootstrap |
By running a bootstrap, all users in the LDAP that correspond to the profile will be synchronized to iKnowBase.The job will be runned as a background job. Be aware it will take some time and it should only be used when you want all users synchronized to iKnowBase. Normally, the changelog synchronization is a preferred way of getting data into iKnowBase. This function is only available if the LDAP profile is valid. |
Run changelog synchronization |
By running a changelog synchronize, all changes since last time the synchronization was runned will be synchronized to iKnowBase. In production, this will normally be runned as a scheduled job. The command you can use to add it as a schedule is : begin oid_sync.synchronize_users (p_sync_id ⇒ 'id',p_execution_user ⇒ 'adminuser');end;. This function is only available if the LDAP profile is valid. |
Run single instance |
By running a single instance, only the entered user will be synchronized, You need to enter a valid DN-string. This function is only available if the LDAP profile is valid. |
17.1.2. Attributes Tab
The attributes tab contains information about the user and group attribute mappings from the LDAP directory to iKnowBase.
Figure 13: LDAP Sync Edit pane - attributes
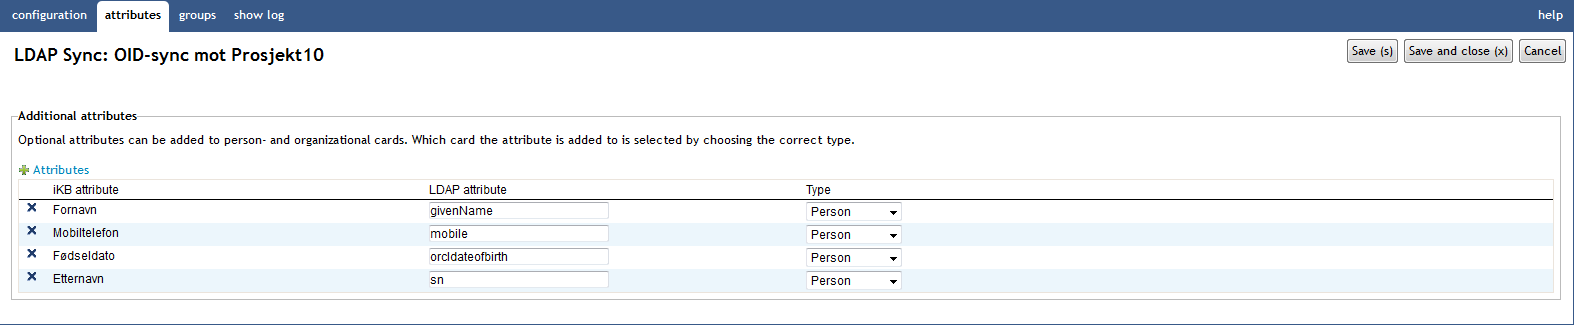
| Property | Description |
|---|---|
IKB attribute |
Select the iKnowBase attribute for the target information object. The select list will only be populated by iKnowBase attributes tagged with an external key. The iKnowBase attribute selected will be the attribute that the LDAP value is synchronized to. |
LDAP attribute |
Type the name of the LDAP attribute of the LDAP object (user or group) to be synchronized from the LDAP to iKnowBase. |
Type |
Select the appropriate object type of this entry. Select Person if the attribute should be synchronized to the person card. Select Organization if the attribute should be synchronized to the organization card. |
17.1.3. Groups Tab
The groups tab contains information on the mapping between groups in the LDAP server and in iKnowBase.
If the property "Sync all groups" is set, this tab is a pure information tab, displaying the information on the actual mapping.
Otherwise, if the property "sync all groups" is not set, this page lets you specify which groups you want to synchronize, and which iKnowBase-group you want to map to. Note: that when you use manual mapping, you need to create the iKnowBase groups before you can map to them.

| Property | Description |
|---|---|
LDAP group |
Select the LDAP group to be synchronized from the LDAP to iKnowBase. Existing groups in the LDAP specified by the Select LDAP-profile property on the Configuration tab are available in the dropdown boxes. |
IKB group |
Select the iKnowBase group which the given LDAP group will be synchronized to. |
17.1.4. Show log
The tab contains a detailed log generated for each run of the synchronization.
When the synchronization is runned it will log info available here. You can choose between a detailed log or a overview of operation runned during synchronization.
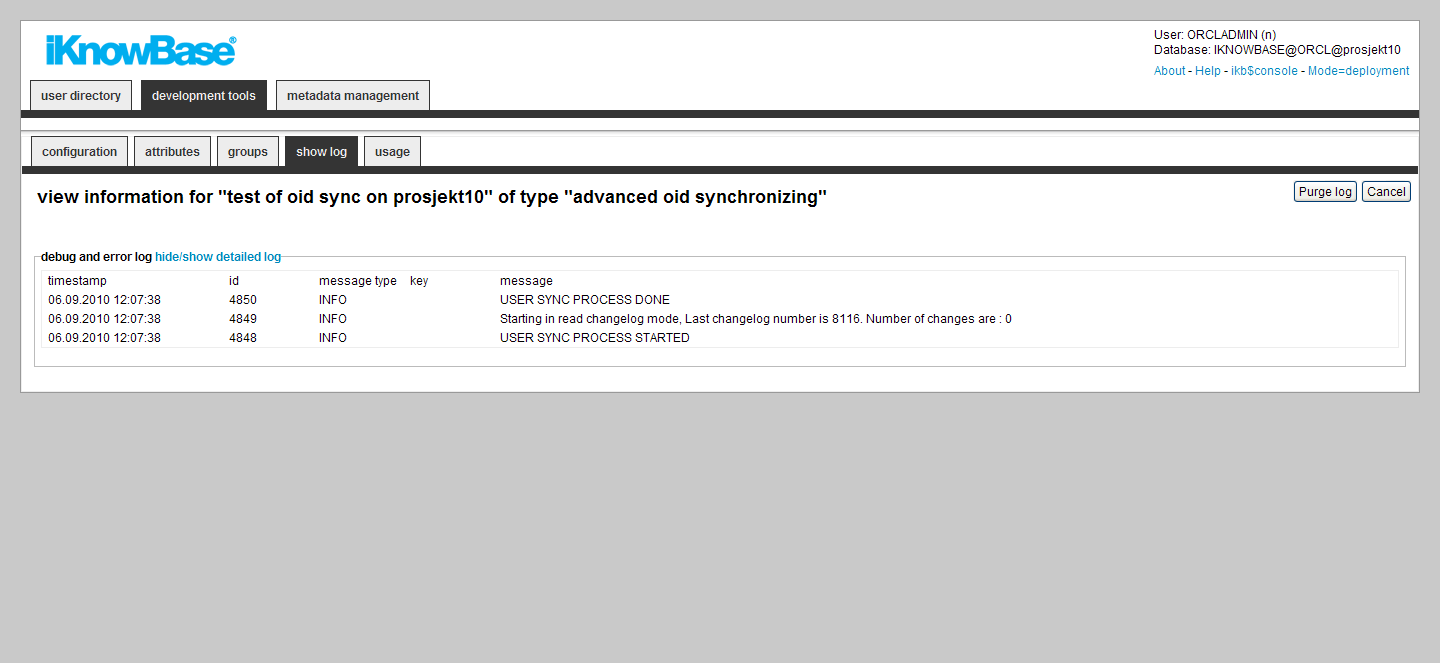
| Property | Description |
|---|---|
Timestamp |
Displays when the log info was created. |
ID |
Displays the id in the log table. |
Message type |
Displays the severity of the message. INFO, DEBUG and ERROR are the valid values. |
Key |
Displays normally the key (DN) handled in the operation. |
Message |
Displays a status/error message for each line. |
Trace info |
Displays trace info (only available when running i debug mode). |
18. Menus
The menu component enables you to create menu structures which may be presented in various formats. You can create a new menu component, and then build its structure by creating submenus and menu items. You can link menu items to a portal page, URL, iKnowBase page, form, task wizard, or quick link. You can apply various menu styles, such as rollover effects, to menus, and insert images or icons to identify menu items.
In iKnowBase, you can create a menu either manually or by importing a menu structure from an existing dimension tree.
Use the menu portlets to make menus available to users.
18.1. Properties
This section describes the properties of a menu, as shown on the corresponding Edit pane tabs.
18.1.1. Edit tab
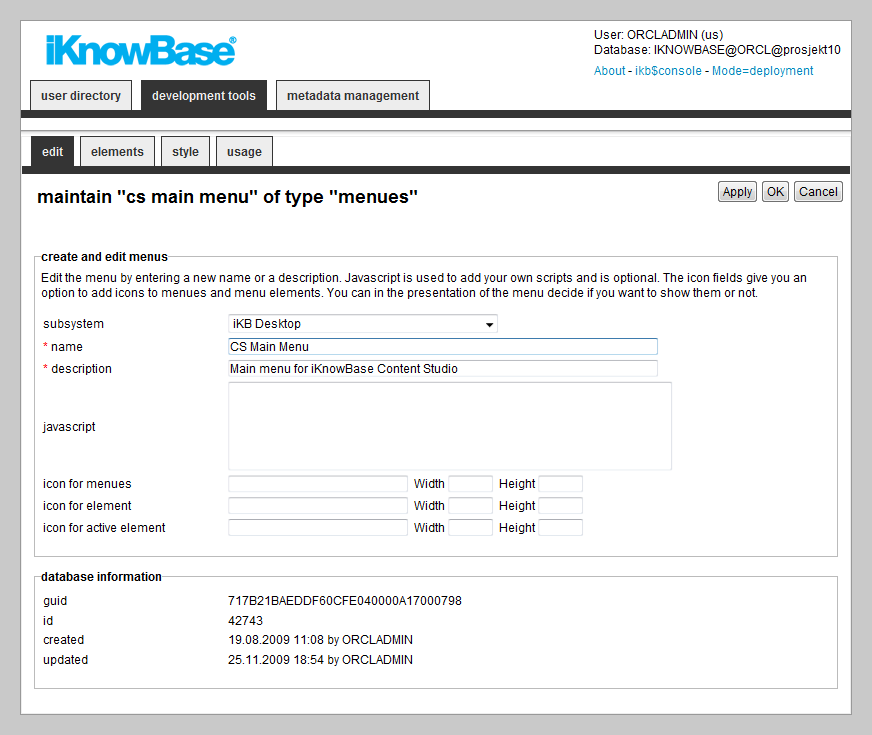
| Property | Description |
|---|---|
Subsystem |
Select the appropriate subsystem. |
Name |
Type a name for this menu. |
Description |
Type a description for this menu. |
JavaScript |
Type JavaScript code which may be used from the portlet rendering the menu. The standard iKnowBase menu portlets don’t require any JavaScript code. This may be relevant if you write your own menu portlet. |
Icon for menus |
Some of the presentation forms of menus support the use of icons. These are used slightly different depending on the form of presentation. Type the reference to the icon, together with its width and height, to be used for menus. The file must be reachable from the application server. |
Icon for element |
Some of the presentation forms of menus support the use of icons. These are used slightly different depending on the form of presentation. Type the reference to the icon, together with its width and height, to be used for menu items. The file must be reachable from the application server. |
Icon for active element |
Some of the presentation forms of menus support the use of icons. These are used slightly different depending on the form of presentation. Type the reference to the icon, together with its width and height, to be used for the active menu item. The file must be reachable from the application server. |
18.1.2. Elements tab
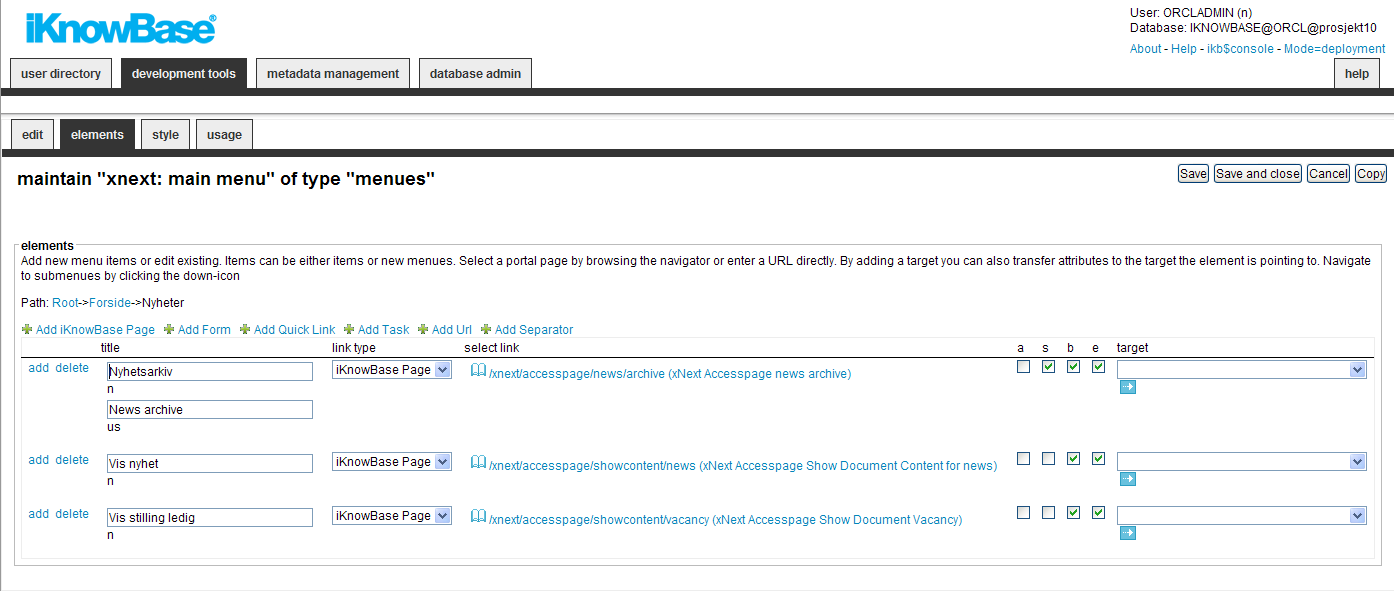
You can choose between six types of menu elements:
-
iKnowBase page: Select this link type to link the element with an iKnowBase page.
-
URL: Select this link type to link the element with a URL.
-
iKnowBase Form: Select this link type to link the element with form.
-
Quick link: Select this link type to link the element with a quick link.
-
Task wizard: Select this link type to link the element with a task wizard.
-
Separator: Used when you want to create a blank line
To change the menu item order, simply drag and drow the element where you want it.
| Property | Description |
|---|---|
Down |
If subitems exists, the link will navigate to the next level. |
Add |
If subitems don’t exist, the link will navigate to the next level where you can add subitems. |
Delete |
Will delete (when Save or Save and Close is pressed) menu items or submenues. |
Title |
Type the name of the menu, or the item that appears in the menu. If multiple languages are supported in the solution, each language displays in a separate input field. The language code is displayed behind the input field. |
Link type |
Select the type of link that is connected to the menu item.
|
Select Link |
Select the proper link destination. |
A (all) |
For protected destinations, enabling this option will show the menu element regardless of login status. With this option deselected, protected destinations will only be shown to logged in users with the proper permission. When users who are not logged on are given access to protected pages, they will normally be asked to log on. |
S (Sitemap) |
Check this option to allow the menu item to appear in a sitemap. |
B (Breadcrumb) |
Check this option to allow the menu item to appear in a breadcrumb. |
E (Enabled) |
Check this option to enable the menu item. |
Target |
Select target to be used. URL parameters may be used together with targets. If both Select link and Target are defined, the former will be passed as a parameter to the latter. |
18.1.3. Style tab
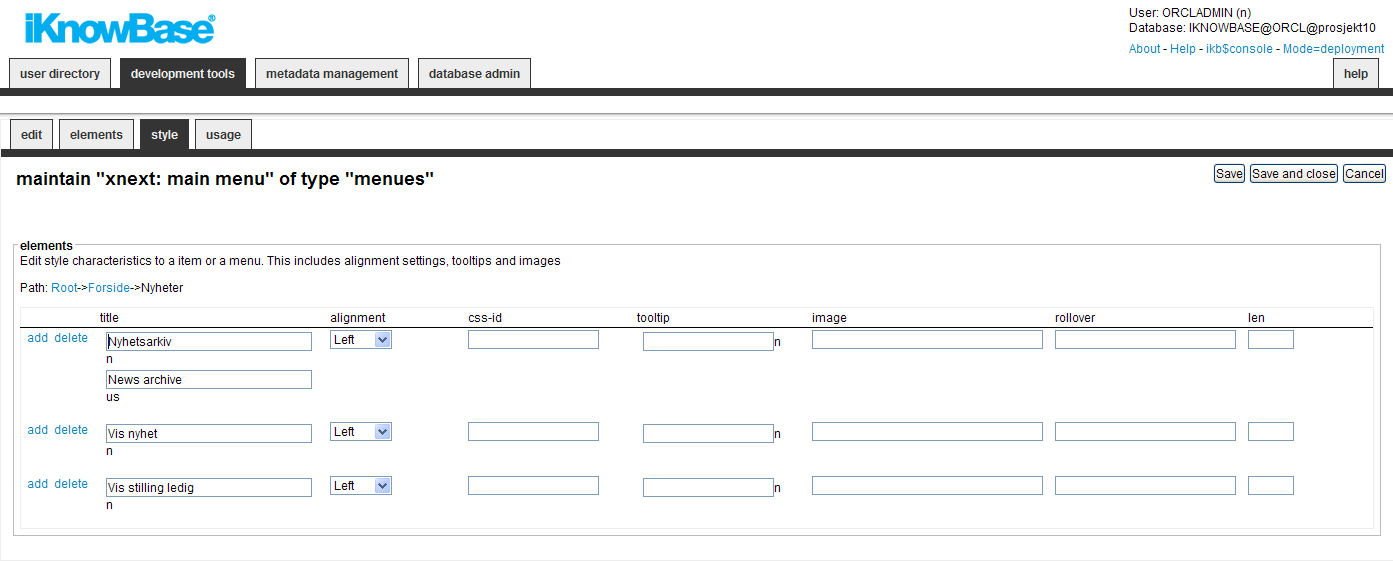
| Property | Description |
|---|---|
Title |
Type the name of the menu, or the item that appears in the menu. If multiple languages are supported in the solution, each language displays in a separate input field. The language code is displayed behind the input field. |
Alignment |
Select the appropriate alignment for the text. |
CSS-ID |
Type the ID of the CSS class that is associated with the elements in the HTML code. This CSS class can be used for styling of the menu element. |
Tooltip |
Type a tooltip for the menu item. If multiple languages are supported in the solution, each language displays in a separate input field. The language code is displayed behind the field. |
Image |
Type the file path of the image that you want to display as the element. The file path is the application server path of the image file that is displayed. |
Rollover |
For menus that support rollover effects, type the reference to the icon that is displayed. The file must be referenced so that it can be accessed from the application server. |
Len |
Type the length of the image. This property is used for some presentation forms. |
18.2. Creating a Menu Based on a Dimension Tree
If you choose to create a menu based on an existing dimension tree (Menu with import from iKnowBase), you will need to choose the starting dimension and number of levels to include. When you click Apply the menu will be created with menu elements corresponding to your specification.
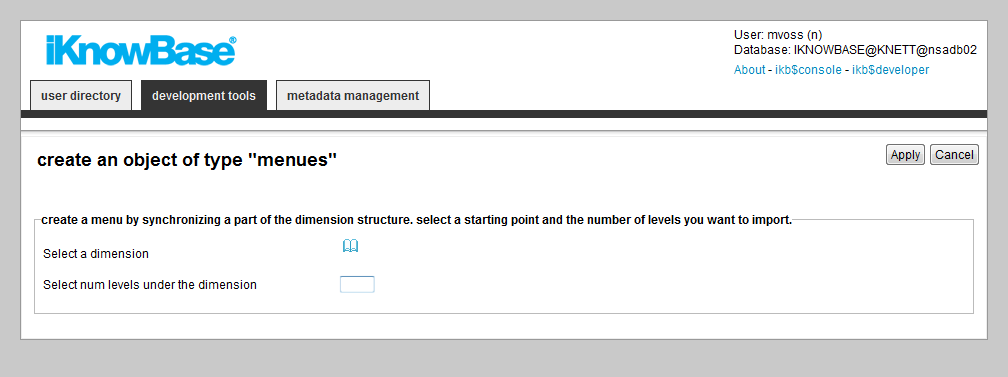
| Property | Description |
|---|---|
Select a dimension |
Select a start node in the dimension tree. Node below this point will be imported into the menu structure |
Select num level under the dimension |
The import will travese down to this level |
18.3. Re-synchronize a menu based on a dimension tree
When you create a menu based on a subset of the dimension tree, iKnowBase will copy the dimension information into the menu structure. If the dimension tree changes, the menu will not change automatically.
Use the Synchronize menu link to re-synchronize a menu based on a dimension tree. When you select this command, iKnowBase will display the same input form as when creating the menu for the first time. Input the correct value, click apply, and iKnowBase will update the menu structure with updated dimension information.
19. Mimetypes and formats
An Internet media type, originally called a MIME type after MIME (Multipurpose Internet Mail Extensions) and sometimes a Content-type after the name of a header in several protocols whose value is such a type, is a two-part identifier for file formats on the Internet. A media type is composed of at least two parts: a type, a subtype, and one or more optional parameters. For example, subtypes of text type have an optional charset parameter that can be included to indicate the character encoding, and subtypes of multipart type often define a boundary between parts. In iKnowBase they are used to describe a page.
Format in iKnowBase is a suffix to the name of a computer file applied to indicate the encoding convention (file format) of its contents. In iKnowBase they describe how to store and index the content of the file.
19.1. Properties
This section describes the properties of a Mimetype, as shown on the corresponding Edit pane tabs.
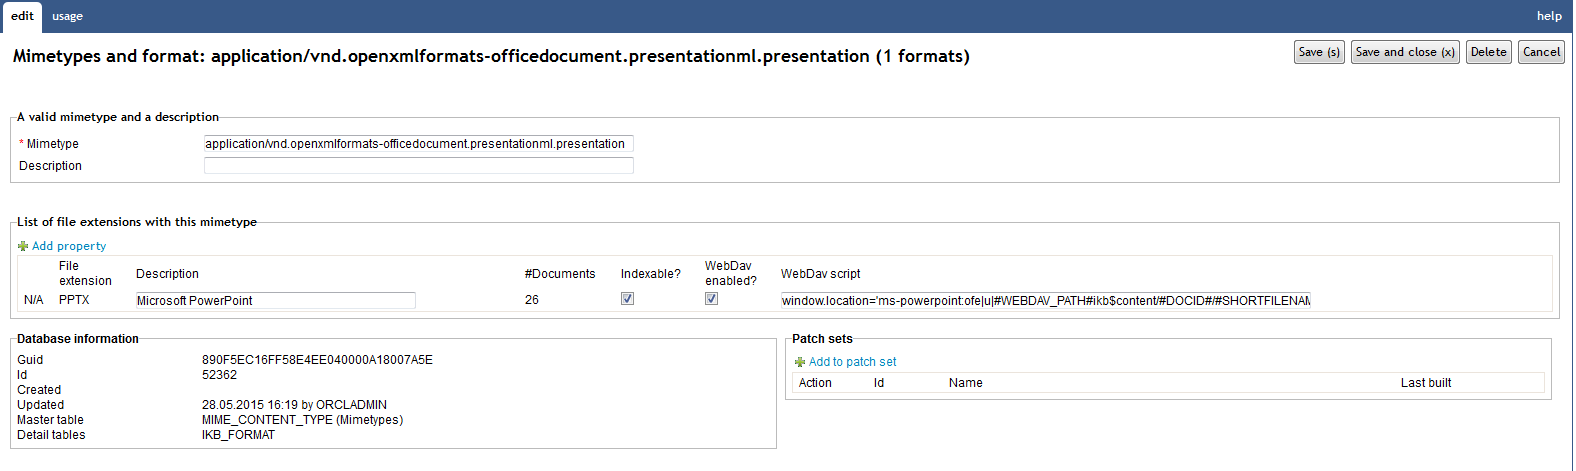
| Property | Description |
|---|---|
Mimetype |
A media type is composed of at least two parts: a type, a subtype, and one or more optional parameters. For example, subtypes of text type have an optional charset parameter that can be included to indicate the character encoding, and subtypes of multipart type often define a boundary between parts. |
Description |
A short description of the mimetype should be placed here. |
Delete icon |
Will only be available if any documents with this extension is store in iKnowBase. |
File extension |
Specify the extension of the file (e.g. GIF). |
Description |
A short description of the format. |
#documents |
Shows the number of documents with this format. |
Indexable? |
If SOLR is in use, "indexable?" decides if the file should be indexed in SOLR. |
WebDAV enabled? |
Defines if WebDAV integration is available for this format. iKnowBase supports WebDAV editing for Microsoft documents. |
WebDAV Script |
Call interface to webDav for this format. A sample is generated for you if you save after checking the WebDav enabled option. The sample script includes registered URI scheme for the application (e.g. "ms-word"). Adjust generated sample with the URI scheme for the application you want to launch (e.g. "ms-excel", "ms-powerpoint", …). |
20. Newsletter
Newsletter enables you to send content to specific subscribers at periodic intervals by e-mail. You can specify various formats for each newsletter, and schedule it for publication to the subscribers of the newsletter.
The newsletter component can use one of the following method to extract the content:
-
A page driven newsletter will run a page and email the content for that page. When running page based newsletters, please note that iKnowBase Batch Server (ikbBatch) has to be running in addition to the page engine server.
-
A search source driven newsletter will use a search source to extract the content. This is the old-fashion way with less flexibility than the page option.
You can also administer the subscribers of the newsletter in this component, but for end users you will need the newsletter portlet to allow subscribe and unsubscribe to the newsletter.
20.1. Newsletter Properties
This section describes the properties of a newsletter, as shown on the corresponding Edit pane tabs.
20.1.1. Edit Tab (Page driven variant)
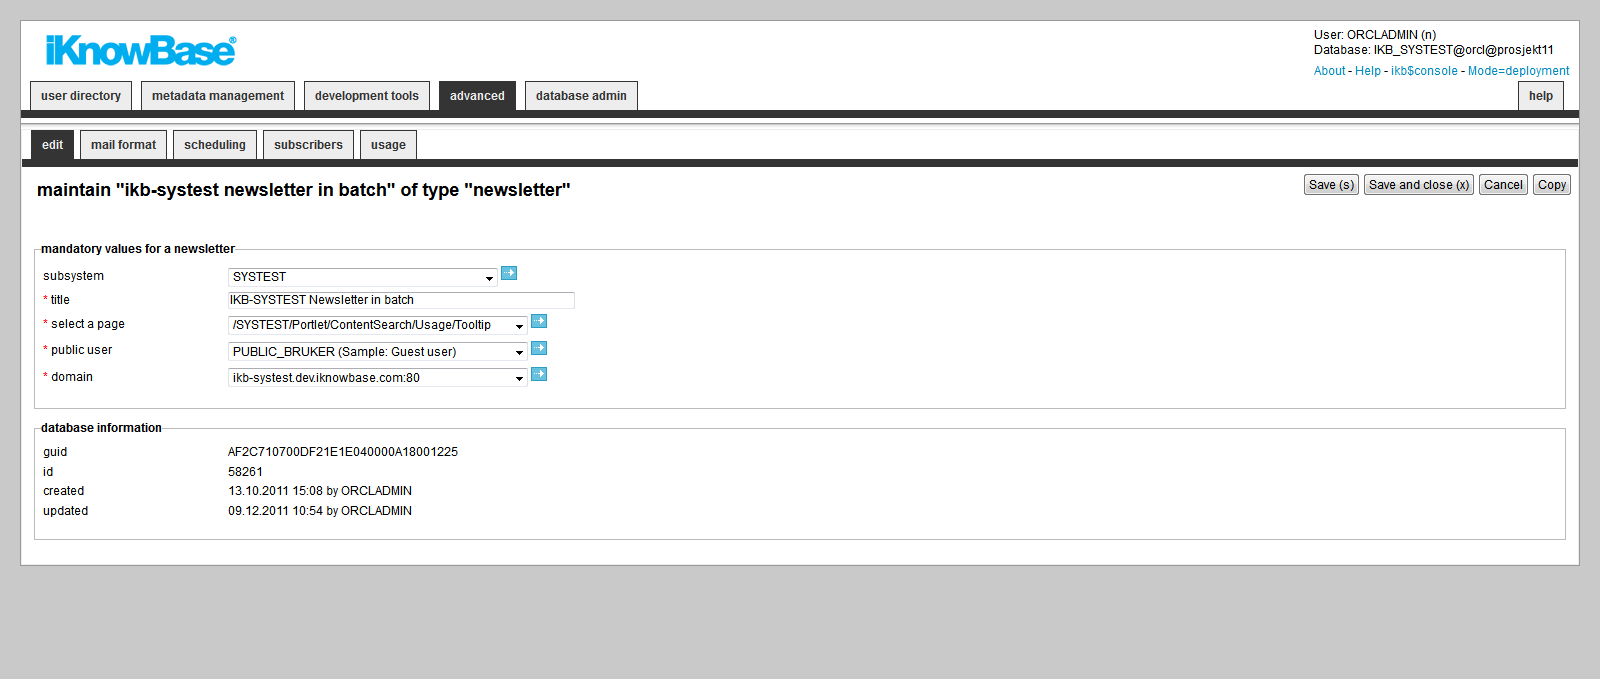
| Property | Description |
|---|---|
Subsystem |
Select the appropriate subsystem. |
Title |
Type a title for this newsletter. |
Select a page |
Select the page you want to use as a newsletter. When creating this page you should be include your css and scripts with full path. |
Public user |
Select the user whose permissions will apply when extracting content for the newsletter. The user must be marked as a "public user" in the user directory. |
Domain |
Select the domain definition used when sending the newsletter. Necessary to build the correct links in the newsletter. |
20.1.2. Edit Tab (Search Source variant)
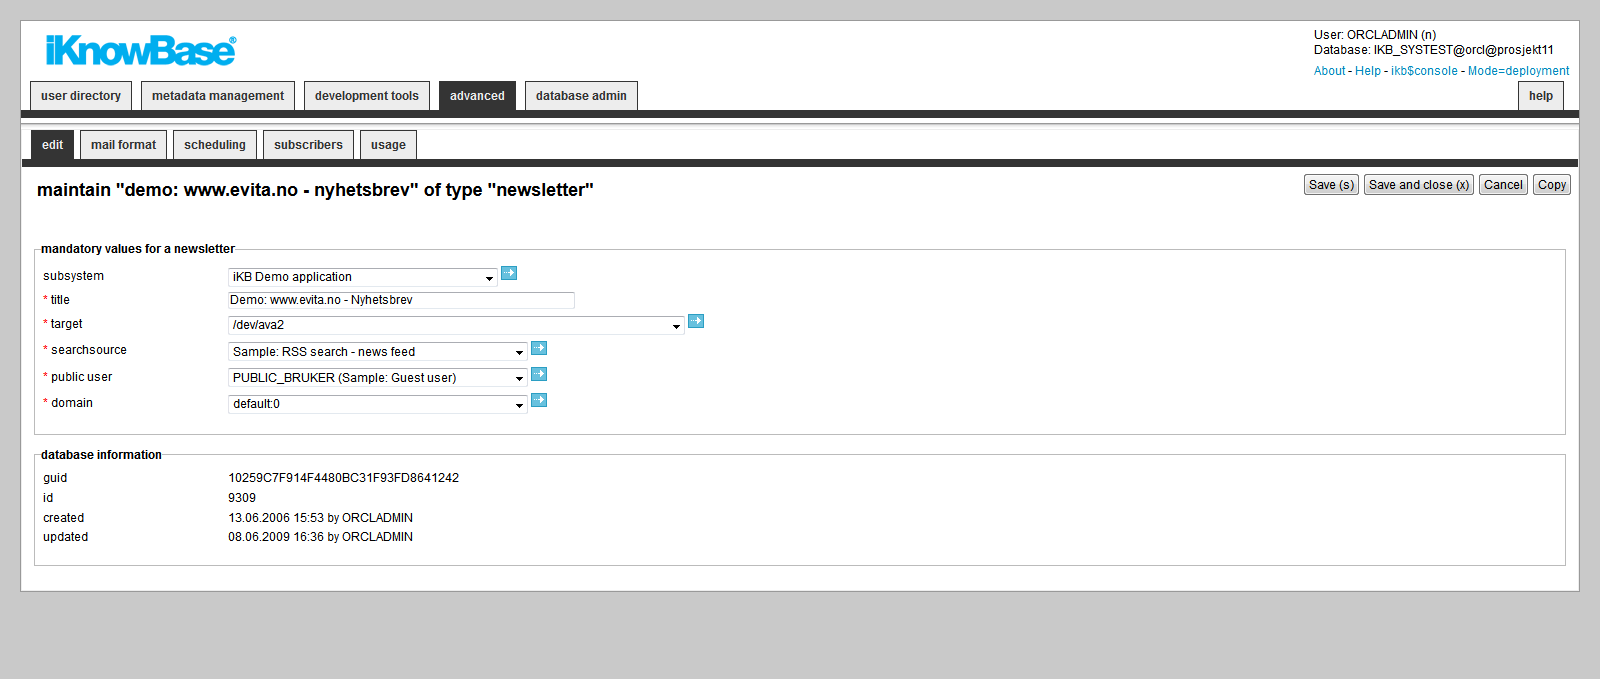
| Properties | Description | ||
|---|---|---|---|
Subsystem |
Select the appropriate subsystem. |
||
Title |
Type a title for this newsletter. |
||
Target |
Select the target where you want to present the content of the newsletter. This property will be used when a user clicks on a document link in the newsletter. |
||
Search source |
Select the search source that represents the content (documents) you want included in the newsletter.
|
||
Public user |
Select the user whose permissions will apply when extracting content for the newsletter. The user must be marked as a "public user" in the user directory. |
||
Domain |
Select the domain definition used when sending the newsletter. Necessary to build the correct links in the newsletter. |
||
Guid |
Displays a globally unique identifier number for this component. This property appears after you save a component. You cannot update the information of this property. |
||
Id |
Displays a unique identifier number for this component. This property appears after you save a component. You cannot update the information of this property. |
||
Created |
Displays when the component was created and by whom it was created. |
||
Updated |
Displays when the component was last updated and by whom it was updated. |
20.1.3. Mail Format Tab (Page driven variant)
You need to specify sender, subject and profile.
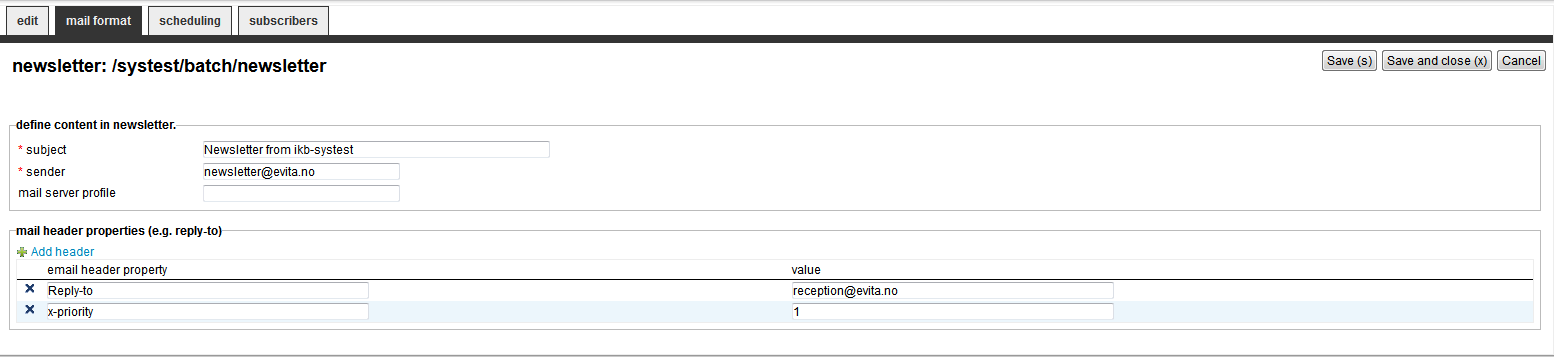
| Property | Description |
|---|---|
Subject |
Type a subject for this newsletter e-mail. |
Sender |
Type the e-mail address of the sender of the e-mail. This address can contain aliases. |
Mail server profile |
The profile field is only available when using the batch mail function instead of the database sendmail function. Profile points to ikb_installation_properties where you can define profiles to different mailservers. The value should be the second last name (PROFILE) from the installation property "com.iknowbase.emailsender.PROFILE.host" |
Mail header properties |
The list can contain valid email header properties added to the email, e.g. Reply-to, Return-Path and so on. Check Internet message Header |
20.1.4. Mail Format Tab (Search Source Variant)
You must specify the HTML code for the newsletter in the Mail format tab. Click the Generate HTML button to populate the HTML fields with default HTML code. This HTML code can be used as the starting point for the e-mail that is defined.
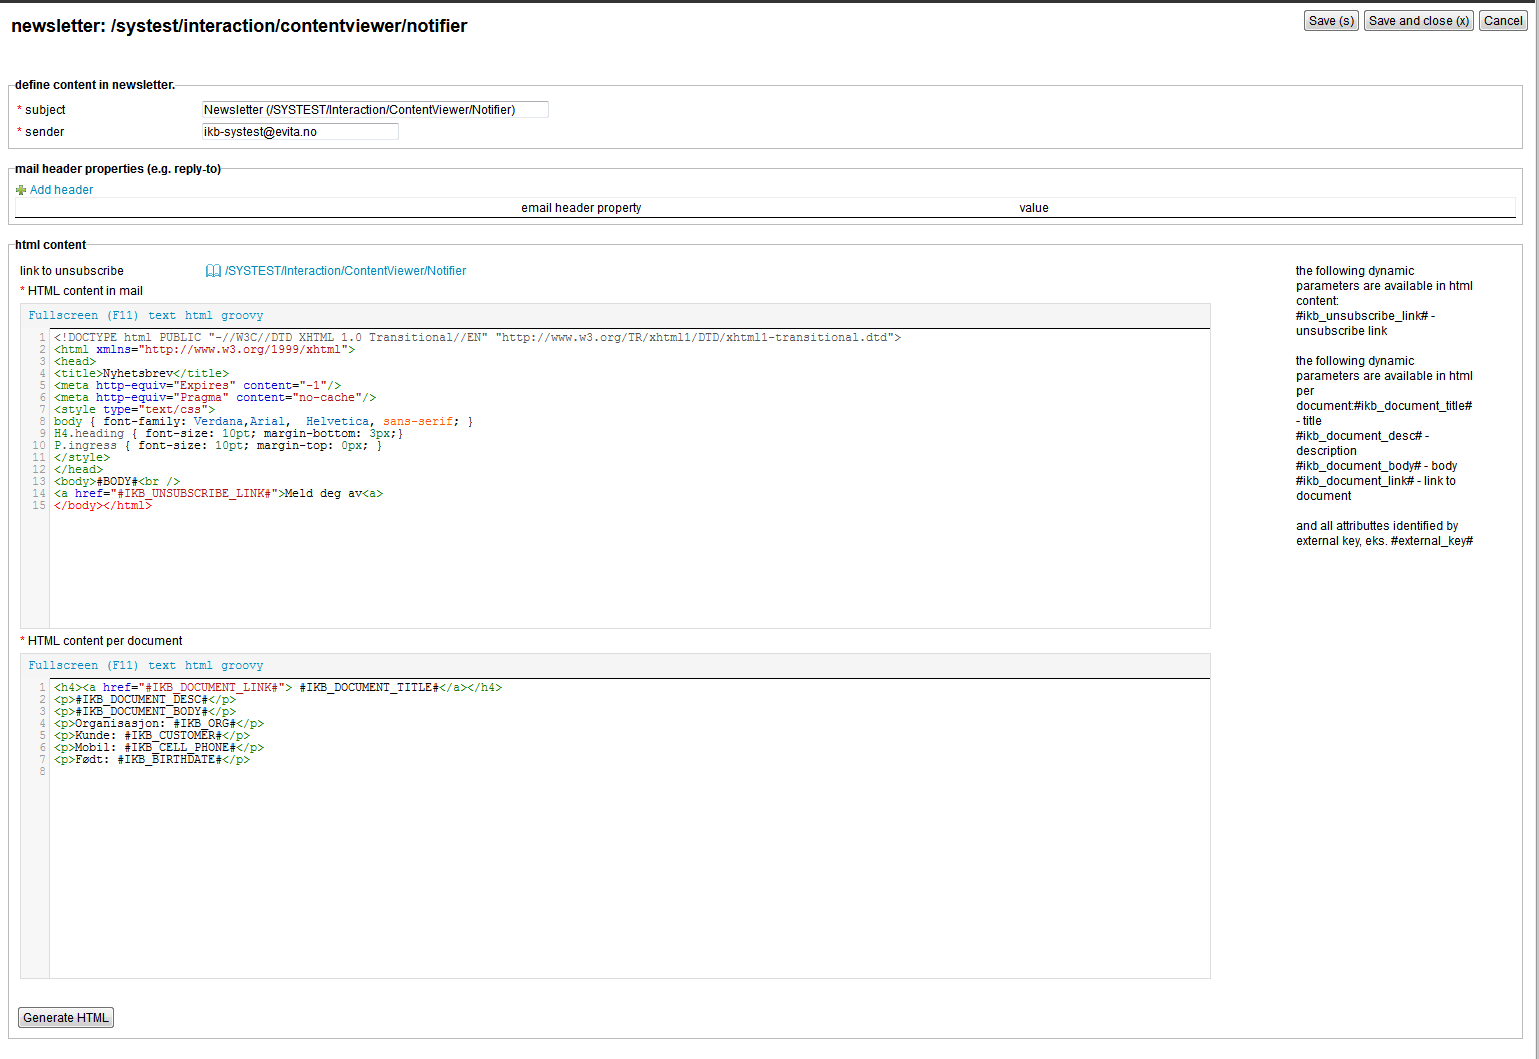
| Property | Description | ||
|---|---|---|---|
Subject |
Type a subject for this newsletter e-mail. |
||
Sender |
Type the e-mail address of the sender of the e-mail. This address can contain aliases. |
||
Profile |
The profile field is only available when using the batch mail function instead of the database sendmail function. Profile points to ikb_installation_properties where you can define profiles to different mailservers. The value should be the second last name (PROFILE) from the installation property "com.iknowbase.emailsender.PROFILE.host" |
||
Email header property/Value |
The list can contain valid email header properties added to the email, e.g. Reply-to, Return-Path and so on. Check Internet message Header |
||
Link to unsubscribe |
Select the appropriate target to be used to unsubscribe from the newsletter. The target must contain a newsletter portlet configured for unsubscribe. This target is used when the user clicks a link to unsubscribe from the newsletter. |
||
HTML content in mail |
Type the format of the e-mail that is sent. The format contains the HTML code for building the newsletter. The #BODY# tag must be included in the HTML code. This is where the content of the newsletter is inserted, as specified by the property HTML content per document. The format supports one dynamic parameter:
|
||
HTML content per document |
Type the format of the HTML code to present for each article in the newsletter. The content is inserted in the #BODY# tag in the HTML content in mail property. This field supports several dynamic parameters:
|
20.1.5. Scheduling Tab
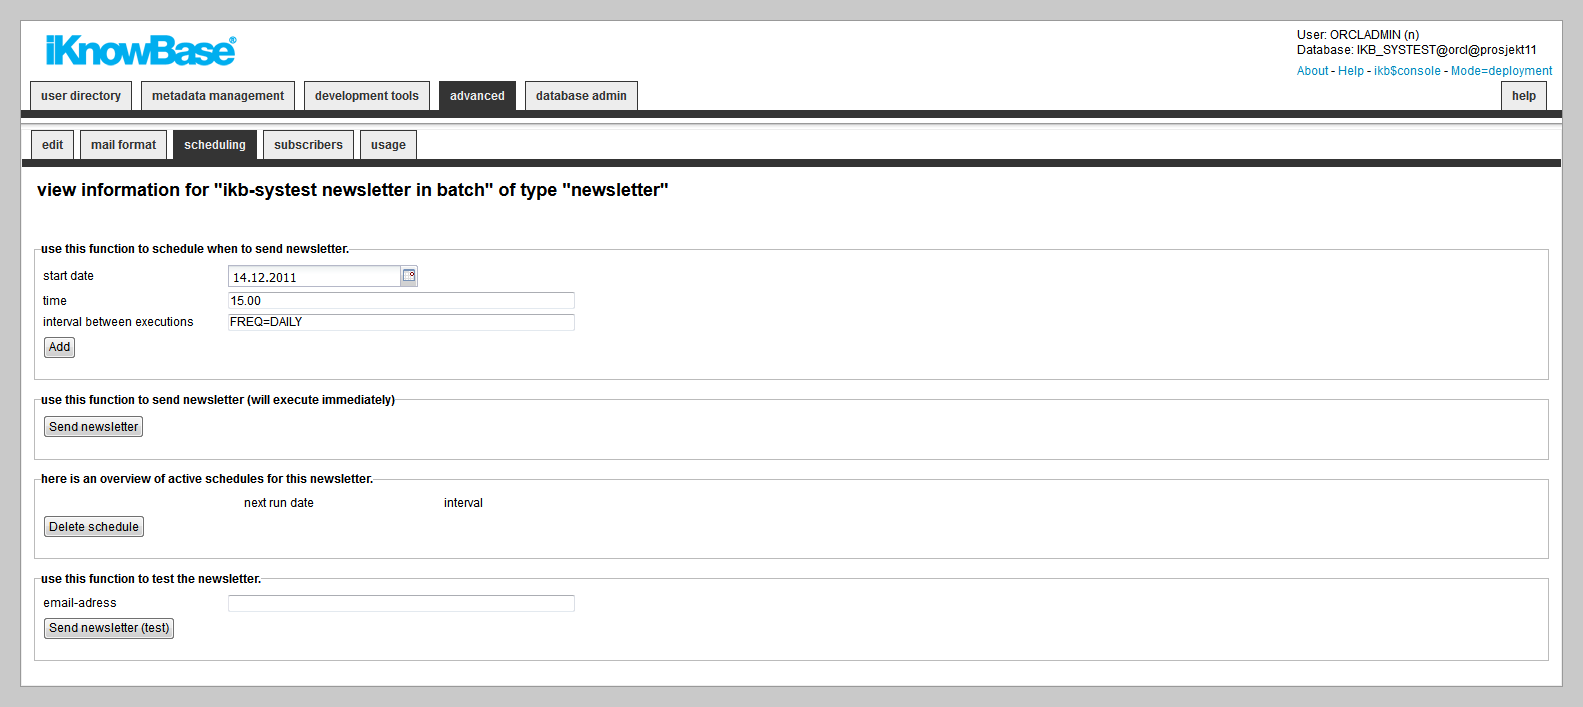
| Property | Description |
|---|---|
Start date |
Enter the start date for the newsletter schedule. |
Time |
Enter the time for running the newsletter routine. |
Interval |
Type the frequency of sending the newsletter, using the Oracle Database syntax.. Examples: FREQ=DAILY FREQ=WEEKLY Note:Click the Add button to add this schedule. |
Next run date |
Displays the next date and time when the newsletter will be sent. |
Interval |
Displays the interval between sending the newsletters. |
20.1.6. Subscriber Tab
You can add and remove subscribers for this newsletter here.
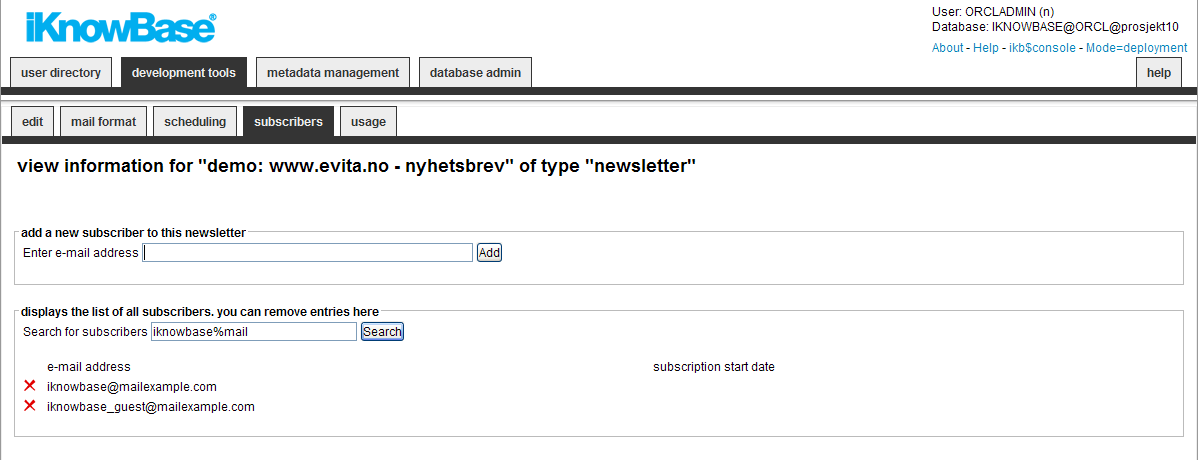
| Property | Description |
|---|---|
Add a new subscriber to this newsletter |
Enter the email address and press the Add button. Next time the newsletter is sent, this subscriber will also get the newsletter. |
Displays a list of all subscribers |
Use the search button to filter the search result. If you want to delete a subscriber, press the delete icon placed before the email you want to delete. |
20.2. Testing a Newsletter
On the Scheduling tab on the Edit pane of the newsletter there is a button Send newsletter (test). Specify an e-mail address to send the test newsletter to, and click on this button to send the newsletter to the specified address.
If there are no documents to send out in the newsletter, the recipient receives an e-mail with the text: No documents ready for mailing.
If there are documents to send out in the newsletter, the recipient receives an e-mail with the prefix TEST in the subject field. The newsletter is identical to the one that is sent out in a regular newsletter e-mail.
20.3. Sending a newsletter
On the Scheduling tab on the Edit pane of the newsletter there is a button Send newsletter. Click on this button to immediately send the newsletter by e-mail to all subscribers.
20.4. Scheduling a Newsletter
On the Scheduling tab on the Edit pane of the newsletter you can specify a schedule for the newsletter.
Enter start date, time, and interval between executions. Click on the Add button to add this schedule as an active schedule for the newsletter. The schedule will appear in the region Here is an overview of active schedules for this newsletter. The newsletter is sent by e-mail to all the subscribers at the specified intervals. Note: This scheduled job will also appear as a Schedule component and can be maintained from the Schedule pages.
To remove an active schedule you must select the checkbox to the left of the schedule, and click on the Delete schedule button. The schedule will no longer appear in the region Here is an overview of active schedules for this newsletter.
21. Package alias
Package aliases are needed for all PL/SQL functions called from a URL (like a custom save from a form).
21.1. Properties
This section describes the properties of a package alias, as shown on the corresponding Edit pane.
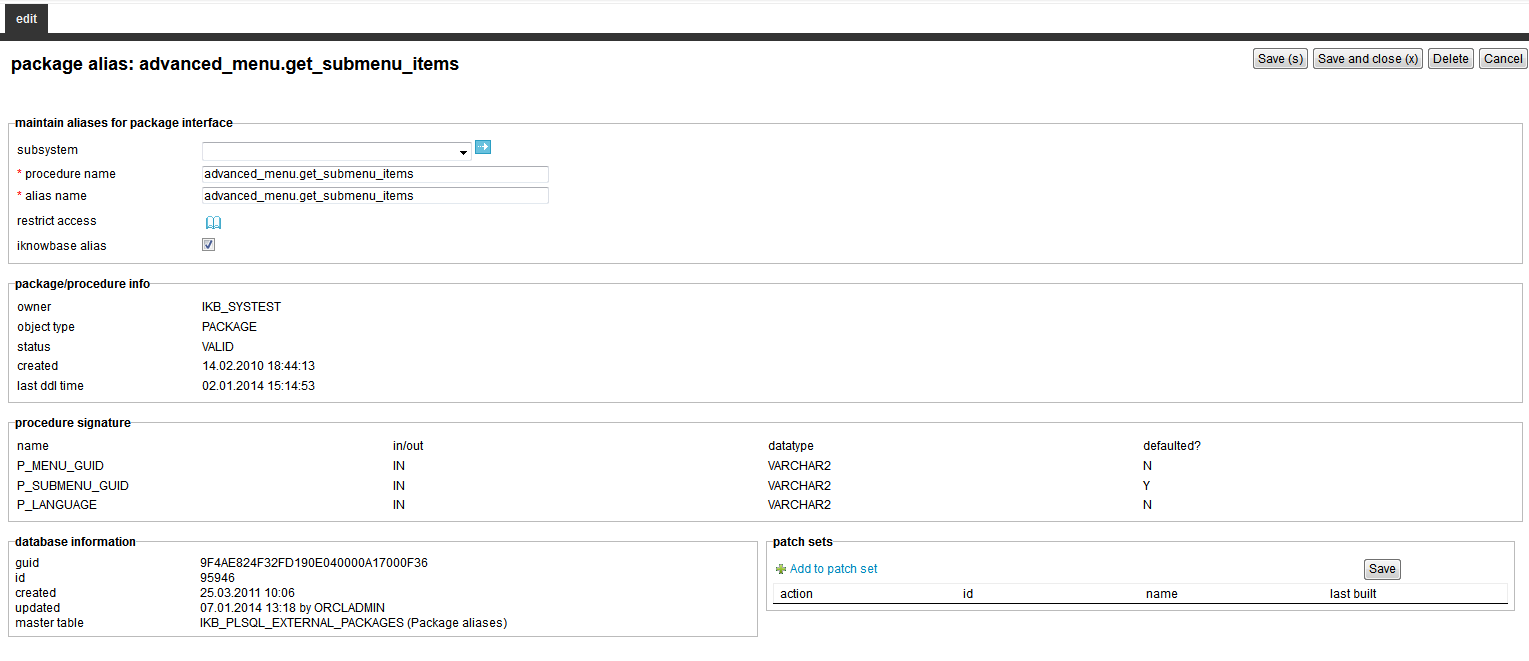
| Property | Description |
|---|---|
Subsystem |
Select the subsystem the profile belongs to. |
Procedure name |
Type the PL/SQL command that you want to call from the iKnowBase Oracle database. Use the syntax |
Alias Name |
Type the alias of the database function. |
Restrict access |
Select a ACL if you want to restrict the access to the function. |
iKnowBase alias |
If checked, the procedure is a part of iKnowBase and should be untouched. |
21.2. Package/procedure info
This section shows information about the procedure such as object type, status, created date and last DDL time.
21.3. Procedure signature
This section shows the signature of the procedure.
22. Page cache strategy
Page cache strategies are applied on page components and define cache rules for a specific component. Cache keys can be a combination of several context variables like user, domain or language.
22.1. Properties
This section describes the properties of an page cache stategy, as shown on the corresponding Edit pane.
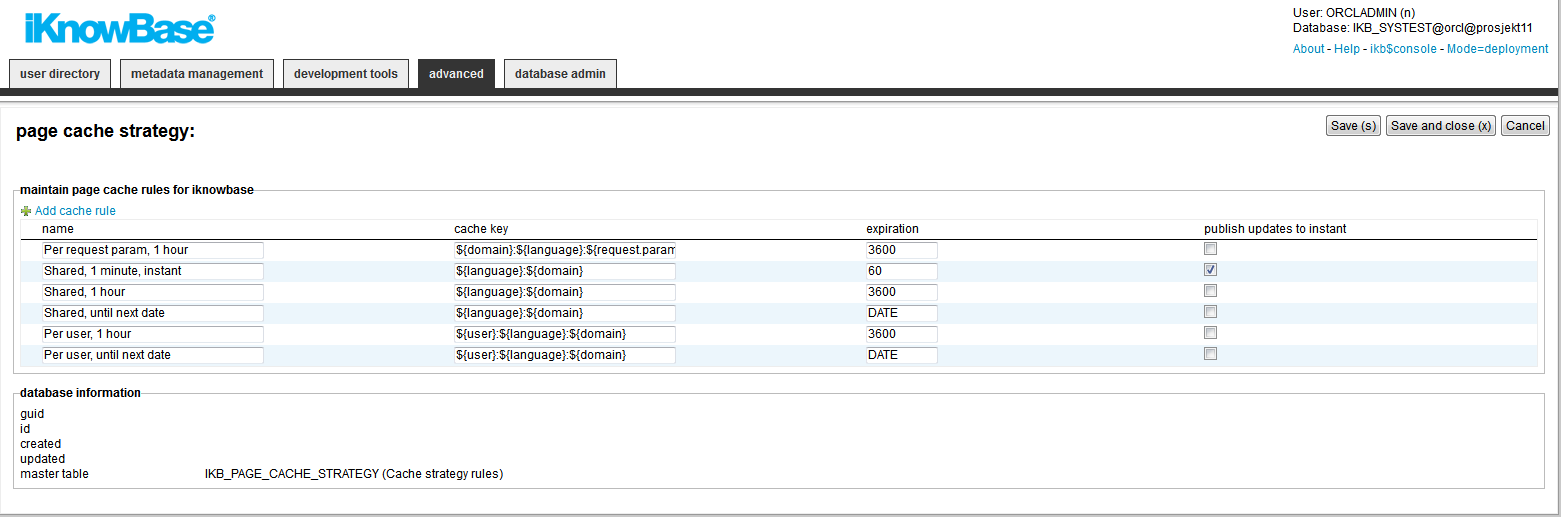
| Property | Description |
|---|---|
Name |
Enter the name of the cache rule. |
Cache key |
Defines the key used for caching. The following model objects are available:
Combine values like objectGuid, domain, language, user and request.param to create a desired cache key. A typical minimal cache key will contain at least objectGuid, domain and language. Note that you should take care to avoid unlimited proliferation of cache keys, in particular if you were to include a document id parameter as part of the cache key. |
Expiration |
Enter how long the component should be cached in seconds. The value DATE tells the cache engine to cache the object until next date. |
Publish updates to instant |
Set to checked if you want a message published to iKnowInstant when the object is expired. |
23. Pages
An iKnowBase page, simply referred to as page in this document, enables you to display and receive content from the end user through iKnowBase Page Engine.
A page can consist of various components, such as Menu portlets and Shared content viewers. These components are referred to as portlets.
While creating a page, you can specify the template, path or URL for the page, the ACL reference that sets access permissions for the page, and the portlets that you want to display, such as forms, menus, and content viewers.
23.1. Properties
This section describes the properties of a page, as shown on the corresponding Edit pane tabs.
23.1.1. Edit Tab
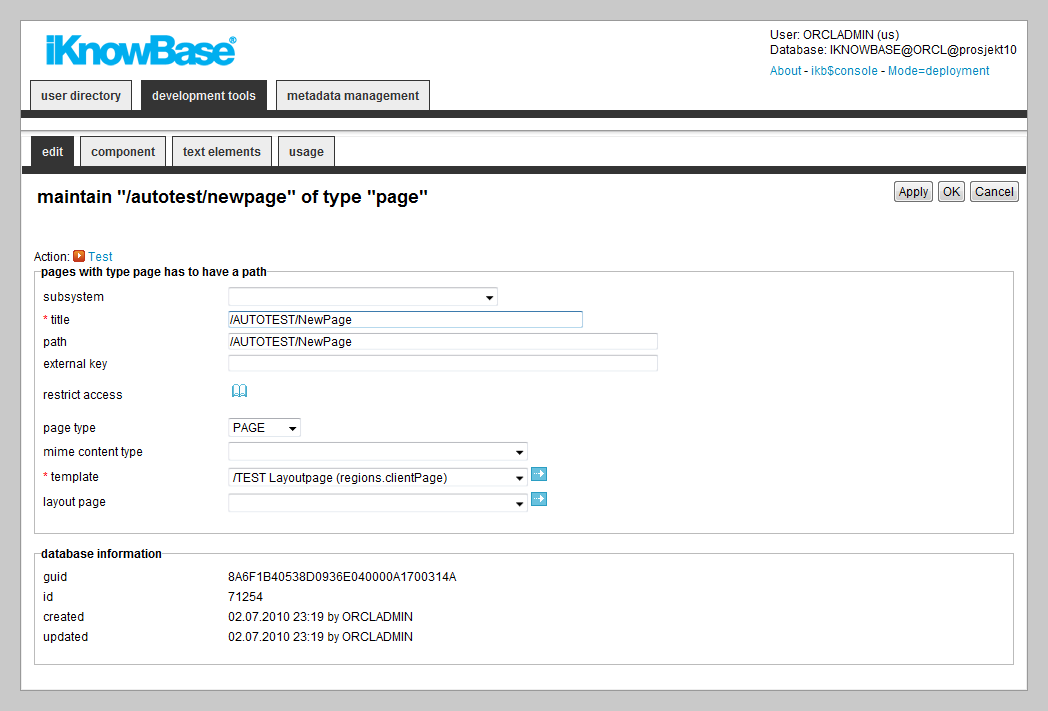
| Property | Description |
|---|---|
Subsystem |
Select the appropriate subsystem. |
Title |
Type a title for this page. |
Path |
Type the reference to the URL that is used to access the page. The reference is relative to the page URL specified on the domain, so the actual URL for a value "/iknowbase/about/" could be http://www.example.com/page/iknowbase/about, but also http://www.example.com/iknowbase.about, depending on your setup. If this field is blank, you cannot access the page directly from a browser. You can still include the path in another page, or use it as a layout page. The path name must be a unique name. |
External key |
Type the external key. This value is used for external integration. |
Restrict access |
Select the appropriate access control list (ACL) for the page. To view the page, the user must have read rights to the specified ACL. |
Page Type |
Click the appropriate page type. This page type specifies whether the page that is created is used as an iKnowBase page or iKnowBase layout page. |
Mime Content Type |
Click the appropriate content type that identifies the type of content on the page. For example, text/html or text/xml. |
Layout page |
Select the layout page you want to use for this page |
Template set |
Please see the Template Set section for more information. |
23.1.2. Component Tab
On this tab you add the portlets to display on the page. The template used for the page decides which regions are available for displaying portlets. You can change the order of the portlets by drag and drop functionality.
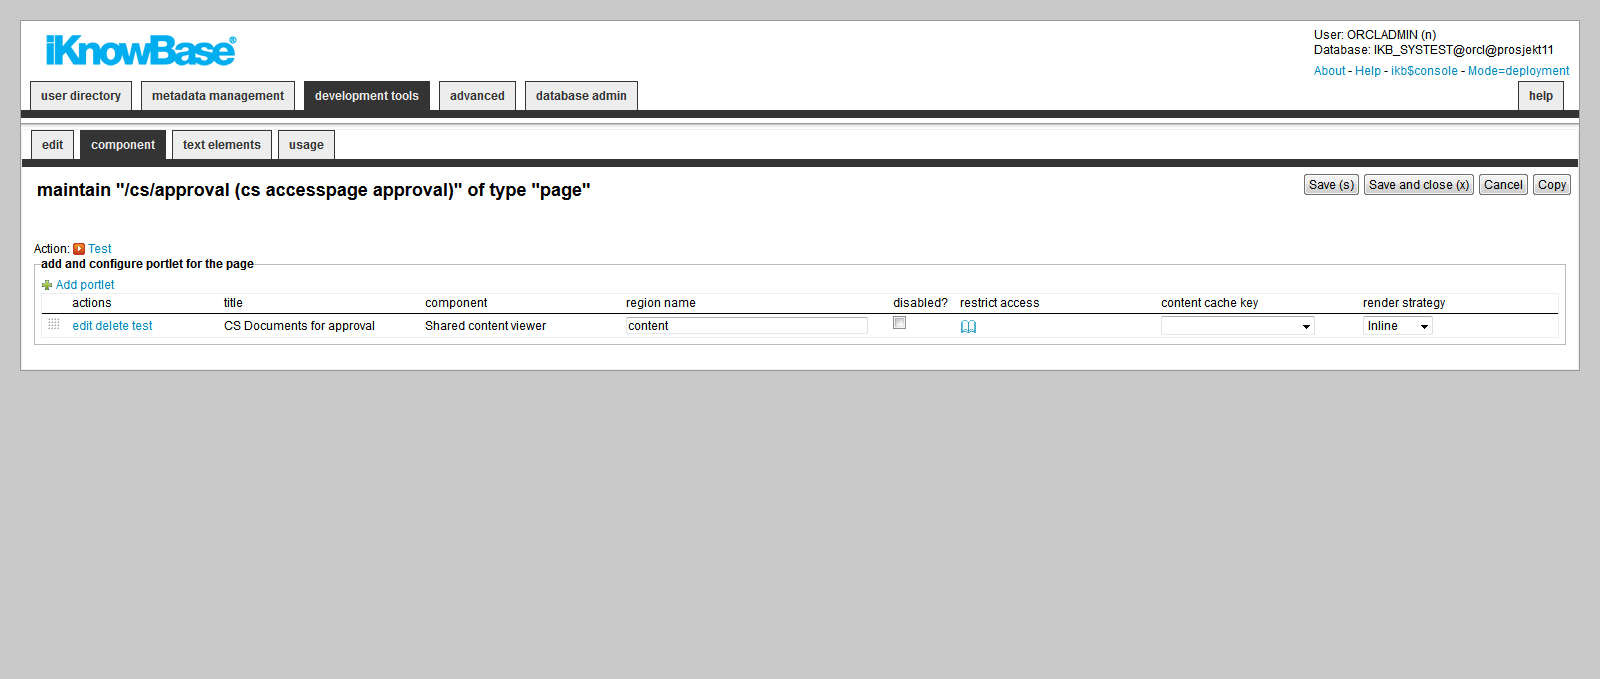
| Property | Description | ||
|---|---|---|---|
Actions |
|
||
Title |
Will either display :
|
||
Component |
Displays the portlet type.
|
||
Region name |
Type the name of the region where the component is shown. The underlying template can display this component at a location that is predefined in the template. The regions are defined in the template. |
||
Markup ID |
Enter an identifier to be used when identifying the component on the web page, or leave blank for an identifier to be automatically generated. The identifier will be used by automatically generated code in certain components, and can also be used as the identifier in the reloadComponent javascript function. Note that if you enter a value here, this value must be unique on the rendered page (including embedded pages and layout pages). Whenever possible, it is recommended that the value is left blank. |
||
Disabled? |
Disable the portlet. It will be rendered when running the page. Typically used for debugging reasons. |
||
Restrict access |
Select the appropriate access control list (ACL) for the page. The component appears to the end user only if he has read access to the selected ACL. |
||
Content Cache Key |
Select the appropriate content cache mechanism to be used for the portlet. Predefined options are:
You can add self-defined options, see the Page cache strategy chapter. Note: If you leave this property blank, the content of this portlet will not be cached. Note: Access control will not be applied to shared cached content. A user who accesses a portlet, which is configured to use shared cache, will see the exact cached content regardless of his access rights. A consequence might be that the user gets access to too much or too little data. |
||
Render Strategy |
Select the appropriate render strategy to be used for the portlet. Available options are:
Note: If you specify other render strategies than Inline, portlet decorations will automatically be rendered for the portlet (i.e. a div-tag with id and class attributes). |
23.1.3. Text elements Tab
The properties on this tab enable you to define texts to be used in the component. The texts are available as FreeMarker model objects from the Template used for the Page. Multiple languages are supported.
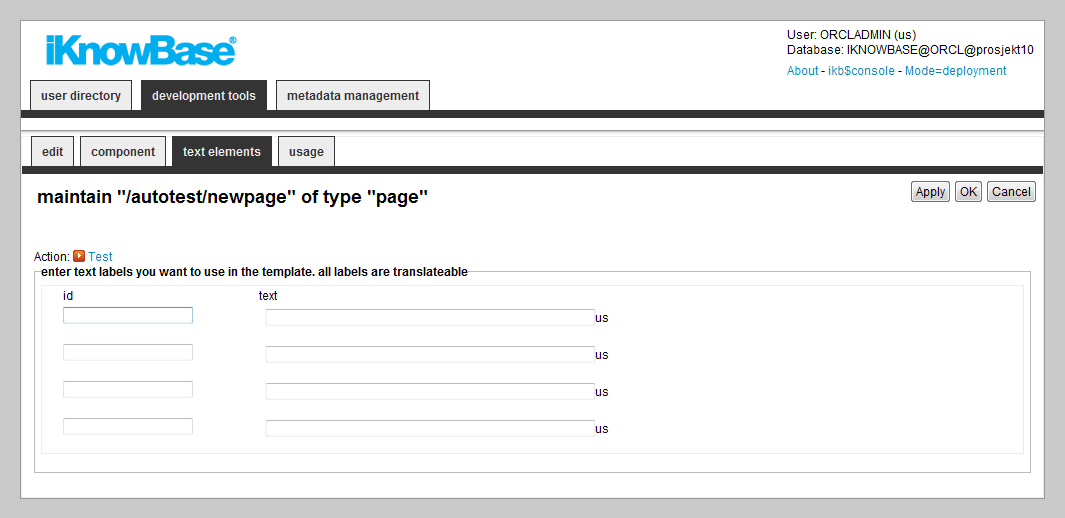
| Property | Description |
|---|---|
Id |
Type an identifier for the label. |
Text |
Type the text labels that you want to use in the page. If multiple languages are supported in the solution, each language displays a box, in which you can type the display form name. When you place the cursor in the Text field, the language box appears. The language code is placed behind the field. |
23.2. Testing your Page
To test your page, either click the Test action for the page on the List pane, or click the Test action link on the Edit pane tabs for the page.
|
Note
|
The Test actions become available for a page after you specify a path and perform the initial save of the page. |
24. Parameter
iKnowBase enables you to define parameters and associate them with targets, viewers, search sources, and forms. Parameters are used to transfer values through targets to portlets and components.
A parameter enables you to specify or filter content that you want to display on target destinations. For example, you can create a parameter and associate it with an attribute named Employee ID. You can then add this parameter to a target and a viewer present on the target destination. The target destination will only display the content that is associated with the given Employee ID.
iKnowBase enables you to create two types of parameters:
-
iKnowBase parameter: An iKnowBase parameter enables you to create a parameter that is mapped to an iKnowBase attribute.
-
SQL parameter: An SQL parameter enables you to create dynamic parameters using an SQL string and a WHERE clause.
24.1. iKnowBase Parameter Properties
This section describes the properties of an iKnowBase parameter, as shown on the corresponding Edit pane.
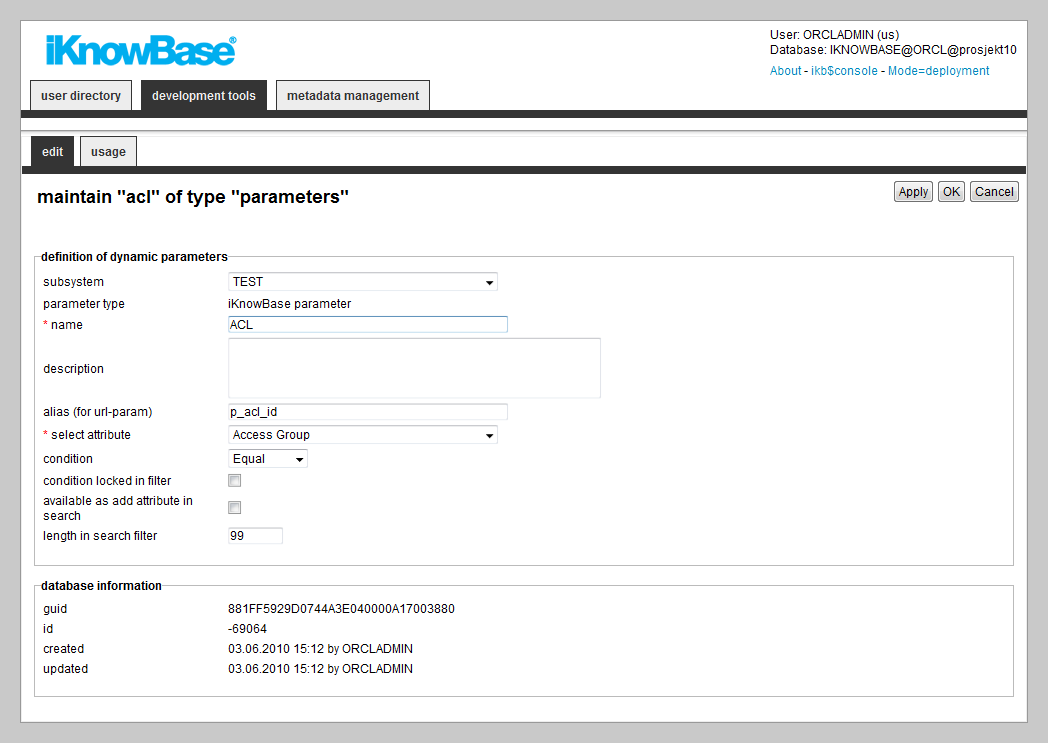
| Property | Description | ||
|---|---|---|---|
Subsystem |
Select the appropriate subsystem. |
||
Parameter type |
Displays the parameter type as iKnowBase. |
||
Name |
Type a name for this parameter. |
||
Description |
Type a description for this parameter. |
||
Alias (for URL-param) |
Type the alias for the parameter. All parameters are sent with the default naming convention such as p_d_i/p_d_v and p_d_c. To increase the readability of the URLs, you can use aliases. For example, the IKB DocumentID attribute has ID = -121. By adding the p_document_id alias, a portlet that uses this parameter can change the URL from |
||
Select attribute |
Select the appropriate attribute. |
||
Wildcard condition |
Only available for title and search string attribute. When checked, it will add a wildcard when used as a search criteria. |
||
Condition |
Select the appropriate condition that is used as default in a search source where the parameter is used.
|
||
Condition locked in filter |
Select this check box to lock the selected condition in the filter dialog box. The condition then becomes mandatory for the user, and the user cannot choose to use other conditions for this parameter.
|
||
Available as Add Attribute in search |
Select this check box to be able to use the iKnowBase parameter in the search filter under the Add Attribute function. This functionality makes the attribute searchable, even if it is not a part of the predefined filter. |
||
Length in search filter |
Type the maximum length of the text that a user can type in a search filter box. |
24.2. SQL Parameter Properties
This section describes the properties of a SQL parameter, as shown on the corresponding Edit pane.
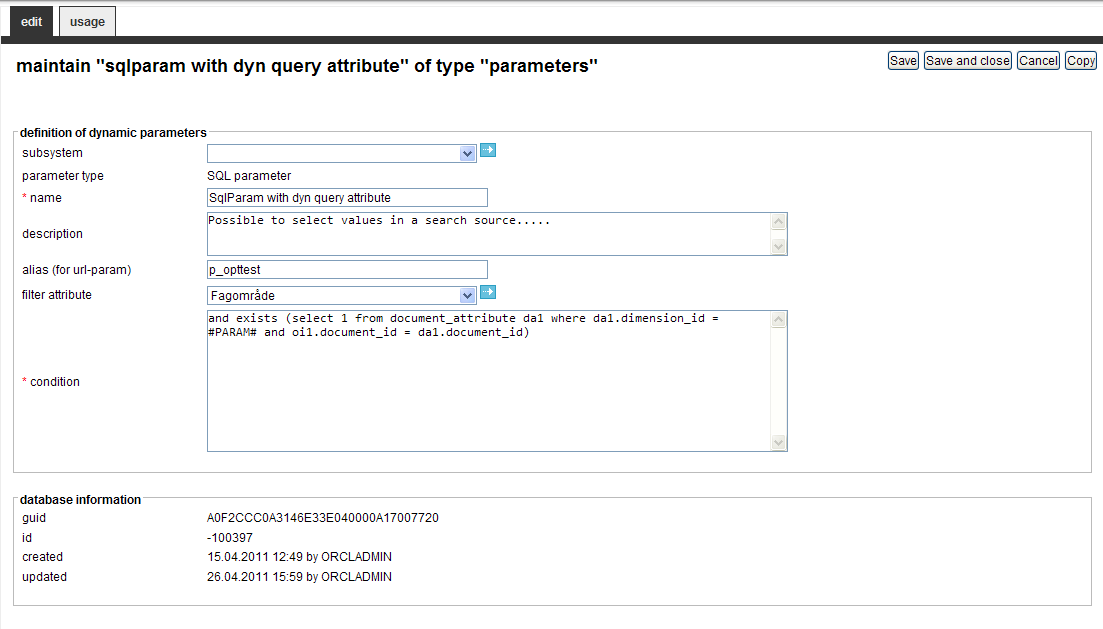
| Property | Description |
|---|---|
Subsystem |
Select the appropriate subsystem. |
Parameter type |
Displays the parameter type as SQL parameter. |
Name |
Type a name for this parameter. |
Description |
Type a description for this parameter. |
Alias (for URL-param) |
Type the alias for the parameter. All parameters are sent with the default naming convention such as p_d_i/p_d_v and p_d_c. To increase the readability of the URLs, you can use aliases. For example, the IKB DocumentID attribute has ID = -121. By adding the p_document_id alias, a portlet that uses this parameter can change the URL from |
Filter attribute |
If the condition has a |
Condition |
Type the where-condition that adds itself to the SQL produced by the component in which it is used, typically a viewer or search source. These components extracts data from the DOCUMENT table with prefix oi1. The condition must start with AND. You can use variables in the where-condition:
You can also define functions that are executed within the condition. The function must return a value. Functions are specified within curly brackets: {functionName}. Note: The execution is done only once, rather than one time per document that are extracted, and might be smart regarding performance. Example: AND (oi1.document_id_ref IS NOT NULL
AND (oi1.owner_id = #USERID#
OR oi1.owner_id = {dbbruker.get_manager(#USERID#)}))
|
Guid |
Displays a globally unique identifier number for this component. This property appears after you save a component. You cannot update the information of this property. |
Id |
Displays a unique identifier number for this component. This property appears after you save a component. You cannot update the information of this property. |
Created |
Displays when the component was created and by whom it was created. |
Updated |
Displays when the component was last updated and by whom it was updated. |
25. Presentation Style
Presentation styles are used by viewers, task viewers and search sources to present data. While the viewer or search source decides which information objects should be shown, the presentation style decides which information to present and the look and feel of the data. By having them separate makes it possible to reuse presentation styles, and thus get a uniform look and feel across your portal. iKnowBase supports two different types presentation styles, with different properties.
|
Note
|
We recommend that you use FreeMarker templates as much as possible. You can convert existing Form- and Tabular based templates to FreeMarker templates by using the Convert to template, either one by one, or as a bulk operation available from iKnowBase Studio/Development tools/Presentation styles. You can by any time revert the style back to its original state. |
| Property | Description |
|---|---|
Template |
Enables you to write your own FreeMarker code to format content. |
SOLR |
Used by SOLR viewers to enhance a result set from SOLR |
In the presentation style you must specify which data source the data should be extracted from. You can choose between data sources for the iKnowBase content store, or external data sources which you define yourself.
When you specify en external data source, the columns defined for this external data source will be available as attributes in the presentation style. They can be presented with the same flexibility as iKnowBase attributes. They will be displayed as <External: ColumnName>, where ColumnName is the name that you have given the column in the external data source. If the external data source is independent, only the columns defined for the external data source will be available. Alternatively, if the external data source is dependent, the columns defined for the external data source will be available in addition to standard iKnowBase attributes.
When a presentation style which is set up with an external data source is connected to a viewer or a search source, it automatically builds an expression with the select, from, and where parts from the external data source. The parameters defined for the external data source will be available in the viewer and search source for building the where condition. They will be categorized as External parameters.
25.1. Template-based presentation style properties
This section describes the properties of a template-based or SOLR based presentation style, as shown on the corresponding Edit pane.
25.1.1. Edit Tab
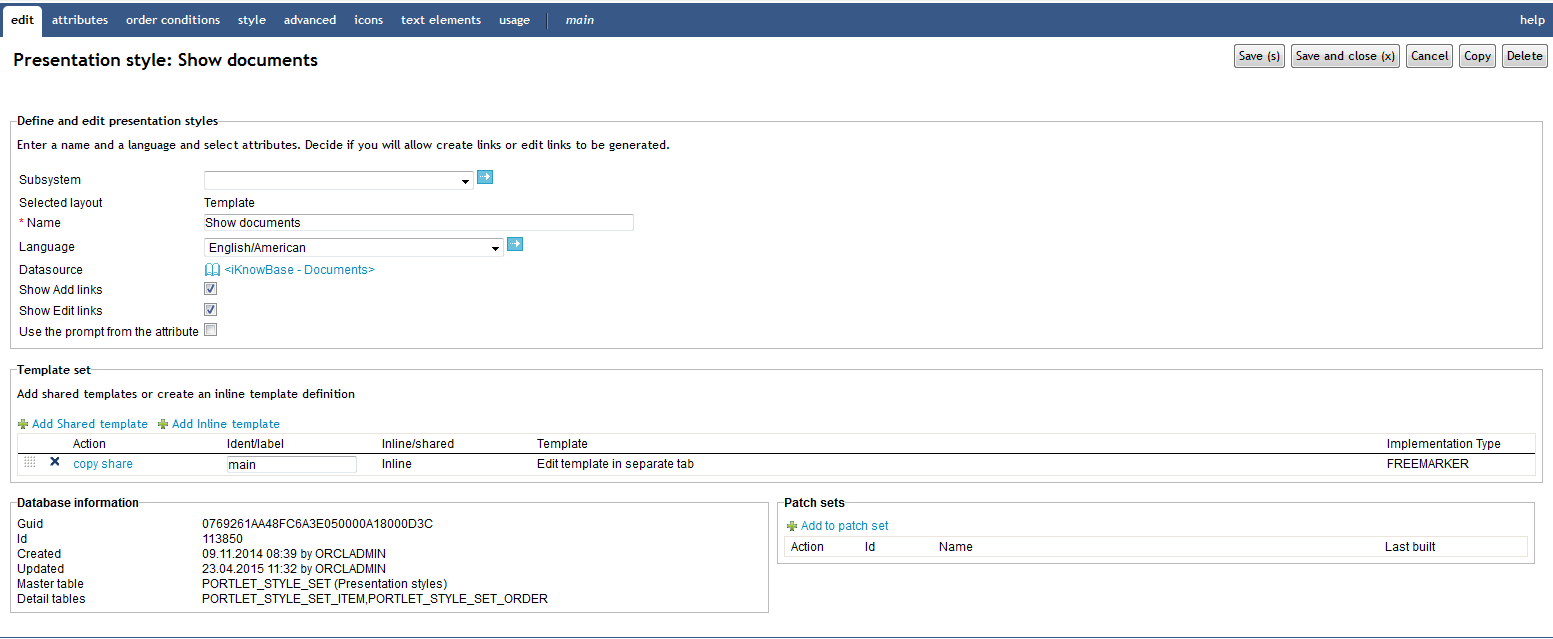
| Property | Description | ||
|---|---|---|---|
Subsystem |
Select the appropriate subsystem. |
||
Selected layout |
Displays the type of presentation style. |
||
Name |
Type a name for the presentation style. |
||
Language |
Select the appropriate language for the form. If you do not select a language, it is automatically set according to: a) the user language, b) the browser language, c) the domain language in the given order. |
||
Datasource |
Select the appropriate data source for this presentation style. For SOLR the value is always set to <iKnowBase - Documents>. The following data sources are available:
In addition to these data sources you will also have access to select all defined external data sources. |
||
Show Add links |
Specify whether to generate links to add new documents or not.
|
||
Show Edit links |
Specify whether to generate icons to modify and delete documents or not.
|
||
Use the prompt from the attribute |
Select the check box to retrieve the labels from the attribute definition. |
||
Template set |
Please see the Template Set section for more information. |
||
Guid |
Displays a globally unique identifier number for this component. This property appears after you save a component. You cannot update the information of this property. |
||
Id |
Displays a unique identifier number for this component. This property appears after you save a component. You cannot update the information of this property. |
||
Created |
Displays when the component was created and by whom it was created. |
||
Updated |
Displays when the component was last updated and by whom it was updated. |
25.1.2. Attributes Tab
On the Attributes tab you can select the attributes or special functions to be used in the presentation style. Make sure to select only the attributes needed.
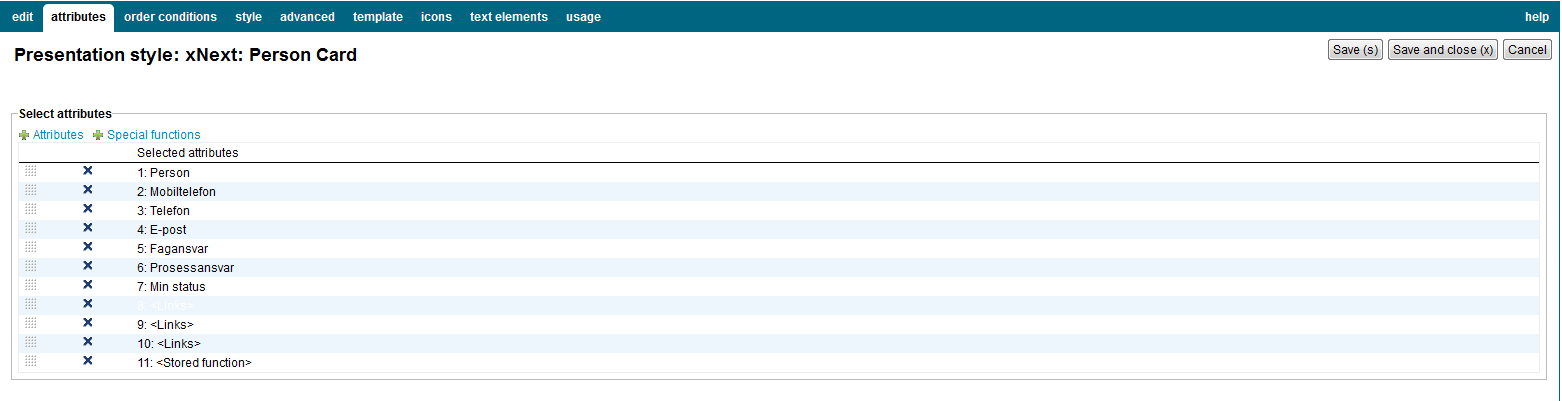
| Property | Description |
|---|---|
Attributes |
Select among all regular attributes defined. Some of the attributes available from iKnowBase content store data sources are in fact special functions. |
Special functions |
Select among all special functions defined.
You can reorder the attribute list by using drag and drop for each line (click the leftmost icon). You can deselect attributes by clicking on the delete icon and save the data. |
25.1.3. Order conditions
Select the attributes to be used to order the result set. A order condition can either be a regular attribute or a database function. If the viewer extracts tree structures you can also define the sort order of the siblings.
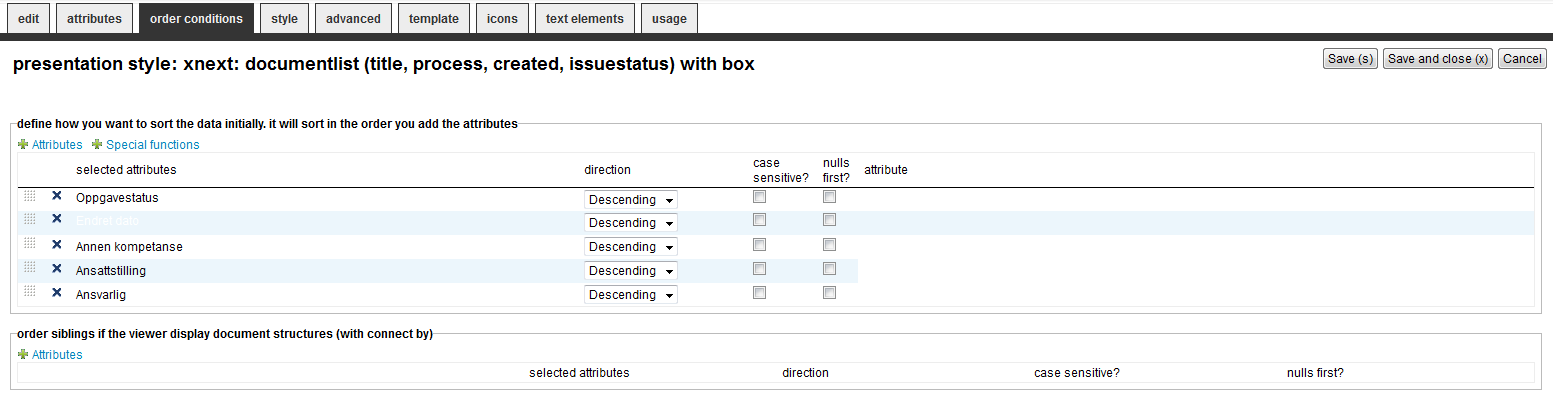
| Property | Description |
|---|---|
Attributes |
Select among the attributes in the list. |
Spesial functions |
Select among the database functions in the list. |
Sort order |
You can reorder the conditions by drag-and-drop up or down. |
Direction |
Decide the sort direction, either Descending or Ascending. |
Case Sensitive |
Set to Checked if you want to do case sensitive search (e.g. A and a is ordered differently). |
Nulls first |
Set to Checked if you want to sort null values first (default is last). |
Attribute |
Select an attribute if its needed by the database function. |
Siblings |
Only applicable if the viewer returns tree structured data and are used to order the siblings. |
25.1.4. Icon Tab
| Property | Description |
|---|---|
New icon for sorting (ascending) |
Enter the path of the icon for an unselected ascending sort, for example /resource/icons/sortxx.png. |
New icon for selected sorting (ascending) |
Enter the path of the icon for a selected (active) ascending sort, for example /resource/icons/sortxx.png. |
New icon for sorting (descending) |
Enter the path of the icon for an unselected descending sort, for example /resource/icons/sortxx.png. |
New icon for selected sorting (descending) |
Enter the path of the icon for a selected (active) descending sort, for example /resource/icons/sortxx.png. |
Icon - Check out documents |
Enter the path of the icon for the "check out documents" command. You can click the icon and check out a document. |
Icon - Checked in by others |
Enter the path of the icon to display this status. A ToolTip displays the name of the user who checks in a document and the time of check-in. |
Icon - Checked in by me |
Enter the path of the icon to display this status. You can click the icon and check in a document. |
Image |
Type the path to the image. This will override the label, but the label will be used as tooltip for the link. You can define default values in installation properties for edit- and delete operations. Set the instance qualifier to * and the property names needs this syntax:
|
Height |
Type the height of the image in pixels. |
Width |
Type the width of the image in pixels. |
25.1.5. Style Tab
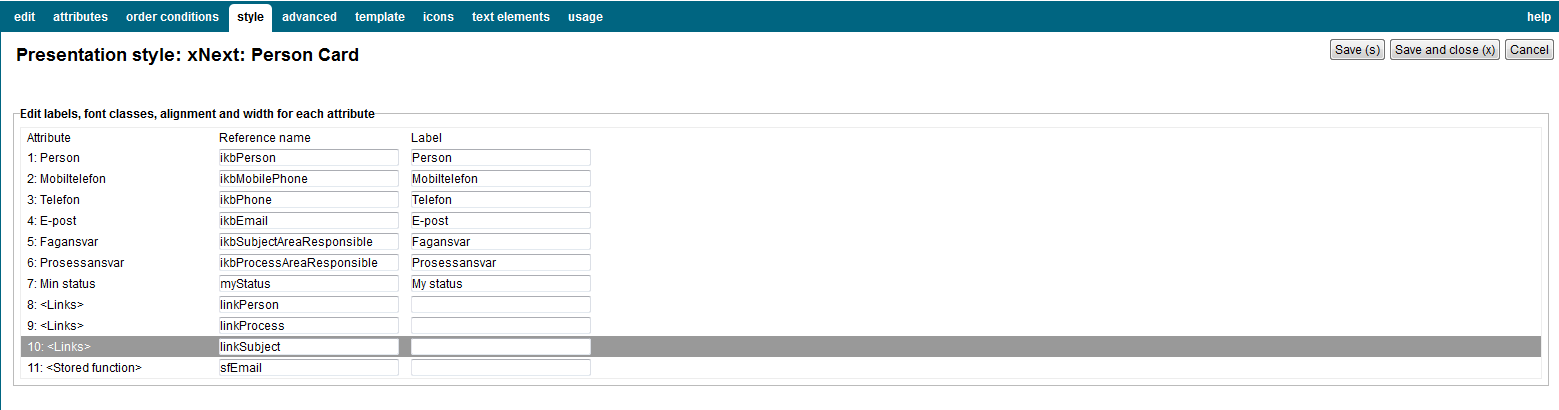
| Property | Description | ||
|---|---|---|---|
Attribute |
Displays the list of selected attributes. |
||
Reference name |
Type the reference name of the attribute. If you want to identify the attribute in the template, you must provide a reference name. This reference name must be unique. |
||
Label |
Type the label that you want to display for the specific attributes.
|
25.1.6. Advanced Tab
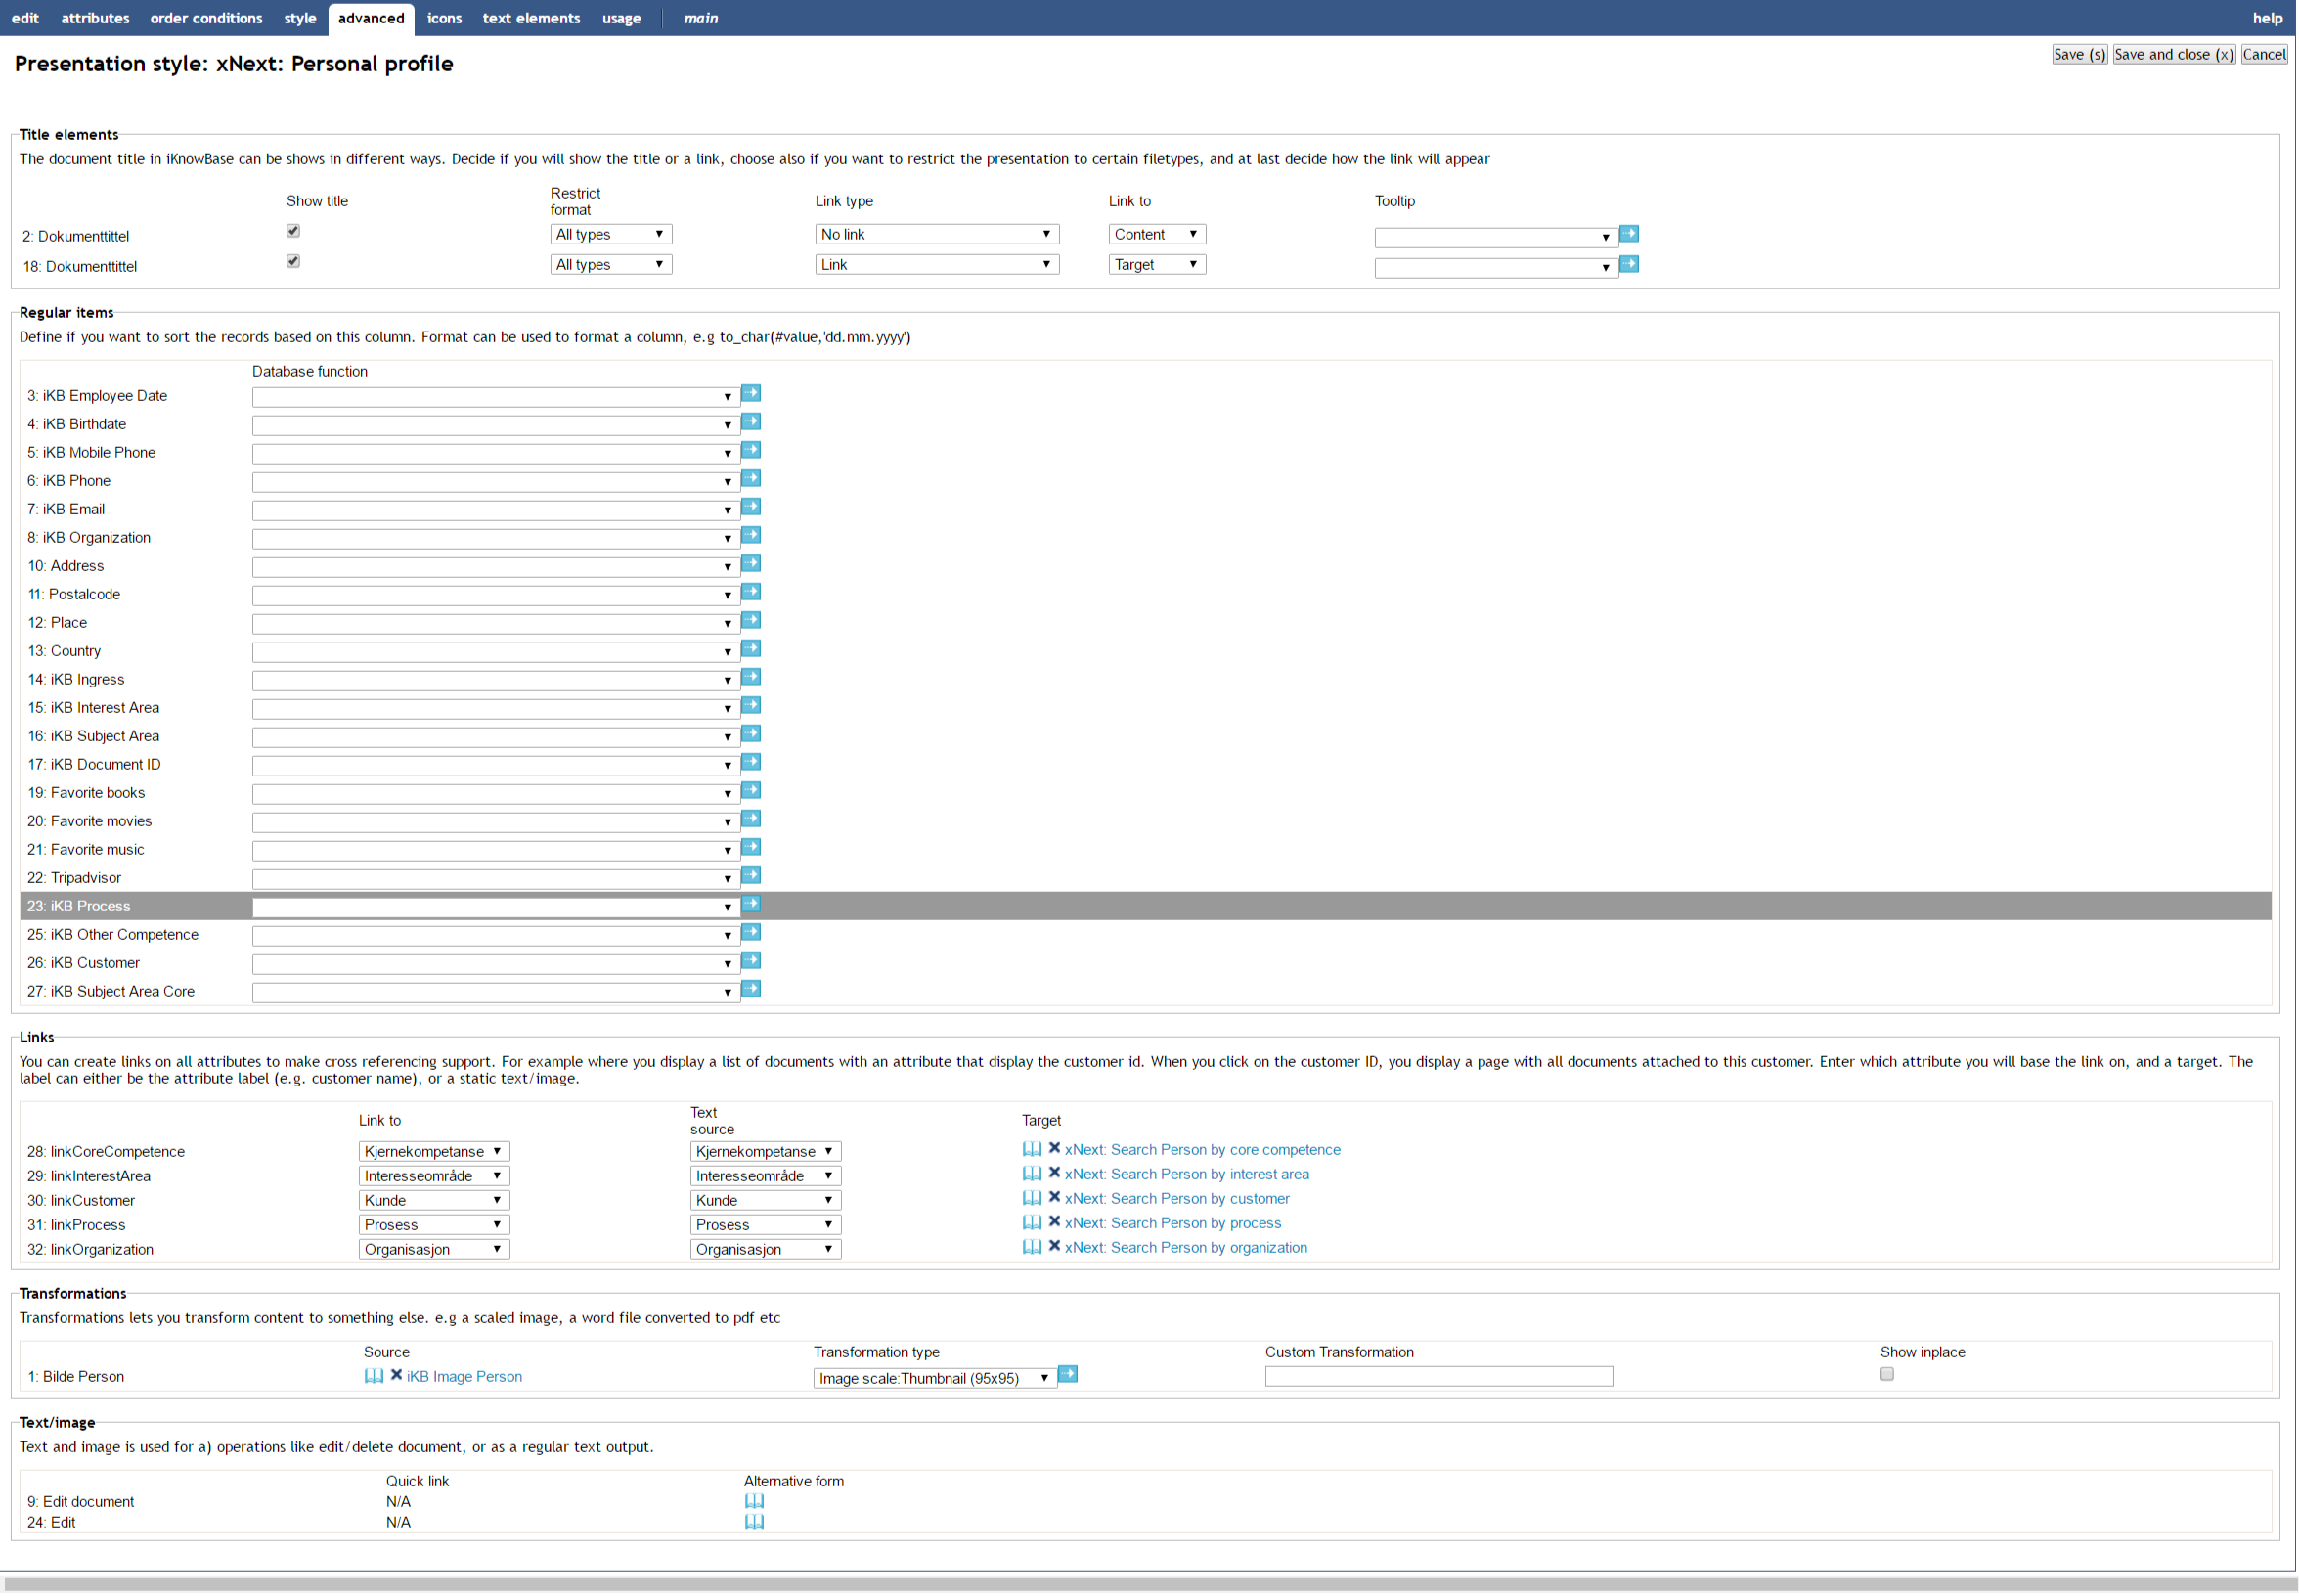
| Property | Description | ||
|---|---|---|---|
Title elements |
|||
Show title |
Select this check box to display the document title itself. Rather that displaying the document title, you can display a label or image for the title attribute. For this, you must define the label or image in the Label property on the Style tab. |
||
Restrict format |
Select the appropriate format restriction.
|
||
Link type |
Select the appropriate link type.
|
||
Link to |
Select the appropriate option to display the document when the user clicks on the title link.
|
||
Tooltip |
Select the appropriate tooltip function. You can use the tooltip to preview an image or display the details of a document. New tooltip functions may be implemented as PL/SQL functions. Have a look at IKB_TOOLTIP.SHOW_ADVANCED_TOOLTIP_INGRESS as an example implementation. Register the new functions in the database table IKB_TOOLTIP_FUNCTION to make them available in the dropdown box. |
||
Regular items |
|||
Show/Hide |
Select whether you want to display or hide the attribute. |
||
Database function |
By default, iKnowBase applies a default format to the item being displayed. If you want to customize this output, create a database function and use that for column formatting. Normally, you will not need to use a function. For more information on properties of database function, see Properties. |
||
Links |
|||
Link to |
Select the attribute value to pass as parameter. |
||
Text source |
Select the text to be displayed on the link. Available options are the label for the |
||
Target |
Select the target to use for the link. |
||
Transformations |
|||
Source |
Select the source attribute for the transformation. Choose among all file attributes and image/document link attributes |
||
Transformation type |
Select the a predefined transformation type. It not given, you need to apply a transformation instruction. |
||
Transformation instruction |
Enter the transformation instruction yourself. |
||
Stored function |
|||
Show/hide |
Select whether to display or hide the title attribute. |
||
Package/function |
Select the database function. |
||
Attribute |
Select the attribute to pass as parameter to the database function. Use the option
|
||
Text/image |
|||
Select quick link |
Select the appropriate quick link to use for this link/icon. Applicable to |
25.1.7. Template Tab (only available for template based style)
iKnowBase enables you to design and create the template-based presentation style layout using your own FreeMarker template. See the FreeMarker reference chapters for information about iKnowBase-specific model objects available for use in the FreeMarker template.
|
Note
|
If you update the selected attributes in the presentation style, you must also update the FreeMarker template to reflect the changes. You can generate a new template or manually update the template. |
There are two action buttons available:
-
Create new template: Click this button to generate a default template, with placeholders for the attributes in the presentation style. You may then change this template as needed.
-
Update: Click this button to update your template with new attributes. iKnowBase will scan the existing template, and find attributes that are missing. Then, it will generate default template code for these attributes, and add to the bottom of the template. Move this code around as required.
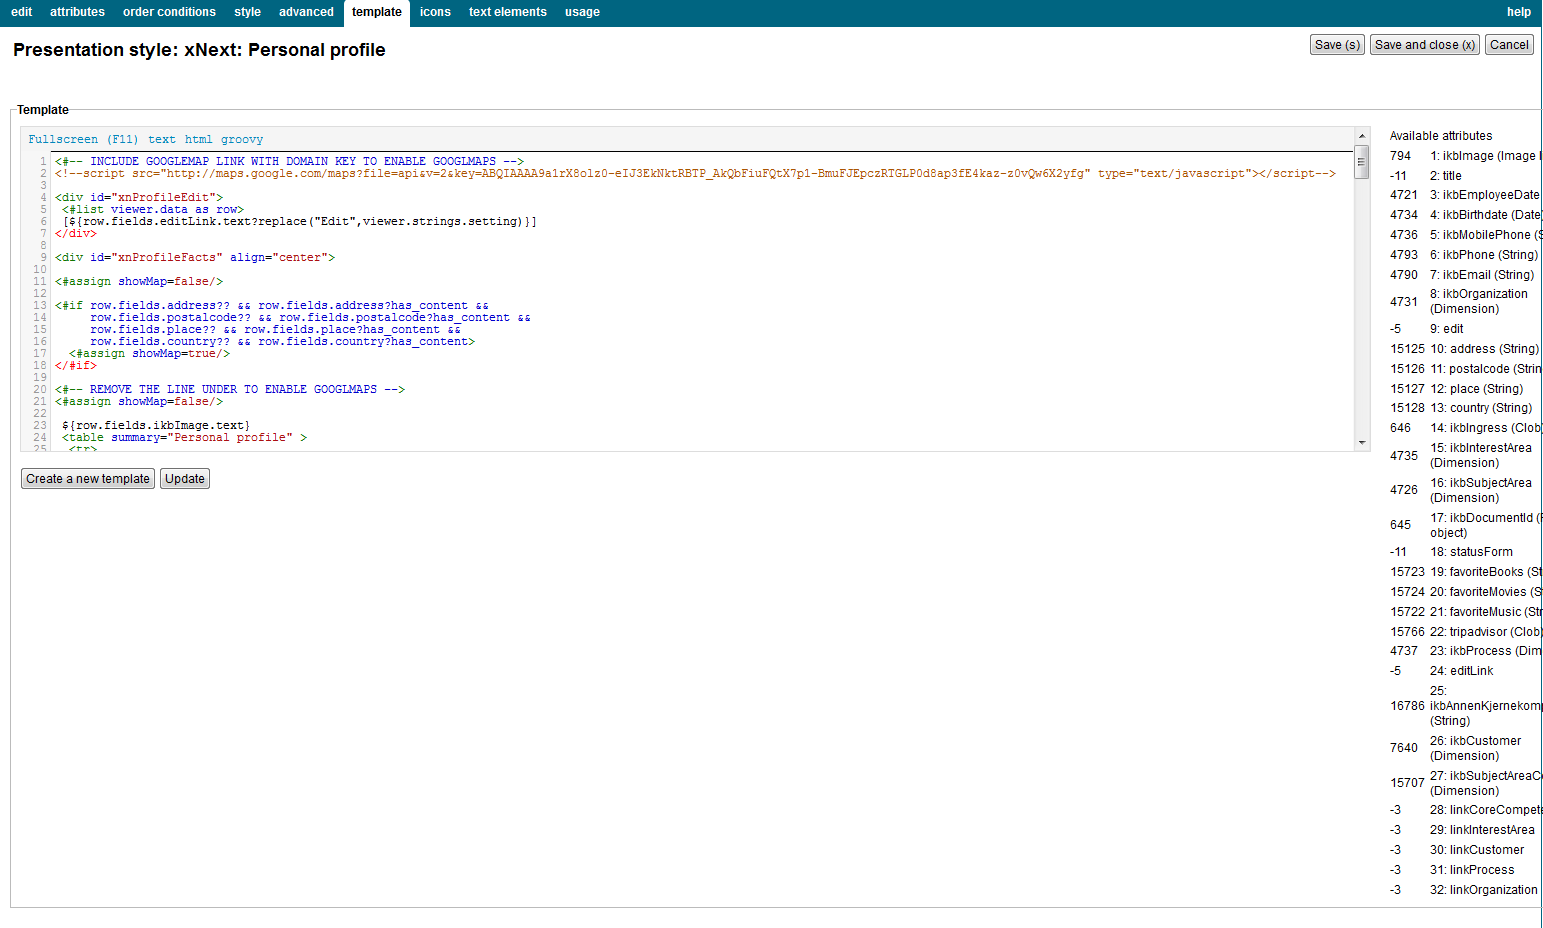
| Template | Type the FreeMarker template code. |
|---|---|
Available attributes |
A list of available attributes and their IDs available for use in the HTML template code. |
25.1.8. Text elements tab
The properties on this tab enable you to define texts to be used in the component. The texts are available as FreeMarker model objects. Multiple languages are supported.

| Property | Description |
|---|---|
Id |
Type an identifier for the label. |
Text |
Type the text labels that you want to use in the template. If multiple languages are supported in the solution, clicking on the text box will display one text box per language, for easy editing. |
25.2. FreeForm presentation style properties
The free form presentation style is only available for backward compatibility purposes; this document therefore does not fully describe this feature.
The FreeForm presentation style does not apply any of its own HTML formatting on the content. Instead, you need to use the property <Text/image> to enter the HTML formatting you want. At runtime, the viewer will output the formatting specified on the Style tab for each document in the source content.
26. Preview Pages
Preview pages are a mechanism you can use to enable document preview, typically during a publishing process.
To accomplish a preview feature in your iKnowBase application, perform the following:
-
Declare one or more preview page components for a given document type. Specify all appropriate targets for documents with the given document type and images representing those targets.
-
Use a Preview portlet to render all the available preview pages for a document with a given document type.
26.1. Properties
This section describes the properties of a preview page, as shown on the corresponding Edit pane.
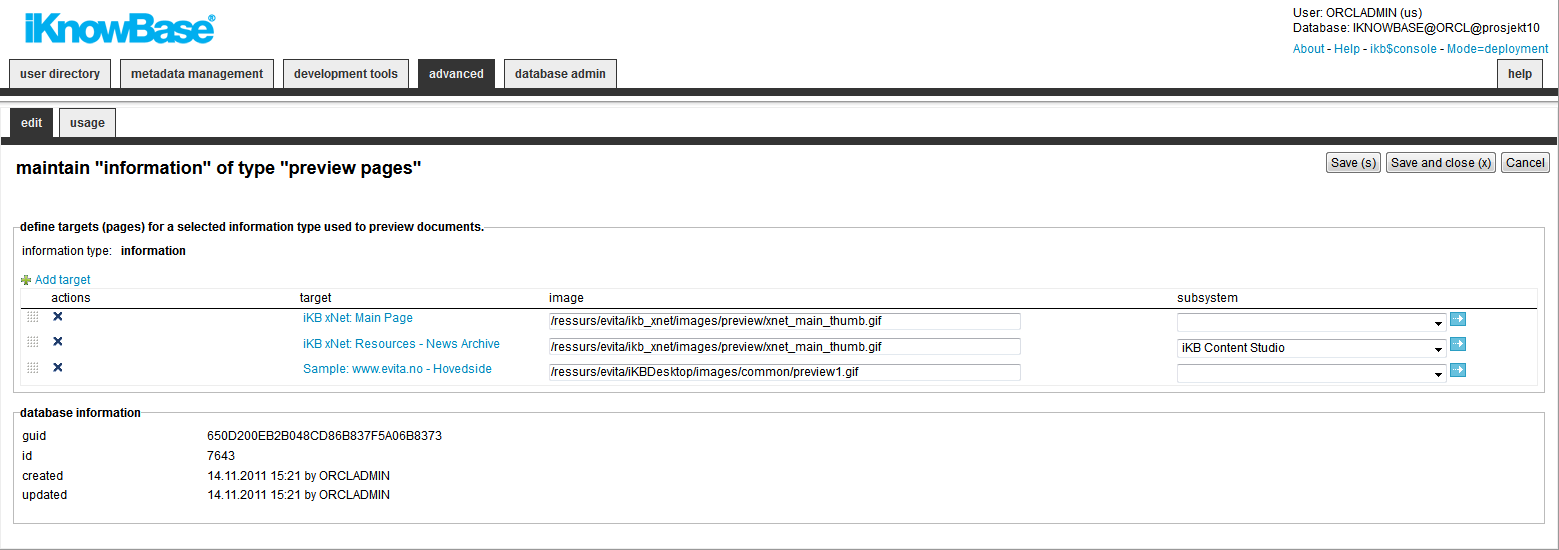
| Property | Description | ||
|---|---|---|---|
Document type |
Select the document type that you want to map preview pages for.
|
||
Target |
Select a target that can be used for preview. |
||
Image |
Type the path of the image which illustrates the target page on the preview page. This image will be a link to the specified target. The image must be placed under the resource directory. |
||
Subsystem |
Select the appropriate subsystem. |
27. Quick Links
iKnowBase enables you to create quick links for one-click publishing in iKnowBase. A quick link is associated with a form or a task wizard, and a target where the form or task wizard is displayed. You can specify parameters for the quick link to pass contextual values in order to populate attributes of the form or task wizard.
You can use quick links from four other iKnowBase components:
-
Viewer
-
Search source
-
Presentation style
-
Menu
A quick link may point to either one or more forms:
-
If the quick link points to a single form, using the quick link opens that form directly.
-
If the quick link points to more than one form, using the quick link opens a dialog page and asks the user which form to use.
27.1. Properties
This section describes the properties of a quick link, as shown on the corresponding Edit pane tabs.
27.1.1. Edit Tab
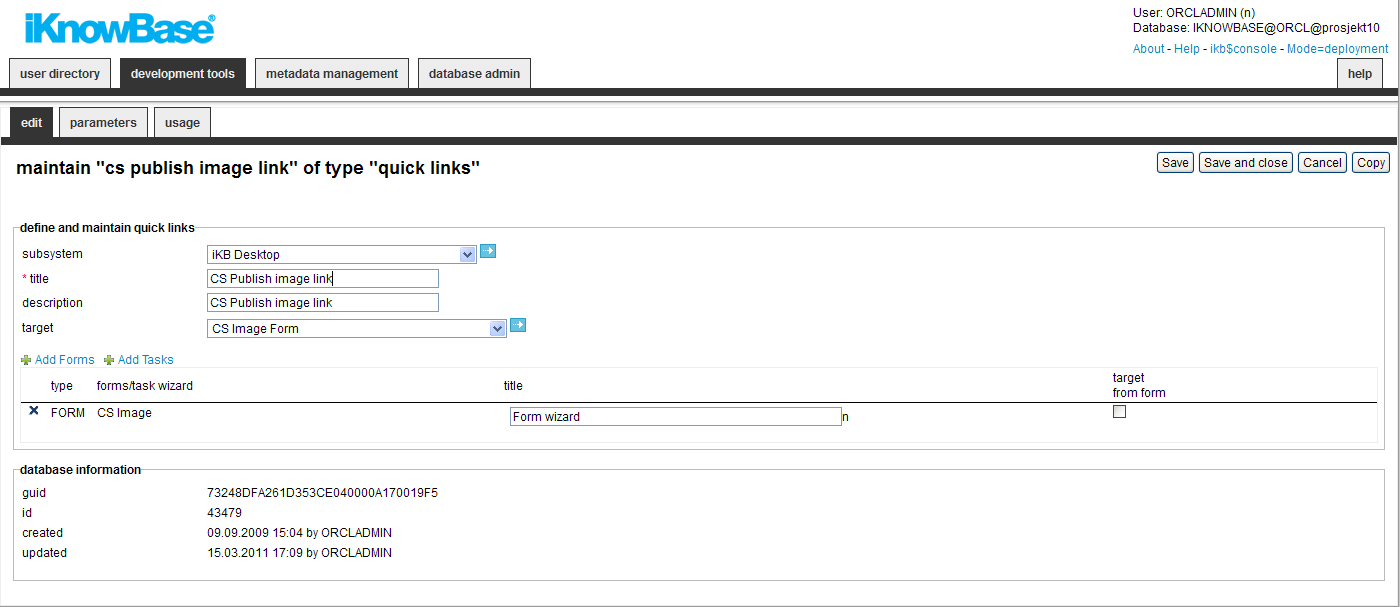
| Property | Description |
|---|---|
Subsystem |
Select the appropriate subsystem. |
Title |
Type a title for this quick link. |
Description |
Type a description for this quick link. |
External key |
Altenative key to the quick link. The value has to be unique. |
Target |
Select the target page in which to display the form. |
Add form |
Click the link to add new forms. You can reorder the list of forms/task wizards by using drag and drop. |
Add task |
Click the link to add new task wizard |
Type |
Displays the type; either form or task wizard. |
Form/Task wizard |
Displays the names of the available forms and task wizards. |
Title |
Type the title use to select this form. Applicable if the quick link contains multiple forms and task wizards and hence needs a title in the dialog window. |
Target from form |
Select this check box to override the Target property of the quick link with the target specified for the form or task wizard. |
27.1.2. Parameters Tab
You can add parameters to the quick link, passing contextual values to the selected form or task wizard and hence the new document that you will create.
You can use three types of parameters with quick links:
-
iKnowBase: Parameters defined as iKnowBase parameters, both iKnowBase and SQL, and parameters defined for iKnowBase external data sources.
-
Function: Parameters defined as database functions. A value returned from the given database function is passed on to the form or task wizard.
-
Constant: Parameters defined with a constant value.
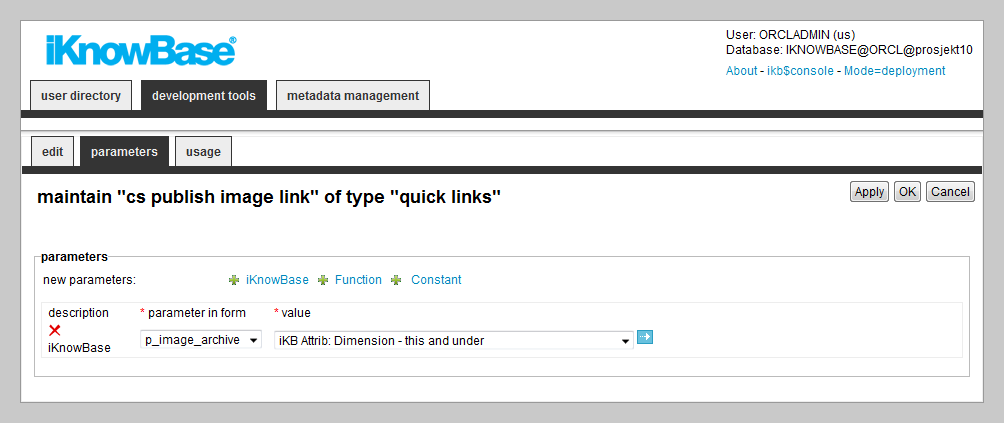
| Property | Description |
|---|---|
Description |
Displays the types of the parameters associated with this quick link. You can use two types of parameters associated with quick links: iKnowBase parameters and functions. See the introduction to this chapter for a description of the parameter types. To add a new parameter, click on the new parameters icon for the appropriate parameter type. To remove a parameter, click on the respective remove icon. |
Parameter in form |
Select the target parameter you want to assign value to. The list of selectable parameters is the union of all declared url parameters in all selected forms for this quick link. |
Value |
For iKnowBase parameter: Select the parameter whose value you want to pass on to the form or task wizard. For Function parameter: Select the PL/SQL database function that will generate the parameter value. For Constant parameter: Type the constant value. |
28. RSS feed
Use the RSS feed component to define RSS-feeds that are available from the iKnowBase application to the outside world.
To configure an RSS feed you must create a search source which defines which documents to include in the feed, and a target to be used to display the entries of the RSS feed.
RSS feed supports RSS 2.0 and RSS 0.91. The standard format of the RSS feed is RSS 2.0. By adding the parameter p_version = 91 to the URL to the feed, RSS 0.91 will be generated.
If the RSS feed component is set up correctly, you will see the link to the feed in the link to RSS feed region on the Edit pane. You can test the RSS feed by copy the URL to the feed into a preferred RSS reader.
By default the feed is limited to ten articles. You can change this number by using the parameter maxrows.
28.1. Properties
This section describes the properties of an RSS feed, as shown on the corresponding Edit pane.
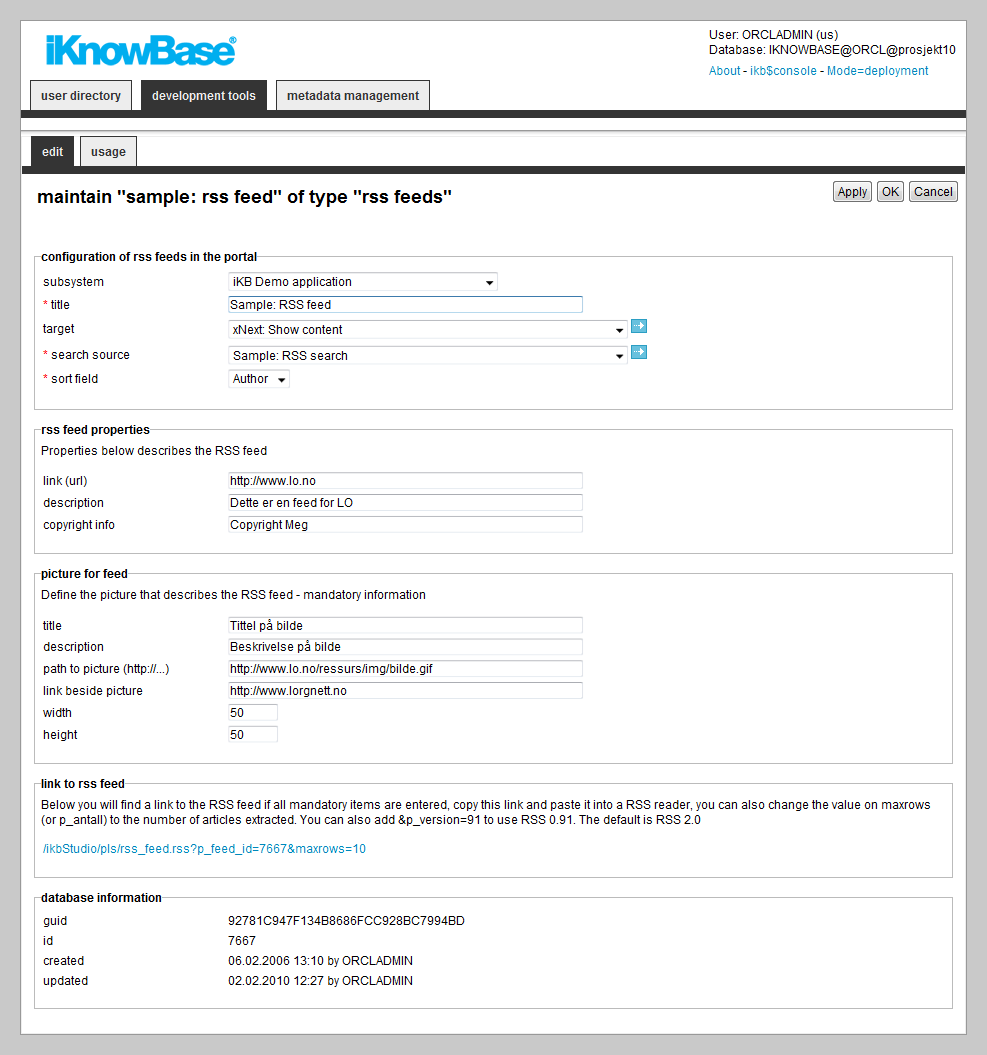
| Property | Description |
|---|---|
Subsystem |
Select the appropriate subsystem. |
Title |
Type unique title of the feed. This will display as the name of the feedn in an RSS reader. |
Target |
Select the target to be used as the URL for individual entries in the RSS-feed, and where the user will be directed if he clicks the entries in the feed. |
Search source |
The search source which extracts the data (documents) that will be shown by the feed. |
Sort field |
Enter the sort order. Determines the order in which documents are listed. Valid values are date (newest first), title (ascending) and author (ascending). |
Link |
Type an URL which will be added to the RSS-feed output. |
Description |
Type a description which will be added to the RSS-feed output. |
Copyright info |
Type the copyright information which will be added to the RSS-feed output. |
Title |
Type a title for the image section which will be added to the RSS-feed output. |
Description |
Type a description for image which will be added tot the RSS-feed output. |
Path to picture |
Type a fully qualified path to an image, including the starting protocol specification (http://…), which will be added to the RSS-feed output. |
Link beside picture |
Type an URL which will be added as a link in the image section in the RSS-feed output. |
Width |
Type the width of the image. |
Height |
Type the height of the image. |
Link to RSS feed |
Displays the link to the RSS feed, when it is correctly configured. |
29. Schedule
The Oracle database contains a feature that enables you to schedule PL/SQL jobs (procedures) for execution at given times and at given intervals. While this feature is very powerful, it is also fairly complex to use. Therefore, iKnowBase Development Studio contains a web user interface to configure such jobs.
29.1. Properties
This section describes the properties of a schedule, as shown on the corresponding Edit pane.
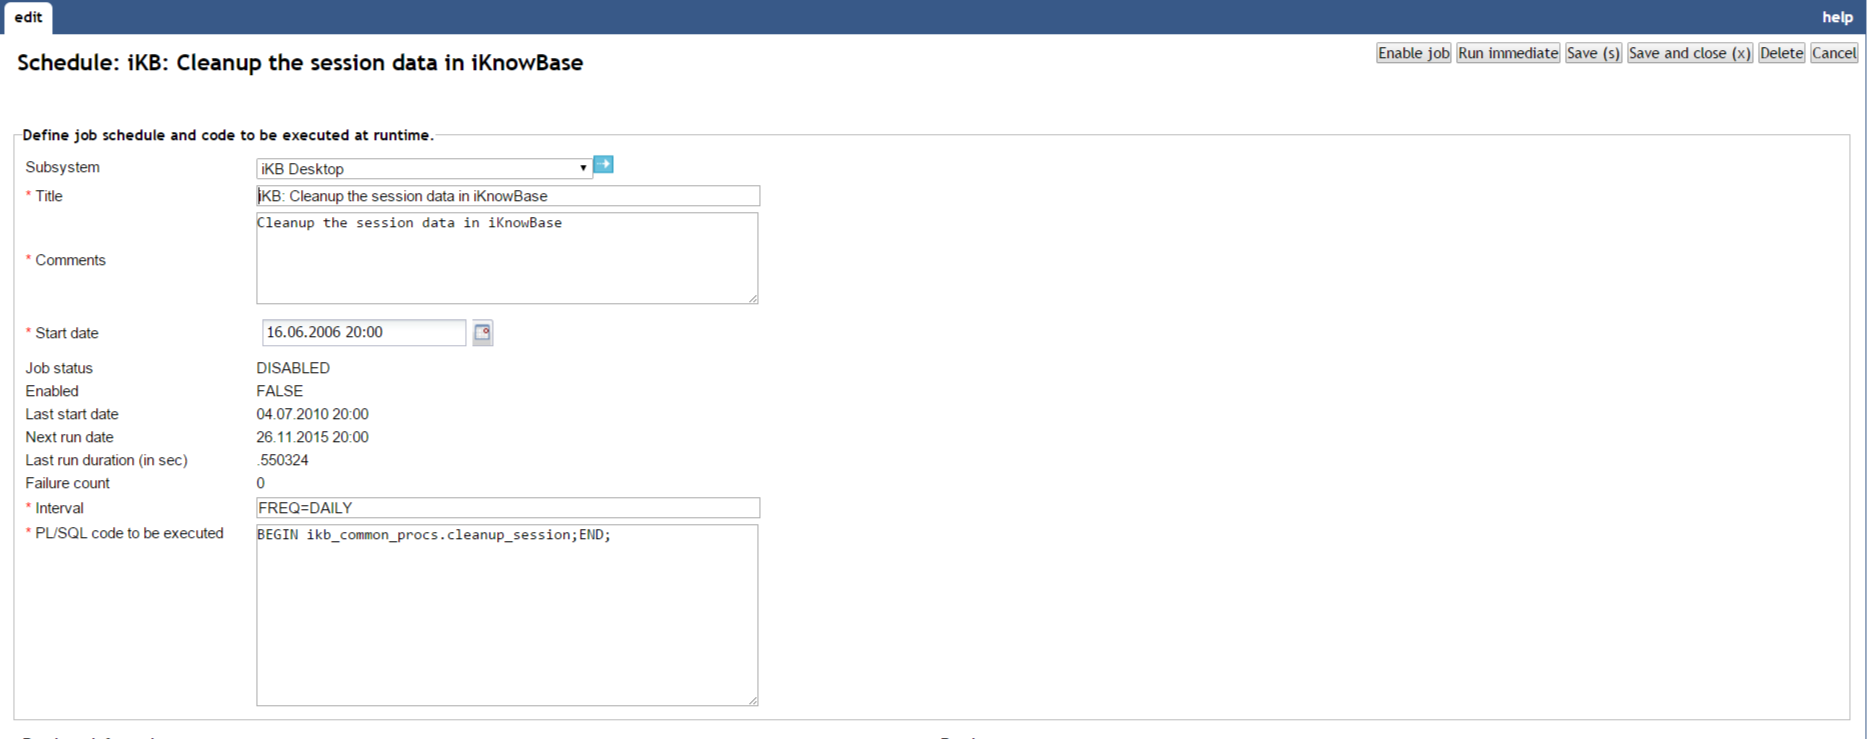
| Property | Description |
|---|---|
Subsystem |
Select the appropriate subsystem. |
Title |
Type a title for the job schedule. |
Comments |
Type a description for the job schedule. |
Start date |
Enter the first date and time that the schedule should run. Format: DD.MM.YYYY hh24.mi. |
Job status |
Displays the current job status. E.g. DISABLED, ENABLED, RUNNING |
Enabled |
Displays if the job is enabled or disabled. |
Last start date |
Displays the date and time when the schedule was last run. |
Next run date |
Displays the next run date and time for the schedule. |
Last run duration (in sec) |
Displays the number of seconds the batch job used last time it ran. |
Failure count |
Displays the number of times the batch job failed has failed. |
Interval |
Type the frequency of the job schedule, using the Oracle Database syntax. Examples: SYSDATE +1 FREQ=DAILY FREQ=WEEKLY |
PL/SQL code to be executed |
Enter PL/SQL-code to execute as per the specified interval. |
Action available |
Select action
|
You can enable or disable for all jobs (in the lists of all jobs).
30. Search Sources
A search source is the definition of a set of searchable documents, including both a form for entering the search criteria and a definition of the result output.
Search sources can apply to both regular iKnowBase documents and external data sources.
To accomplish a search feature in your iKnowBase application, perform the following:
-
Create a presentation style to be used for the search result, if you don’t already have an appropriate presentation style which can be reused.
-
Create a search source component associated with the previously created presentation style.
-
Use a Search source portlet to display the configured search source.
You can use the Build search dialog portlet together with one or more configured search sources. The Build search dialog portlet will display a search dialog to the user where he can perform a free text search using one of the associated search sources.
The Search Source is a specialized form of a Viewer, with the addition of the input search form.
30.1. Properties
This section describes the properties of a search source, as shown on the corresponding Edit pane tabs.
30.1.1. Edit Tab

| Property | Description | ||
|---|---|---|---|
Subsystem |
Select the appropriate subsystem. |
||
Name |
Type a name for this viewer. |
||
Display title |
Type a title for this viewer. This may be presented to the end-user by a Presentation Style. The title supports multiple languages. |
||
External key |
Type the appropriate external key. |
||
SQL Hint |
For advanced users only, type the appropriate SQL hint. The syntax is the name of the hint, like FIRST_ROWS. The hint will be inserted into the SQL-query; using the appropriate hint may help speed up query execution. |
||
Custom access control |
Type the name of the appropriate database procedure to use a special access control, if you want to extend the default access control.
The following signature must be used for the database procedure: PROCEDURE <package>.<procedure name> ( site_id in number, user_id in number, reference_path in varchar2, result out ); The returned result must be an SQL fragment which fits into the SQL WHERE clause generated by the Viewer. For example, the function could return or oi1.owner_id = 125 and the query would then be ... and (oi1.owner_id = <userid> or ((oi1.acl_guid is null or oi1.owner_id = 125 or oi1.acl_guid in (select v_acl.acl_guid from v_acl) ... |
||
Presentation style |
Select the Presentation style you want to use to format the output. |
||
Override styleset |
Select the Styleset you want to apply. If set, this will override the styleset defined on the Presentation style. |
||
Target for text |
Select the target page to use for link to documents with text content. |
||
Target for links |
Select the target page to use for link to documents with file or url content. |
||
Callback function |
A function used as callback from Forms when adding new documents or editing existing documents initiated from the viewer. You can use this property to avoid page redirect upon save from form. The parameter passed to the callback function is a json object with the properties action and documentId. The callback function could for example reload the search source. |
||
JS script before search |
Defines a custom javascript function. It will execute before the search is posted to the server and can be used e.g. to validate input criterias. If the function returns false, the search will not be executed. ...
<script type="text/javascript">
function myValidator()
{
var lval = $("#p_value_122").val();
if (lval == "money")
{
alert("Do not search for money");
return false;
}
return true;
}
</script>
...
|
||
Target to show_more page? |
Select the target page to use for the "show more" link. Please note that the target definition should have a parameter named p_search_id as Parameter1. |
||
Search source on the show_more page |
To reuse a single target page for multiple "show more" pages, select the search source you want to display on the target page. |
||
# records |
Type the number of rows that you want to extract at a time. The default value is 10. |
||
Start from record |
Type the row number from which you want to display the result set. The default value is 1. |
||
Max records |
Type the maximum number of documents that you want to extract. The default value is 100. |
||
Cache interval (0 is none) |
Type the time in minutes for which you want to keep content in the cache. |
||
Show total number of rows |
Select this check box to display the total number rows on the status line. |
||
Override homeplace mapping |
Select this check box to use the targets defined on this Viewer rather than the target selector mechanism. |
||
Use "Target for text" for all content types |
Select this check box to use the target defined in the Target for text property for all links to documents, disregarding the content type. |
||
Save dynamic variable |
Select this check box to use a session save on all the dynamic parameters. If these values are not in the URL, this property allows iKnowBase to use the saved values. e.g. sortinfo. If you do not save the session variables, no content appears when you enter the page without the necessary dynamic parameters specified on the portlet. |
||
Print header also with no hits |
Select this check box to display the title of the portlet if the search finds no documents. |
||
Show quicklink inside header |
Select this check box to display the quick links within the header section of the viewer. |
||
Always print quicklinks |
Select this check box to display the quick links even it mandatory attributes are not set. |
||
Print portlet decoration |
Select this check box to print the portlet decoration that surrounds the content in a portlet. |
||
Log read operation |
Uncheck if you want to avoid logging to the document statistic table. By default it will insert one row everytime a document with HTML-content is displayed. |
||
Create cacheable URLs? |
If set, all URLs to files will has a cache instruction set in the URL. e.g. /cache=timestamp |
||
HTML Filter generator |
Select this check box to build the search form using the HTML-based generator. You must enter the appropriate HTML code on the HTML form tab. If you don’t select this check box, the limited, rule based generator is used. |
||
Save search criteria |
Select this check box to save the search statistics of a user. When you select this check box, the search statistics of the user are logged in the LOG_SEARCH_VALUES table. |
||
Available as select list |
Select this check box to use the search source as a list for selection of documents or dimension values. This list may be connected to a form as a new selector of values. |
||
Dynamic attribute selector |
Select this check box to allow a user to manually add attributes to the search criteria. When this is checked, iKnowBase will display a drop down list of all searchable attributes in the search form; selecting one will add that attribute to the search form. |
30.1.2. Attributes Tab
You can choose between four types of parameters:
-
Dynamic parameter: Parameters defined as iKnowBase parameters.
-
SQL parameter: Parameters defined as SQL parameters.
-
Attribute: iKnowBase attributes, used to set constant values in the query.
-
External: Parameters defined for iKnowBase external data sources. Only available if the data source is an external datasource.
When the parameter is selected, you must save before you can set any values.
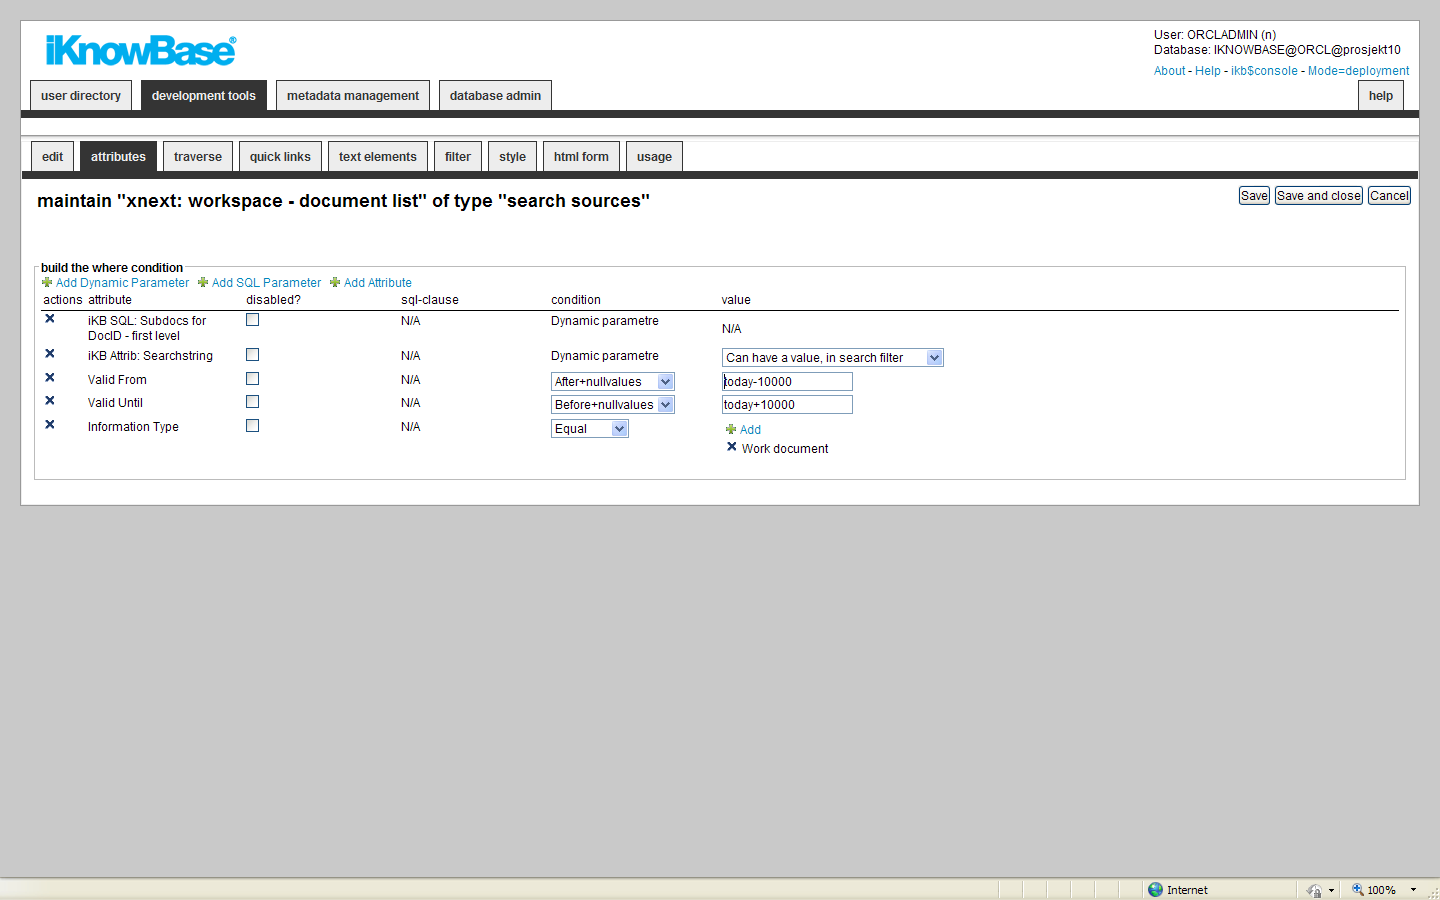
| Property | Description |
|---|---|
Actions |
Delete the parameter by clicking the icon. |
Attribute |
Displays the names of the selected attributes to use as conditions for the Search source. |
Disabled? |
You can for debugging reasons disable attributes. |
Sql Clause |
Used for performance reasons for advanced users. Will generate a SQL with either IN or EXISTS. |
Condition |
Select the appropriate conditions for the selected attributes. The conditions depend on the type of attribute. Note: You cannot select a condition for parameters. |
Value |
Select or enter the appropriate values for the selected attributes. Available options depends on the attribute/parameter type. Applicable to SQL parameters only when the parameter is defined with an attribute. |
30.1.3. Traverse Tab
The properties on the Traverse tab enable you to define a Search source with traverse features, e.g. possibilities to display subdocuments or versions of the extracted documents. Examples are discussion forums and view all versions of a document.
When running the query will automatically add a condition for selecting subdocuments for the current document.
| Property | Description |
|---|---|
Select method |
Choose how you want to traverse the document structure. You can choose between : No traversal: will not retrieve any subdocuments Traverse down by using a connect-by clause: will fetch all subdocuments for every documents retrieved. It will use the same presentation style as defined on the main viewer definition. When selected, you can enter the number of levels you want to traverse. Traverse up by using a connect-by clause: will fetch all documents above for every documents retrieved. It will use the same presentation style as defined on the main viewer definition. Suitable for viewers showing only one document where you want to see the top levels. When selected, you can enter the number of levels you want to traverse. Traverse by using search sources: For each document it will run a new viewer. This is not as efficient (performance) as the above methods, but gives you the flexibility of defining separate conditions and presentation style for each level. |
Level |
Type the level for the extraction source. Level 1 specifies first level, but you may specify extraction sources that traverse further on level 2 documents, etc. |
Select source |
Select the appropriate Search source as the base for the extraction of subdocuments. You can vary the style and layout on different levels. |
Expand Collapse |
To enable the expand/collapse functionality for the subdocuments, click Yes. To display the subdocuments directly, click No. |
Icon Expand |
Enter the reference to the icon to be used to expand the list of subdocuments. Note: You must click Yes in the Expand Collapse list. |
Icon Collapse |
Enter the reference to the icon to be used to collapse the list of subdocuments. Note: You must click Yes in the Expand Collapse list. |
30.1.4. Quick links Tab
The properties on the Quick links tab enable you to generate links to create new documents in the Viewer. The link can point to a quick link, iKnowBase Form or Task Wizard. In order to use the Quick link to create a subdocument, you should define the Quick link to take a document ID as a dynamic parameter, which may be used to set the parent document for the document to be created.
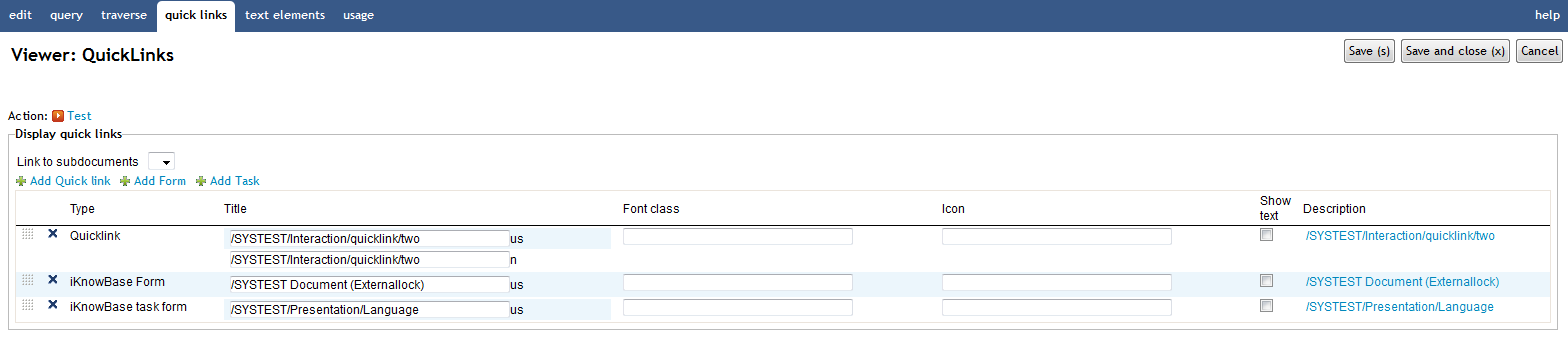
| Property | Description |
|---|---|
Link to subdocuments |
Select the appropriate dynamic parameter, must be a document ID, to pass to the Quick link in order to be able to create a subdocument. |
Add quicklink |
The link opens a window with all available quicklinks. Select one or more. |
Add Form |
The link opens a window with all available iKnowBase Forms. Select one or more. |
Add Task |
The link opens a window with all available task wizards. Select one or more. |
Title |
Type the title that to use for the Quick link. If multiple languages are supported in the solution, each language displays a box, where you can type the title that appears. When you click in the Title box, the language box appears. The language code is placed behind the box. |
Font class |
Type the font class to use for the Quick link text. |
Icon |
Type the path of the image to use for the quick link. |
Show text |
Select this check box to display both text and image. |
Sort |
Type the sorting IDs to sort the quick links that you select. |
Description |
Displays the description of each quick link. |
30.1.5. Text elements Tab
The properties on this tab enable you to define texts to be used in the component. The texts are available as FreeMarker model objects from the Template used for the Page. Multiple languages are supported.
| Property | Description |
|---|---|
Id |
Type an identifier for the label. |
Text |
Type the text labels that you want to use in the page. If multiple languages are supported in the solution, each language displays a box, in which you can type the display form name. When you place the cursor in the Text field, the language box appears. The language code is placed behind the field. |
30.1.6. Filter tab
You can use the properties on the Filter tab to define how to present the various dynamic parameters.
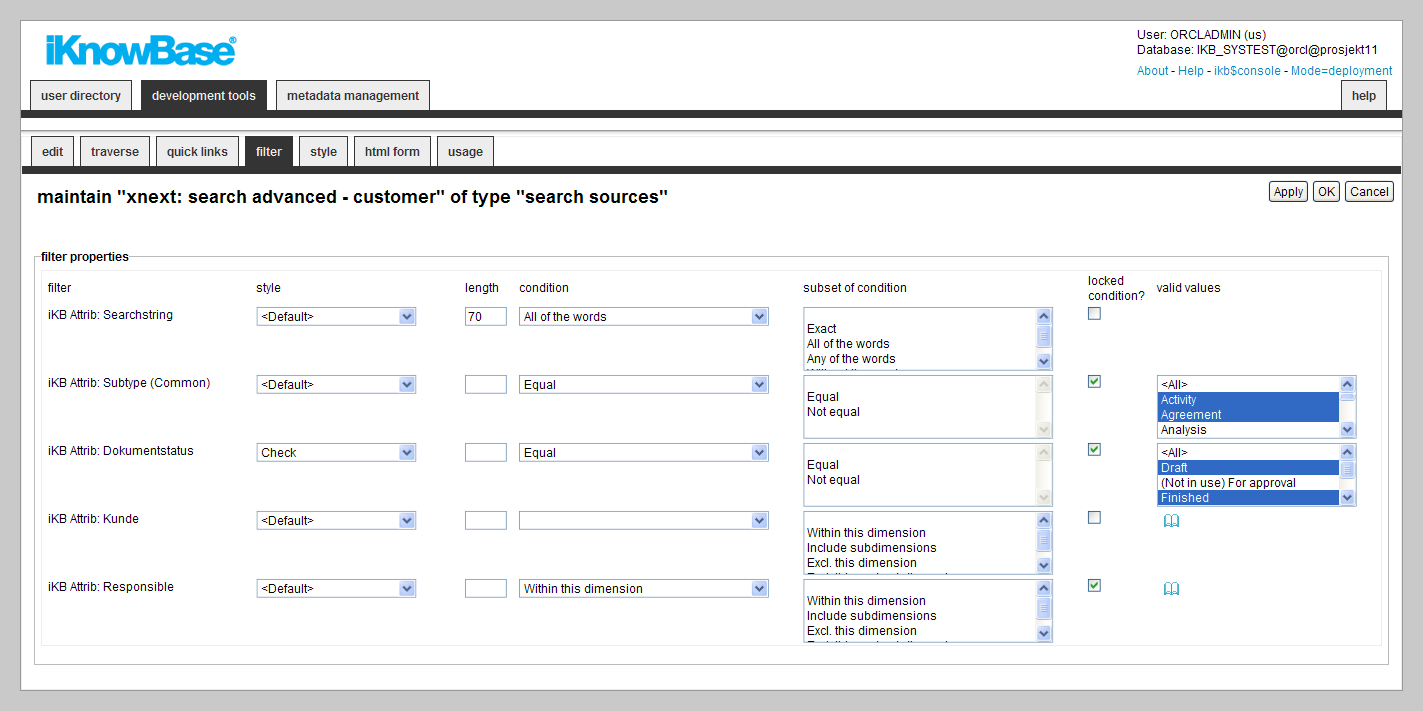
| Property | Description | ||
|---|---|---|---|
Filter |
Displays the selected attributes that makes up the search criteria for the search source. |
||
Style |
Select the appropriate styles for the input fields of the search criteria. Available options for lists of values are radio buttons, check boxes, select box, multiselect box, or |
||
Length |
Type the lengths of the input fields of the search criteria. |
||
Condition |
Select the default conditions for the search criteria. |
||
Subset of condition |
Select the conditions which will be available for selection in the search form. If none is selected, all will be available. |
||
Locked condition? |
Select the check box to restrict the user from selecting a condition for the given search criterion in the search form. In this case the value given in the Condition will be used.
|
||
Valid values |
Select the values which will be available for selection in the search form. Applicable to value list and dimension attributes. |
30.1.7. Style tab
The properties on the Style tab enables you to define labels and styles for the attributes in the search form.
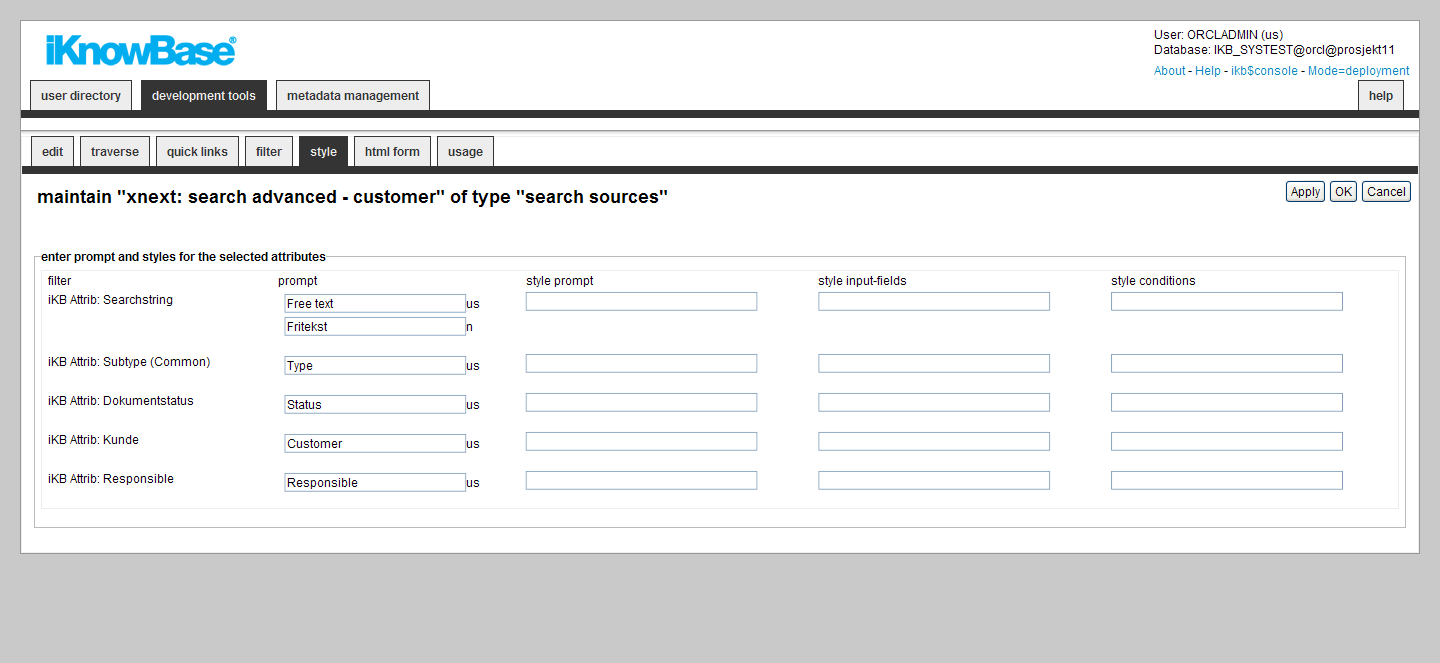
| Property | Description |
|---|---|
Prompt |
Type the label you want to use for the dropdown used to manual add attributes to the search criteria. Available when the Dynamic attribute selector property is selected. If multiple languages are supported in the solution, each language displays a box, in which you can type the prompt. The language code is placed behind the field. |
Style prompt |
Enter the style class to use for the label for the dropdown used to manual add attributes to the search criteria. Available when the Dynamic attribute selector property is selected. |
Style dropdown |
Enter the style class to use for the dropdown used to manual add attributes to the search criteria. Available when the Dynamic attribute selector property is selected. |
Style prompt |
Enter the style class to use for the label for the manually added search criterion. Available when the Dynamic attribute selector property is selected. |
Style input-fields |
Enter the style class to use for the value input field for the manually added search criterion. Available when the Dynamic attribute selector property is selected. |
Style conditions |
Enter the style class to use for the condition field for the manually added search criterion. Available when the Dynamic attribute selector property is selected. Enter prompt and styles for the selected attributes |
Filter |
Displays the names of the selected filter attributes. |
Prompt |
Type the labels for the respective filter attributes. If multiple languages are supported in the solution, each language displays a box, in which you can type the prompt. When you place the cursor in the Prompt field, the language box appears. The language code is placed behind the field. |
Style prompt |
Enter the style classes to use for the labels of the respective filter attributes. |
Style input-fields |
Enter the style classes to use for value input fields of the respective filter attributes. |
Style conditions |
Enter the style classes to use for the condition fields of the respective filter attributes. |
30.1.8. HTML Form tab
When using a search source, you typically create a form where the user can enter the desired search criteria.
iKnowBase enables you to design and create the search form layout using your own HTML markup, rather than using the automatically generated search form. The notation in the setup is based on HTML with several extensions to generate dynamic fields for iKnowBase, pretty much the same as for regular Forms.
You can write the HTML template code in the HTML form tab.
|
Note
|
If you update the selected attributes in the search form, you must also update the HTML template to reflect the changes. You can generate a new template or manually update the template, and insert IKB tags for new attributes or delete old tags. |
There are two action buttons available:
-
Create new template: Click this button to generate a default template, with placeholders for the attributes in the search source. You may then change this template as needed. If you do in fact not need to change this template, then a rule-based search form is generally a better choice.
-
Update: Click this button to update your template with new attributes. iKnowBase will scan the existing template, and find attributes that are missing. Then, it will generate default template code to edit these attributes, and add to the bottom of the template. Move this code around as required.
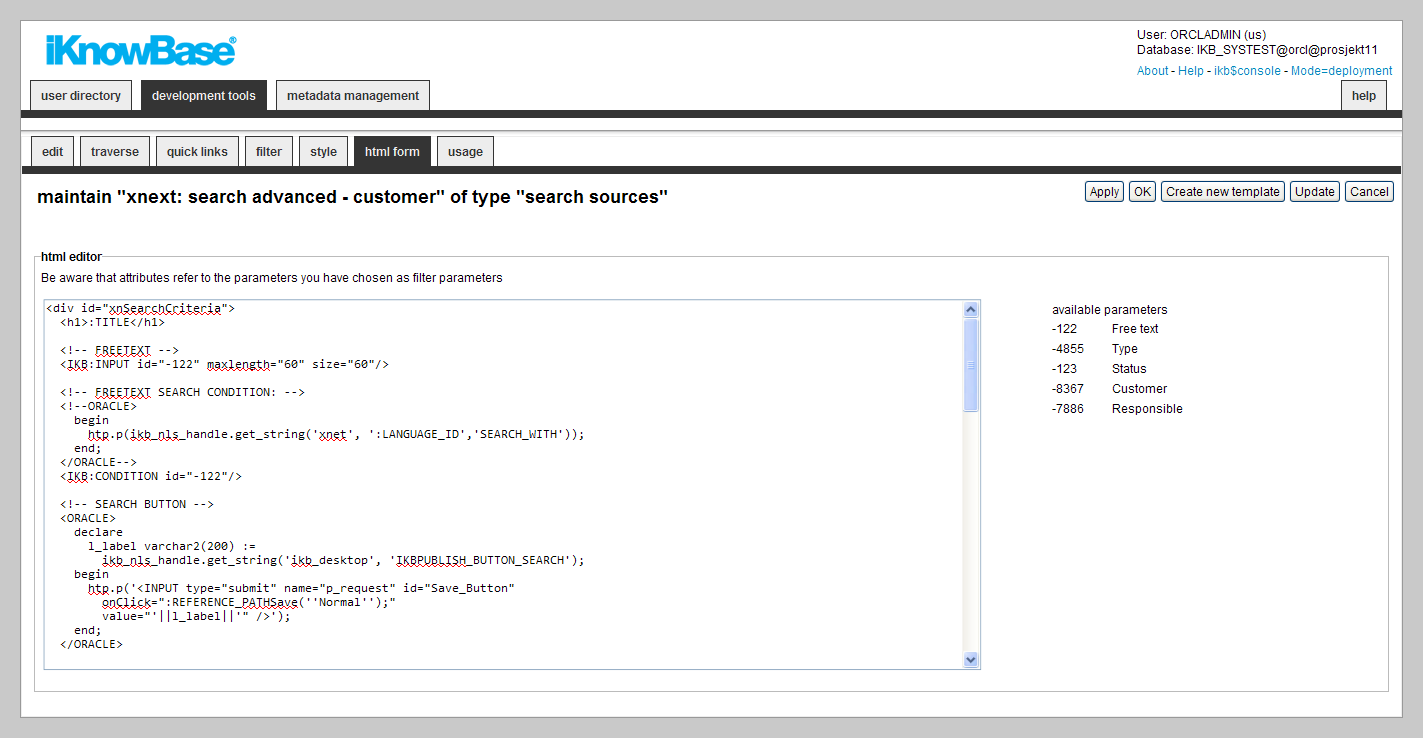
| Property | Description | ||
|---|---|---|---|
HTML code |
Type the HTML template code.
|
||
Available parameters |
A list of available parameters and their IDs available for use in the HTML template code. |
30.1.9. Picklist Tab
If you define the search source to be available as a select list, property Available as select list on the Edit tab, you get access to the Picklist Tab.
Pick lists are used to select one or more values, for example document ID or dimension ID, from a list of iKnowBase documents, and then return those values back to a given dialogue, such as a TinyMCE- or other attribute field in a Form.
When the search source is used as a pick list, the extracted documents are displayed together with check boxes or radio buttons, which enables the end user to select one or more documents. The specified values for the selected documents are returned to the calling dialogue. By default, radio buttons are generated if the calling dialogue only accepts one return value, and check boxes are generated otherwise.
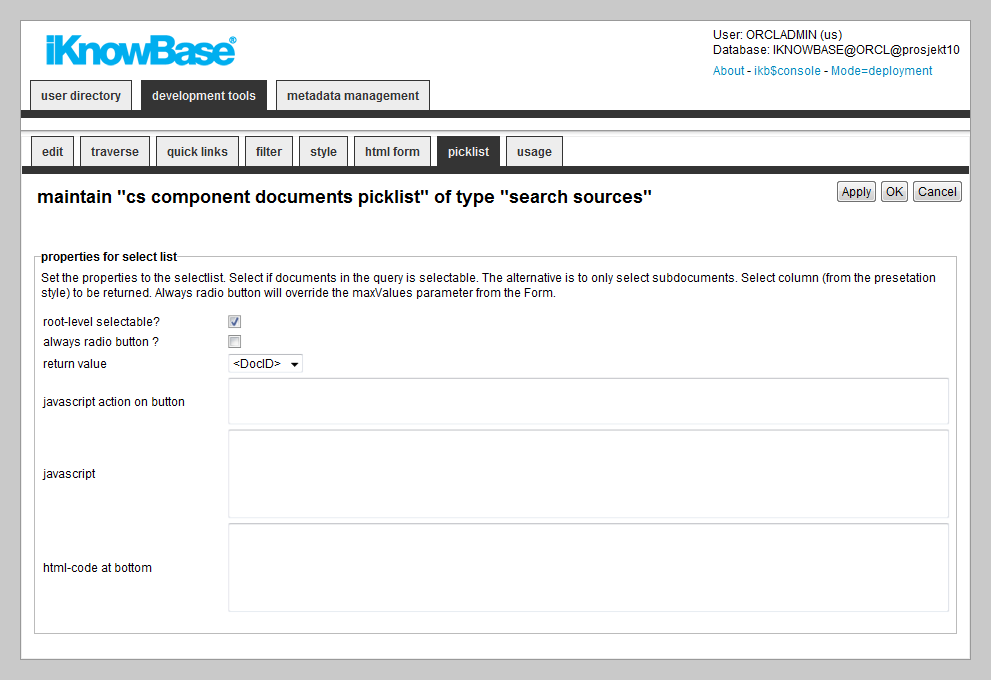
| Property | Description |
|---|---|
Root-level selectable? |
Select this checkbox to make documents at the upper most level selectable. Applicable if you have defined the search source with traverse features, e.g. to extract and display subdocuments on one or more sublevels. |
Always radio button? |
Select this check box to always display a radio button, even though the calling dialogue accepts more than one return value. |
Return value |
Select which value to return; typically document ID or dimension ID. Available options are decided by the Presentation style associated with the Search source. The selection must correspond to the value expected from the calling dialogue. If the calling dialogue is a related document or image attribute on a form, a document ID must be returned. If the calling dialogue is a dimension attribute on a form, a dimension ID must be returned. |
JavaScript action button |
Type the JavaScript code that runs when the end user clicks the radio button in the pick list. Rather than typing your own code, you can use two pre-defined actions:
|
JavaScript |
Type your own JavaScript code if needed, could for example be run using the button. |
HTML-code at bottom |
Enter the HTML code to be generated at the end of the page, after the extracted data. Examples can be a button which returns the selected values. |
Using the StartReturnFromPickList() function
As mentioned above, you can use the StartReturnFromPickList() function to return from a picklist. This works as follows:
-
Make sure to enter the value StartReturnFromPickList() for the javascript action button.
-
Next, make sure that the picklist is opened in a new window, and that values are passed for the URL parameters cbFunction and cbClosure.
-
When the user selects an item, the predefined function StartReturnFromPickList() is called. This function, in turn, calls the built-in function ReturnFromPickList(), passing the values for cbFunction and cbClosure.
-
ReturnFromPickList will fetch the selected item’s information (id and label), and call the function named in cbFunction, in the window that originally opened the picklist.
31. Solr Configuration
When using the Solr search engine, we need to define what kind of information we should index for each document. This screen allows you to add fine grained definitions for each attribute you want to index and also how it should be represented in Solr.
In Solr we differ between three main types of storage :
-
Store: The value is stored and can be retrieved by the client.
-
Search: The value will be searchable.
-
Index: The value will be indexed in its own index and can be used as a filter (e.g. facet).
These three types can be combinded.
In addition it is also possible for most attributes to index the ident (either the id or the GUID) for the value and the Path for dimensions. The SOLR representations for these fields will be attributeName__ident, attributeName__guid or attributeName__path.
In many implementations the labels are in more than one language and in those cases all labels with NLS support will be populated into separate fields in Solr. By default, Solr is set up to support Norwegian and English. It is also possible to add extra value to the indexer by using custom written PL/SQL functions. They can be triggered document-based or for each attribute.
As a rule, you should have only ONE Solr configuration for each search engine and share it between all Solr events populating data to the index.
31.1. Properties
This section describes the properties of an Solr configuration, as shown on the corresponding Edit pane tab.
31.1.1. Edit tab
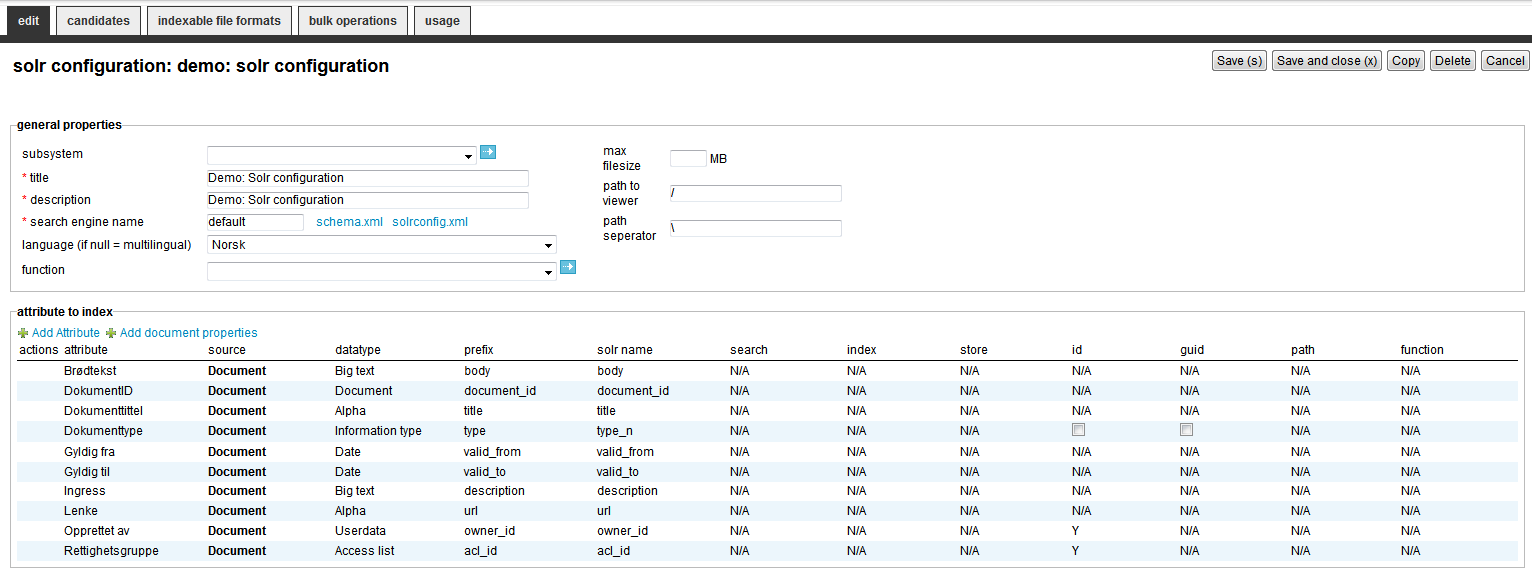
| Property | Description |
|---|---|
Subsystem |
Select the appropriate subsystem. |
Title |
Type a name for the Solr Configuraiton. |
Description |
Type a description for Solr Configuration. |
Search Engine |
When you index data to more than one solr instance, you need to define seperate names for the destination. These are logical names, but refer to Installation properties where you define index- and search URLs to the instances. If you define a new search name, Installation properties will be populated by dummy data. |
Language |
Select a language if you have a single language environment and the index should only handle that specific language. Set the value to blank if you want to index the values in all languages defined in iKnowBase. |
Function |
A custom function is used to execute your own built-in function to add / remove content before it is sent to the indexer service. (e.g. You want to create a Solr field for sorting where you select an attribute value if it exists, else you use the document timestamp). The function is executed after the document data is populated. The signature is defined in the Database funtion-section. To add an extra field for indexing, it must be added to the object type ct_solr_rows like this: p_solr_data.EXTEND;
p_solr_data (p_solr_data.COUNT) :=
ot_solr_row (
'<a name>',
'<type>', -- Value can be VALUE_CHAR/DATE/NUMBER/XML/BLOB
<char-value>,
<number-value>,
<date-value>,
<xml-value>,
<blob-value>,
<mimetype>);
|
Max filesize |
Defines maximum size of a binary file to be indexed. Very large files can be time consuming to index and should be avoided. |
Path to viewer |
Defines where and how the link should be generated when indexed. Default values is retrieved from domain preferences, but can be overridden here. |
Path seperator |
Defines the seperator used when building path elements from dimensions. |
Attribute to index |
You can choose between two types of attributes:
|
Actions |
Delete the parameter by clicking the icon. Mandatory attributes are not possible to delete. |
Attribute |
Name of the attribute / property. |
Source |
Document means it’s a document property, Attribute means its a regular attribute on the document. |
Datatype |
Display the datatype. |
Prefix |
First part of the name used for the attribute in Solr. For attribute values the full name is generated when you select how to store/index/search the value in Solr. Some document properties are locked and will be named by the same value as the prefix. |
Solr Name |
The full name in Solr for the attribute. |
Search |
Select (if available) if you want the value to be searchable. |
Index |
Select (if available) if you want the value to be indexed. |
Store |
Select (if available) if you want the value to be stored. |
ID |
Select (if available) if you want to index and store the Ident of the value. The Solr name will be |
GUID |
Select (if available) if you want to index and store the GUID of the value. The Solr name will be |
Path |
Select (if available) if you want to store the path of the value. The Solr name will be |
Function |
A custom function is used to execute your own built-in function to add / remove content before it is sent to the indexer service. The signature is defined in the Database funtion-section. This function is called if the attribute exists. |
31.1.2. Candidates
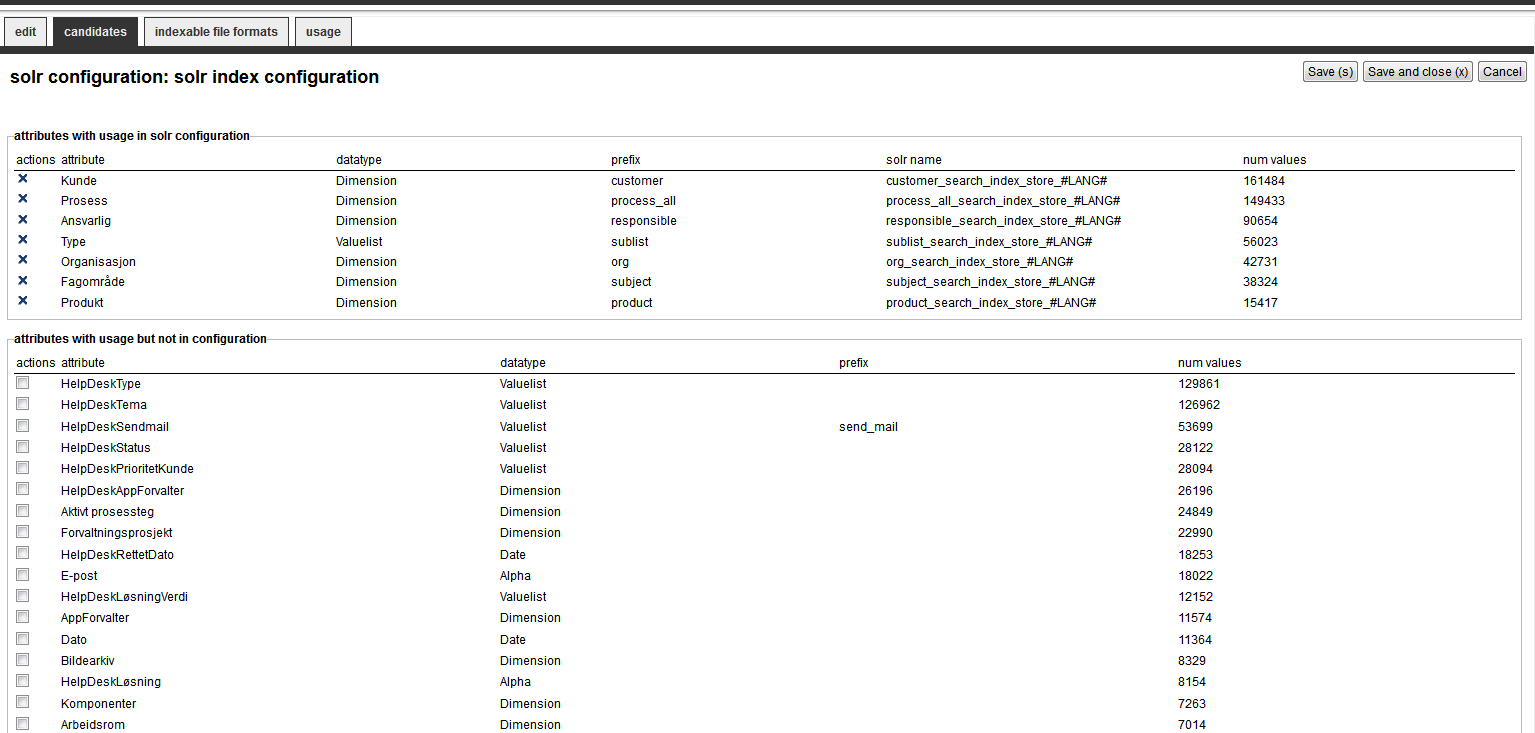
| Property | Description |
|---|---|
Attributes with usage in Solr Configuration |
Displays all selected attributes and how many times they are used by documents. This might indicate if the attribute is a useful indexed attribute. The only available operation you can do is to delete the attribute from the configuration. |
Attributes with usage but not in Solr Configuration |
Displays all attributes not in the configuration and how many times they are used by documents. This might indicate if the attribute is a useful indexed attribute. The only available operation you can do is to add the attribute to the configuration. |
31.1.3. Indexable file formats
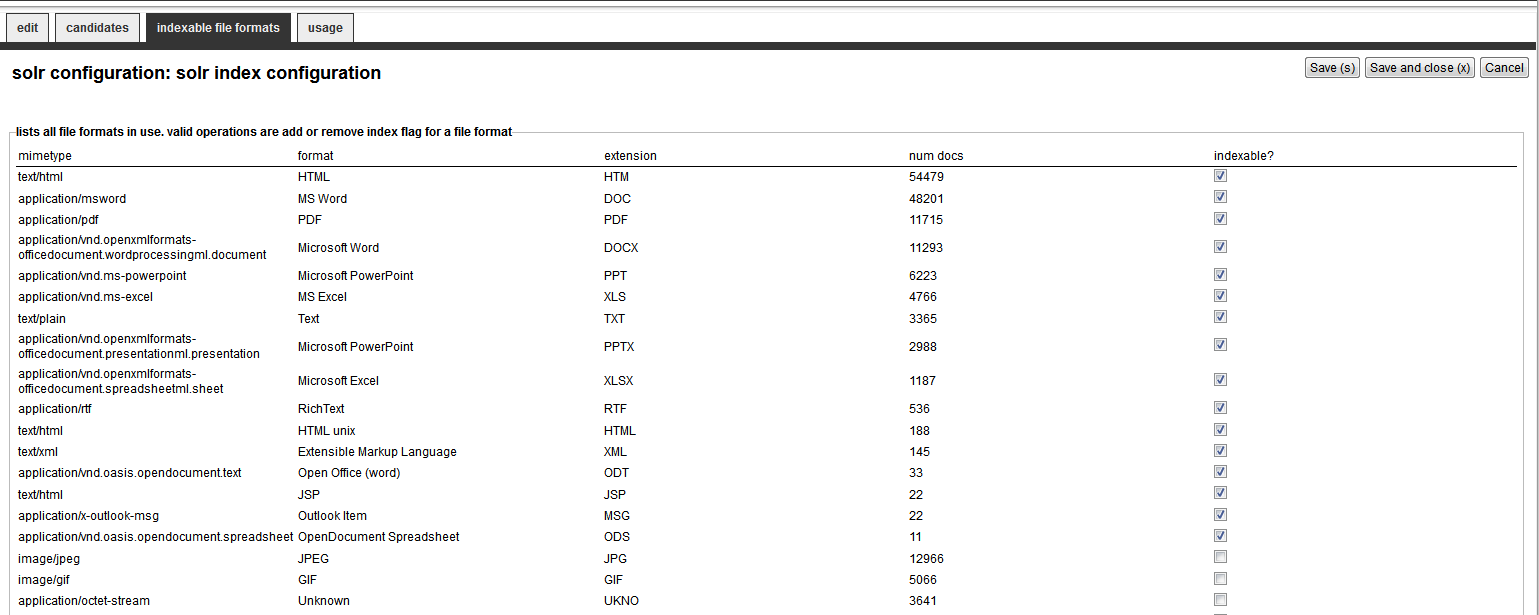
| Property | Description |
|---|---|
File formats supported in Solr Configuration |
Displays all used file formats in iKnowBase. You can decide if files with this format should be indexed or not. |
31.1.4. Bulk operations
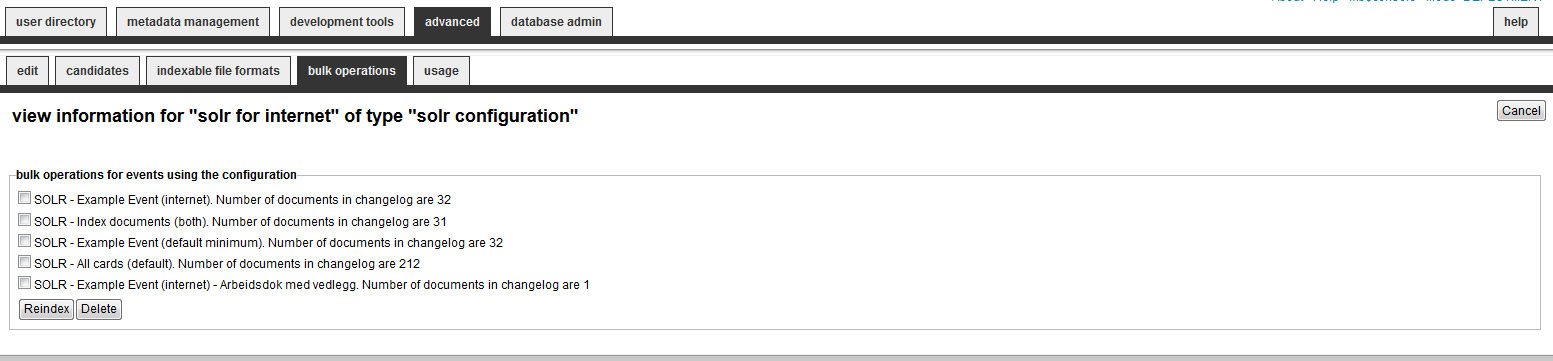
| Property | Description |
|---|---|
Select events for bulk operation |
Displays all events using the current configuration. You can easily reindex all documents for all events using the configuration, or delete all documents from solr by checking the boxes and then press the desired button. |
Cleanup misconfigured changelog entries |
The SOLR changelog might have entries originally created by a event or a solr configuration. If the event definition / solr configuration is deleted or changed, the changelog can 'come out of sync'. Use cleanup to remove entries without a correct event or solr configuration. The option is only available if such misconfiguration exists. |
32. Stylesets
Stylesets are reusable fragments of HTML-markup that can be used to "decorate" certain other components, in order to customize the HTML-markup from them. In general, stylesets are used with components that do not allow template-based output.
There are three different styleset types:
-
Style for iKnowBase: You can use this type of styleset for Form, Viewer and Presentation style components, as well as Build search dialog portlets.
-
Style for menus: You can use this type of styleset for the menu portlets Advanced menu and Advanced iKnowBase menu.
32.1. Styleset iKnowBase Properties
This section describes the properties of an iKnowBase style set, as shown on the corresponding Edit pane.

| Property | Description |
|---|---|
Subsystem |
Select the appropriate subsystem. |
Description |
Type a description for this style set. |
Header |
Type the HTML header you want to render at the top of the style set, before rendering content. You may use substitution tags to insert context-specific content into the header. |
Footer |
Type the HTML footer you want to render at the end of the style set, after rendering content. You may use substitution tags to insert context-specific content into the footer. |
Table tags |
Type the attributes you want rendered for the iKnowBase will render the value inside the tag, like this: <table HERECOMESTHECONTENT> |
HTML-tags for rows |
Type the attributes you want rendered for the iKnowBase will render the value inside the tag, like this: <tr HERECOMESTHECONTENT> |
Tags for Select-list in search |
Type the attributes you want rendered for the iKnowBase will render the value inside the tag, like this: <select HERECOMESTHECONTENT> Applicable for Build search dialog portlets. |
Alternative row |
Type the attributes you want rendered for the iKnowBase will render the value inside the tag, like this: <tr HERECOMESTHECONTENT> |
Row tag to labels |
Type the attributes you want rendered for the iKnowBase will render the value inside the tag, like this: <tr HERECOMESTHECONTENT> |
Tags on input-field in search dialog |
Type the attributes you want rendered for the iKnowBase will render the value inside the tag, like this: <select HERECOMESTHECONTENT> |
Table tags for status line |
Type the attributes you want rendered for the iKnowBase will render the value inside the tag, like this: <table HERECOMESTHECONTENT> |
HTML-Tags for the text on the status line |
Type the tags you want rendered for the text rendered in the navigation controls (first/next), if enabled. iKnowBase will render the value inside the tag. |
Font class for buttons |
Type the font class you want rendered for any buttons rendered. |
32.2. Styleset Menu Properties
This section describes the properties of an menu style set, as shown on the corresponding Edit pane.
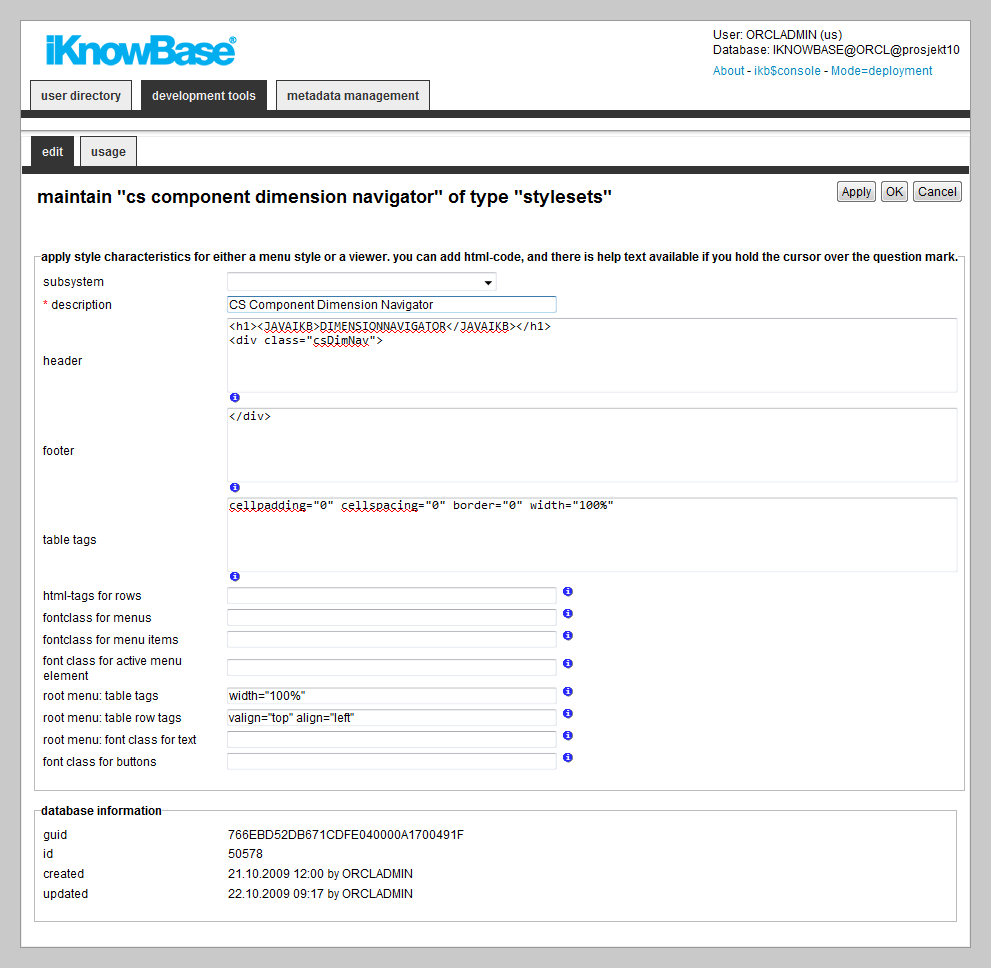
| Property | Description |
|---|---|
Subsystem |
Select the appropriate subsystem. |
Description |
Type a description for this style set. |
Header |
Type the HTML header you want to render at the top of the style set, before rendering content. You may use substitution tags to insert context-specific content into the header. |
Footer |
Type the HTML footer you want to render at the end of the styleset, after rendering content. You may use substitution tags to insert context-specific content into the footer. |
Table tags |
Type the attributes you want rendered for the iKnowBase will render the value inside the tag, like this: <table HERECOMESTHECONTENT> |
HTML-tags for rows |
Type the attributes you want rendered for the iKnowBase will render the value inside the tag, like this: <tr HERECOMESTHECONTENT> |
Font class for menus |
Type a font class for menu items that have sub menus. |
Font class for menu items |
Type a font class for menu items that do not have sub menus. |
Font class for active menu element |
Type a font class for active menu elements. |
Root menu: Table tags |
Type the appropriate HTML tags. If the root menu appears, these tags are inserted in the |
Root menu: Table row tags |
Type the appropriate HTML tags. These tags are inserted in the |
Root menu: Font class for text |
Type a font class that is for the text of the root menu. |
Font class for buttons |
Type the font class for any buttons rendered. |
Guid |
Displays a globally unique identifier number for this component. This property appears after you save a component. You cannot update the information of this property. |
Id |
Displays a unique identifier number for this component. This property appears after you save a component. You cannot update the information of this property. |
Created |
Displays when the component was created and by whom it was created. |
Updated |
Displays when the component was last updated and by whom it was updated. |
32.3. Substitution Tags
In the HTML fields (header and footer), you can use substitution tags insert context-specific content.
| Property | Description |
|---|---|
#TITLE# or ${viewer.style.portletTitle} |
You can use this tag to display the portlet name inside the header text. |
:LANGUAGE_ID or ${viewer.logic.languageId} |
If the NLS-supported text is also entered in the HTML code, you can use this tag. |
${viewer.param.referencepath} |
You can use this tag to display the reference path of the portlet instance in the header text. |
#SHOW_MORE# OR ${viewer.navigation.moreLink} |
If you want to create a link to a new search source, you can use this tag. You must set up a search source and a target page in the viewer. You must build the a-tag. <a #SHOW_MORE#>Show more</a> |
You can also use <ORACLE> tags to run PL/SQL commands inside the text.
For example:
<oracle>
BEGIN
Htp.p(Ikb_nls_string.get_string('<objectID>',':LANGAUGE_ID','<StringID>');
END;
<oracle>
33. Subsystem
Subsystems enable you to divide metadata into different areas to get an overview of where the metadata is used. For example, you can create a Subsystem for testing or a Subsystem for the intranet. When a new metadata is created, such as a Form, you can select the Subsystem that this Form belongs to.
33.1. Properties
This section describes the properties of a subsystem, as shown on the corresponding Edit pane.

| Property | Description |
|---|---|
Name |
Type a name for the subsystem. |
Description |
Type a description for the subsystem. |
External key |
Type an external key for the subsystem. |
Access |
Select the appropriate access control list. This field specifies who can update, delete, or add metadata associated with this subsystem. |
Hide |
Hides the elements tagged with this subsystem, to avoid accidental editing. |
34. Targets
A target is a generic concept that is used to specify destinations for links and the content information to be displayed in the destination. Web-based applications use URLs to specify the content information and the location of the information. With iKnowBase, the task of generating context-based URL is abstracted into easy-to-use targets. You can view content information as is or add parameters that enable you to specify or filter the content that you want to display on the destination page.
iKnowBase enables you to create four types of targets:
-
Popup targets: A popup target opens the given link in a new window. Used where you want to show the link in another window than the base window. For this target type you can define height and width of the new window.
-
Page targets: A page target opens the given target destination and passes the specified parameters. For this target type you must specify the destination, which could be of type iKnowBase page or URL, and which parameters to pass.
-
Parameter targets: A parameter target opens the given link and passes the specified parameters. For this target type you must specify which parameters to pass.
-
Template targets: A template target runs a template, and returns the output to the user. A template target corresponds roughly to a Java servlet or a Groovy Groovlet.
You can use parameters with Page targets and Parameter targets. All parameters are transmitted as URL parameters, and might be used by the portlets and components on the destination page. The following parameter types are available for targets:
-
URL parameter: Use this parameter type to transfer a value from a URL parameter on the currently rendered page to a URL parameter on the destination page. For example, if the current page has the URL `http://www.example.com?mainmenu=value`, and you want to pass the
mainmenu=valueparameter to a new page, then you must define a URL parameter with them same name as the name of the parameter in the URL of the current page, e.g. mainmenu. -
IKB-URL parameter: Use this parameter type to transfer a value from an iKnowBase Parameter on the currently rendered page to an iKnowBase Parameter on the destination page. This removes the need to understand URL parameter naming.
-
Function: Use this parameter type to execute a PL/SQL database function, and pass the return value as a parameter to the destination page. For example, if you want to send today’s date as a parameter to a page, you must create a Function parameter for the target. Specify a name for the parameter, and choose the database function that generates the proper value. The function will be executed, and the return value of the function will be passed on the URL which will look something like this: `http://www.example.com?<paramName>=01012004`. It is undefined whether the function is executed when you click the page, or when the source page is first rendered.
-
Value from link: Use this parameter to send a dynamic value from the link to a named parameter. This is typically implemented in the database layer where you build the URL programatically.
-
Constant: Use this parameter when the value that is being sent is constant.
-
iKnowBase parameter: Use this parameter to send a dynamic value to an iKnowBase parameter on the target page. This is typically implemented in the database layer where you build the URL programatically.
34.1. Properties
This section describes the properties of a target, as shown on the corresponding Edit pane.
The Parameters region on the Edit pane displays for Page targets and Parameter targets.
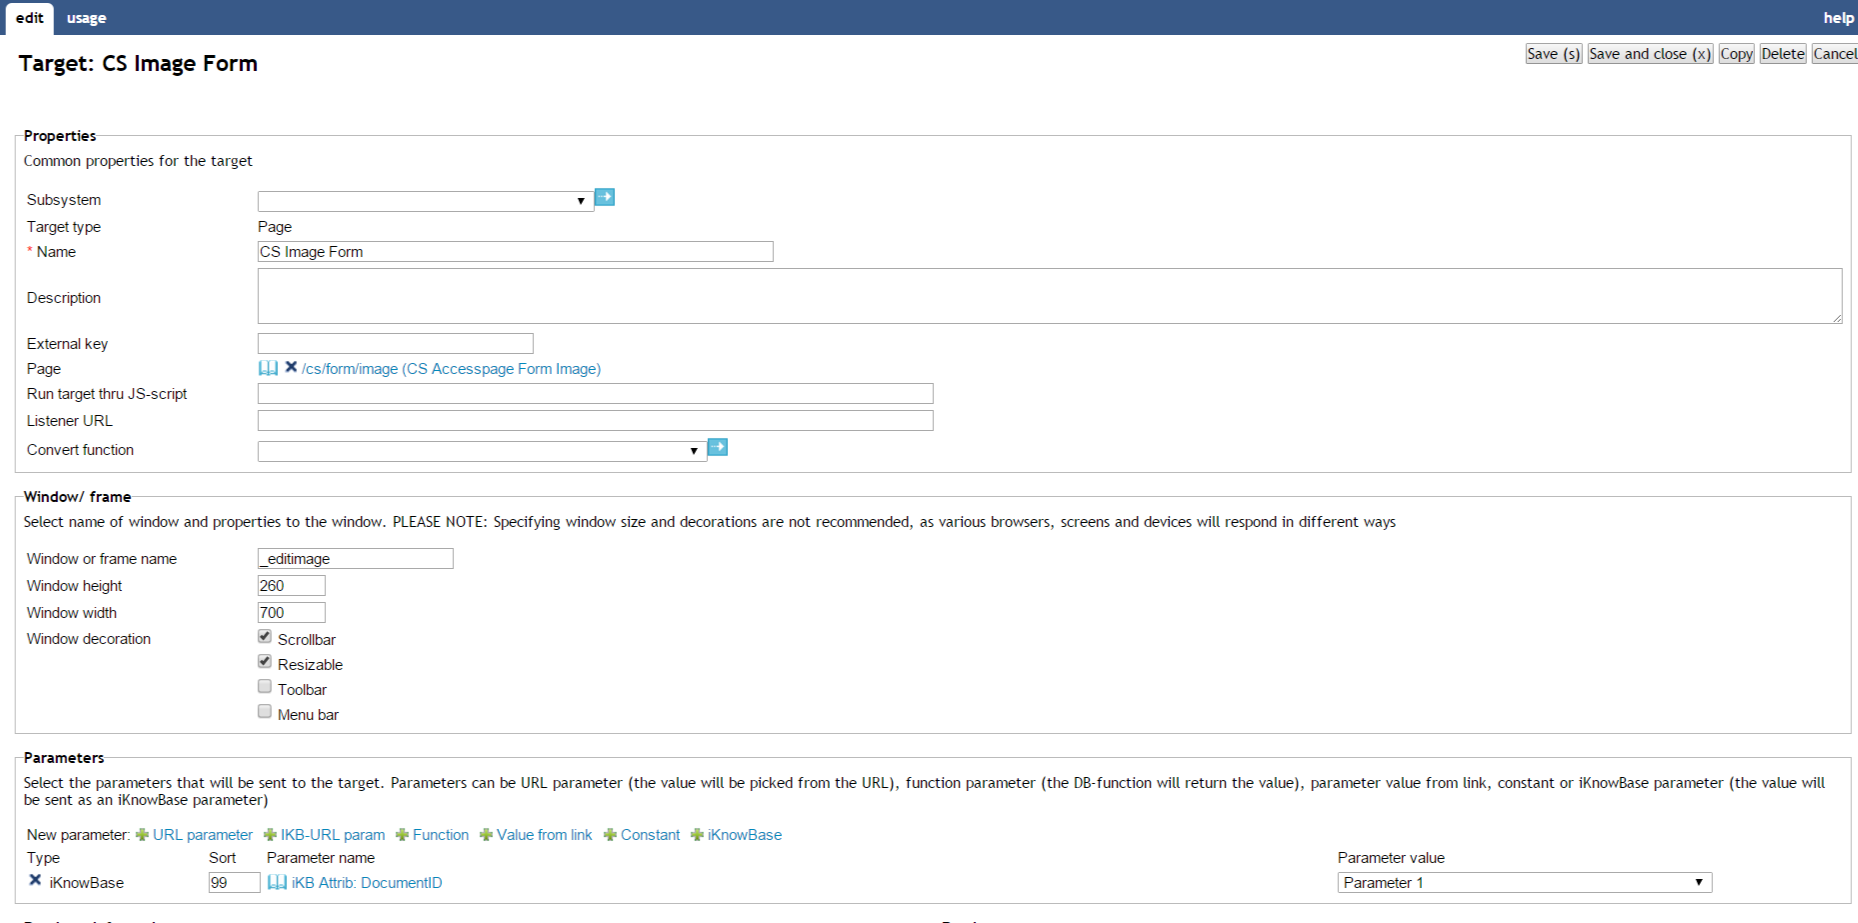
| Property | Description |
|---|---|
Subsystem |
Select the appropriate subsystem. |
Target type |
Displays the target type that you select. |
Name |
Type a name for this target. |
Description |
Type a description for this target. |
External key |
Type the appropriate external key. This key is an alternative key for the target page, and can be used to call a target page without using the target ID. |
Select target |
Select the appropriate target type and destination.
|
Run target thru JS-script |
You can define a target where the URL built for the target is used as an input to a javascript instead of navigating directly to the URL. The code generated will look like this :
|
Listener Url |
Define a listener URL if you want to generate more readable URLs. By default all URLs will be generated where the parameters end up at the end like this: /url?param=value1¶m2=value2. A Listener URL can take the parameters and place them with understandable values inside the URLs instead. You can either use one asterisk ( Examples: /mypage/*/* Two fragments can be placed in the URL /mypage/**/* Two fragments can be placed in the URL, the first can contain "/" You may also use URI Templates, which lets you map parts of the URL to named parameters. Note that URI Templates will never be used for URL generation, only for URL parsing. This means that URI Templates are most useful with targets that you activate by URL (for example from a client side script), and not so much when the target is activated automatically (by selection in e.g. a Menu or Dimension viewer). Examples: /mytarget/{from}/{to} The url /mytarget/OSL/CPH corresponds to /mytarget?from=OSL&to=CPH
|
Convert function |
When defining a listener URL you need a custom function to build and parse the URL. The function will on BUILD get all parameter values for the target defined as fragments. The custom code must define how the value should appear in the URL. (e.g. a document ID should be presented as |
Template set (only for template targets) |
Please see the Template Set section for more information. |
Window or frame name |
Type the name of the web browser window or iframe where you want to open the target. Use "_blank" to always get a new window. PLEASE NOTE: Specifying window size and decorations are not recommended, as various browsers, screens and devices will respond in different way. The frame name is rendered into the target-attribute of the HTML |
Scrollbar |
Select this check box to display a scroll bar for the new window. This field is applicable only to the Popup target type. |
Resizable |
Select this check box to enable a user to resize the window. This field is applicable only to the Popup target type. |
Toolbar |
Select this check box to display the Windows Explorer toolbar. This field is applicable only to the Popup target type. |
Menu bar |
Select this check box to display the Windows Explorer menu bar. This field is applicable only to the Popup target type. |
Width |
Type the width of the window in pixels. This field is applicable only to the Popup target type. |
Height |
Type the height of the window in pixels. This field is applicable only to the Popup target type. |
Type |
Displays a list of parameters associated with this target. To add a new parameter, click on the new parameter icon of the appropriate type. See the introduction to this chapter for a description of the available parameter types. To remove a parameter, click on the respective remove icon. |
Sort |
Type the appropriate sort key, if you want the parameters in a specific order. |
Parameter name |
|
Value |
|
FragmentID |
Used where a listener url is defined. The fragmentID correspond to the placement of the asterics (*) in the listener URL. If you have two * in the listener URL you should also have two fragments with id 1 and 2. |
35. Task Wizard
Use the task wizard to design sequences of input steps to create a single iKnowBase information object (document). Rather than using a single form, this enables more intuitive user interfaces.
The task wizard will act as a supervisor to perform a task. The component will handle the navigation between the different components and storage between each step in the navigation. The Task wizard is document-oriented, e.g. information about the task wizard and the active step within it is saved to one document (information object). This means that each step of the task wizard must have actions that update this document.
To configure a task wizard, you must define the forms to be used in the task wizard. You also need to define a default Target to be used if no target is set on the individual steps of the task wizard, and a Form to be used to edit the information object after the user has finished all the steps in the task wizard.
In order to use a task wizard, you must first create a Page with a Process arrow in task wizard portlet, which will display the steps of the task wizard and which step the user is on, and a Form portlet.
|
Note
|
You may reuse this Page for different task wizards, as both these portlets are dynamic. Then you must create a quick link for the task wizard. Associate this quick link with a component such as a Viewer. Make this component available on a Page using the appropriate portlet such as the Shared content viewer portlet for a Viewer component. Now, the end user may click on the quick link to initiate the task wizard. |
35.1. Properties
This section describes the properties of a task wizard, as shown on the corresponding Edit pane tabs.
35.1.1. Edit tab
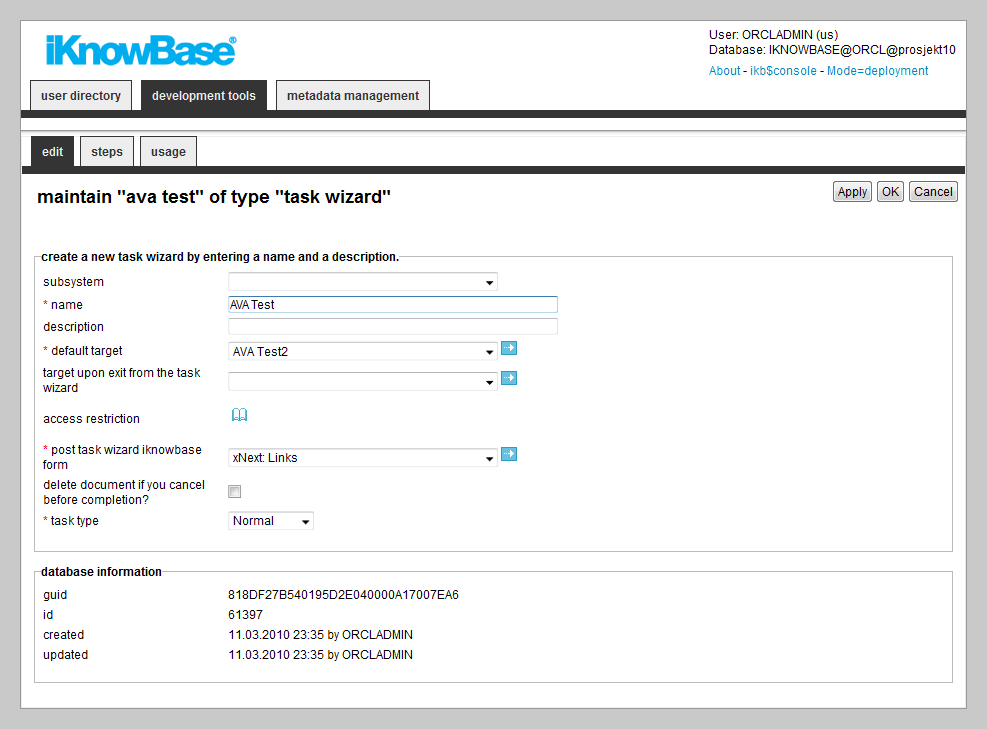
| Property | Description |
|---|---|
Subsystem |
Select the appropriate subsystem. |
Name |
Type a name for this task wizard. |
Description |
Type a description for this task wizard. |
Default target |
Select the default target for this task wizard. If no target is set on the individual steps, this target is used. |
Target upon exit from the task wizard |
Select the appropriate target to use after the task wizard has been completed. |
Access restriction |
Select the appropriate access control list. Only members with the create privilege in this access control list can use the task wizard. |
Post task wizard iKnowBase Form |
Select the Form to use for editing the information object after initial creation from this task wizard. |
Delete document if you cancel before completion? |
Select this check box to delete the document if the user clicks cancel in the middle of a task flow. |
Task type |
Select the appropriate task type. The following options are available:
|
Use temporary ACL on main document |
Select this check box to update the access group on the main document, e.g. the document which initiated the task wizard. Only applicable to Temporary task type. |
Use temporary STATUS on main document |
Select this check box to update the status on the main document, e.g. the document which initiated the task wizard. Only applicable to Temporary task type. |
Use temporary VALID_FROM on main document |
Select this check box to update the valid from date on the main document, e.g. the document which initiated the task wizard. Only applicable to Temporary task type. |
Use temporary VALID_TO on main document |
Select this check box to update the valid to date on the main document, e.g. the document which initiated the task wizard. Only applicable to Temporary task type. |
Use temporary TITLE on main document |
Select this check box to update the title on the main document, e.g. the document which initiated the task wizard. Only applicable to Temporary task type. |
Use temporary DESCRIPTION on main document |
Select this check box to update the description on the main document, e.g. the document which initiated the task wizard. Only applicable to Temporary task type. |
Use temporary CONTENT on main document |
Select this check box to update the content(URL, file, or text) on the main document, e.g. the document which initiated the task wizard. Only applicable to Temporary task type. |
Use temporary OWNER on main document |
Select this check box to update the owner on the main document, e.g. the document which initiated the task wizard. Only applicable to Temporary task type. |
Use temporary Post task wizard iKnowBase Form on main document on exit |
Select this check box to update the form information on the main document, e.g. the document which initiated the task wizard. The identification of the form given in the Post task wizard iKnowBase Form property will be saved to the main document. This means that this form will be used for maintenance of the main document. Only applicable to Temporary task type. |
35.1.2. Steps tab

| Property | Description |
|---|---|
Sort# |
Type the appropriate number to sort the steps. |
Title |
Type a name for the step. This name appears in the process arrow for the task wizard. If multiple languages are supported, each language displays a box, where you can type the title that appears. When you click in the Title box, language box appears. The language code is placed behind the field. |
Target |
Select the appropriate target for the step. |
iKB Form |
Select the appropriate form for the step. |
Dimension |
Select a dimension you want to associate with the step. You can use the associated dimension to display relevant content to the task wizard step, such as guidelines, etc. |
35.2. Creating a Task Wizard
Use the basic create actions to add a task wizard.
During the creation of a task wizard, you can have iKnowBase automatically generate steps matching a certain dimension structure. To use this feature, click the dimension navigator icon for Select the steps for the task wizard from dimensions, and select the appropriate dimensions. After initial save of the task wizard, it will contain one step per selected dimension.
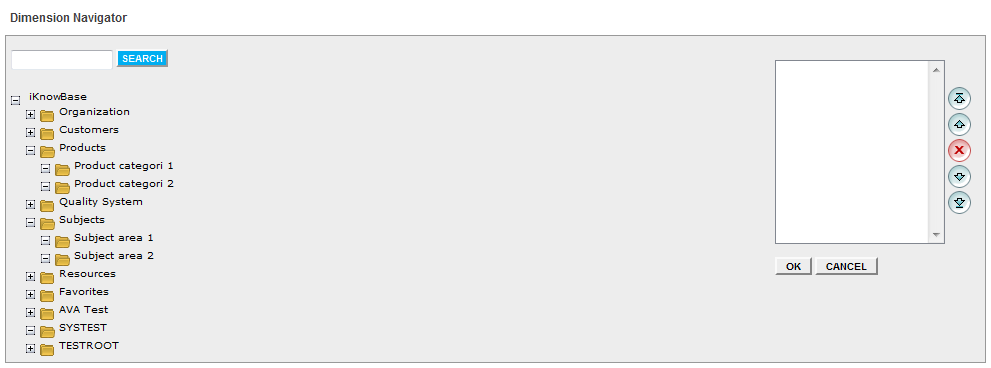
35.3. Testing a Task Wizard
To test your task wizard, either click the Test action for the task wizard on the List pane, or click the Test action link on the Edit pane tabs for the task wizard.
|
Note
|
The Test actions become available for a content form after you specify the target Target on show for the form. |
36. Template set
36.1. Concept
Template are used by a large number of components in iKnowBase. The template set feature allows you to define links to existing templates or/and create new inline templates used by the specific component. This chapter will focus on the user interface where you define such template set. To read more about scripts and templates, see Using Scripts and templates in the iKnowBase API Reference.
Features of Template set:
-
Create inline templates
-
Use existing shared templates
-
Copy or share inline templates
-
Detach a shared templates and make it inline
36.1.1. Properties
This section describes the properties of an template set.

| Property | Description |
|---|---|
Add Shared template |
Choose among shared templates for the specific component type. Only templates with the same template type as the context you are in will be available. |
Add Inline template |
Create a local, inline template used only by this component. |
Action |
The following actions are available:
|
Ident/label |
Name of the template in the set. The default template will be the first template in the component. |
Inline/shared |
Displays if its a shared or inline template. |
Template |
For shared templates it will let you either go to the selected templated or call a popup to select another one. Inline templates are maintain within the component in a separate tab named after the ident of the template. |
Implementation |
Displays the implementation type. |
36.1.2. Inline templates
This section describes how to maintain an inline template. Shared templates are described in the Templates section.
First, the inline template will be available as a separate tab named like Ident name you gave.
Multiple inline templates will create multiple tabs.
The screen to maintain the inline tab looks like this:
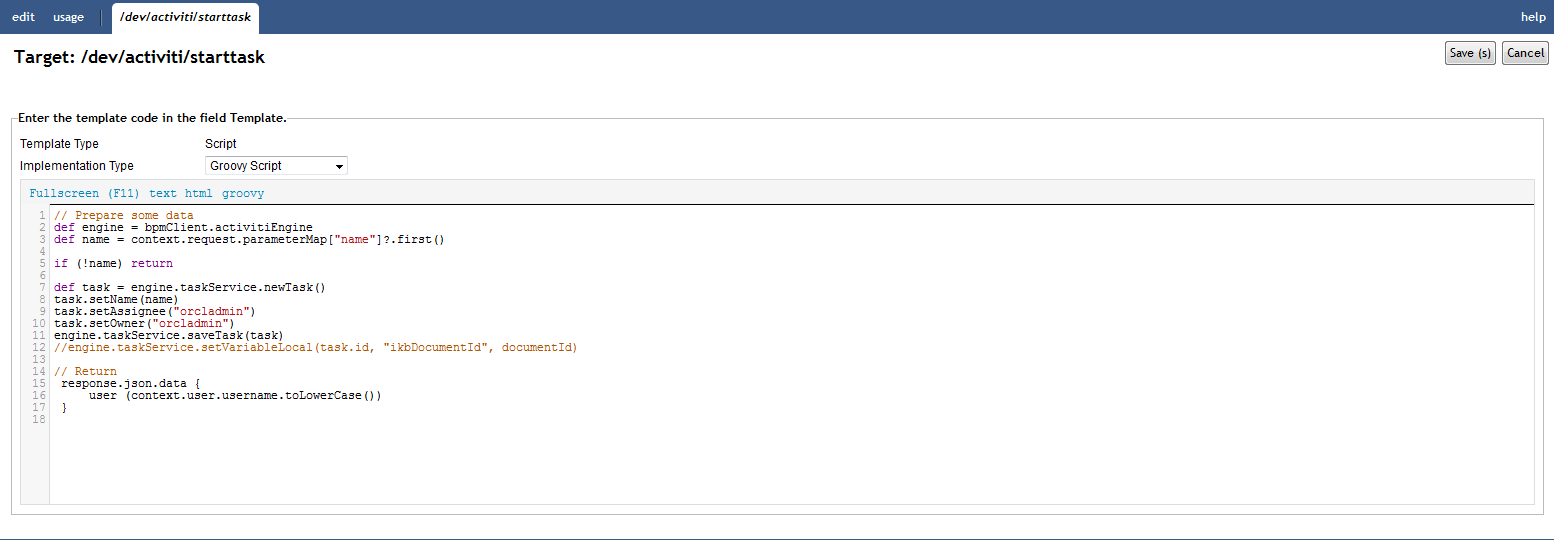
| Property | Description |
|---|---|
Template type |
The value is given by the context. e.g. a inline template for a presentation style will set the template type to Presentation style. |
Implementation type |
Select the appropriate implemetation type. Choose between the following options:
|
Template |
Type the template code using the appropriate syntax (FreeMarker, html, javascript or Groovy). Click on the label to enter a full screen editing mode, where you can use CTRL+S to save. |
37. Templates
Templates enforce a standard layout across multiple pages and within content regions on pages within your iKnowBase application. With templates, you can ensure that you have a consistent look and feel across the portal. You can create a template once and use it for multiple pages or layout pages. When you modify a template, the pages or the regions based on that template are automatically updated. You can use an existing template for a page or a layout page, or create you own template by writing your own FreeMarker template code.
See Part V for further information about FreeMarker and available FreeMarker model objects.
37.1. Properties
This section describes the properties of a template, as shown on the corresponding Edit pane tabs.
37.1.1. Edit Tab
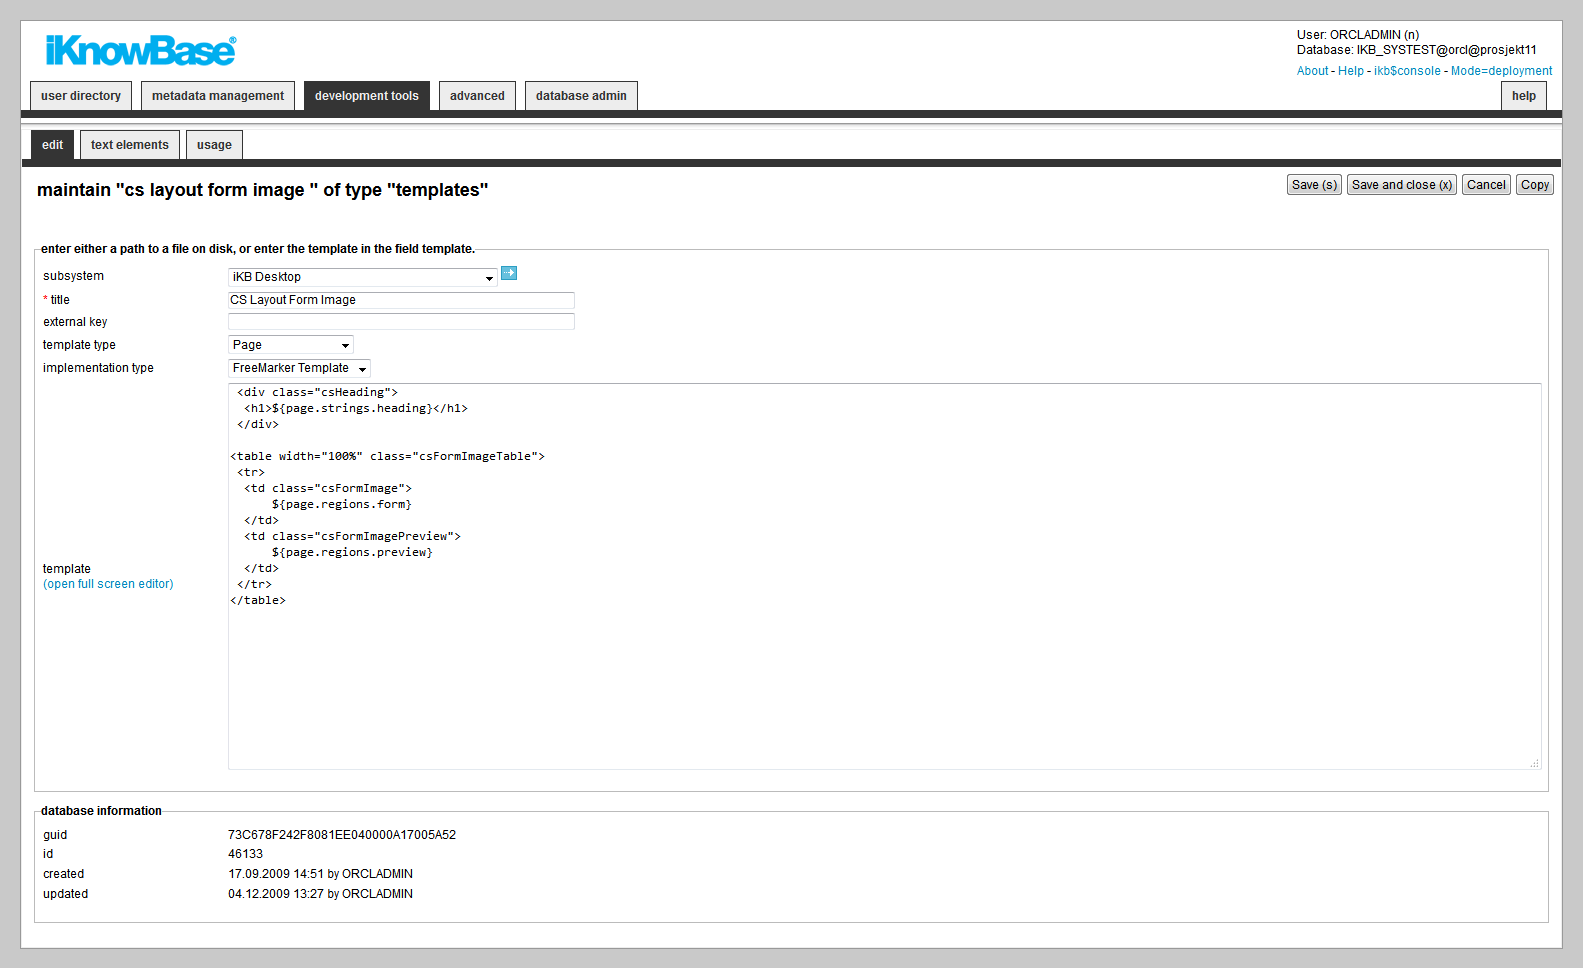
| Property | Description |
|---|---|
Subsystem |
Select the appropriate subsystem. |
Title |
Type a name for this template. This name is used during the configuration and not available for the end user. |
Template Type |
Select the appropriate template type. A template type defines where the template can be used. Choose between the following options:
|
Implementation type |
Select the appropriate implemetation type. Choose between the following options:
|
Template |
Type the template code using the appropriate syntax (e.g. FreeMarker or Groovy). Click on the label to enter a full screen editing mode, where you can use CTRL+S to save. |
37.1.2. Text Elements Tab
The properties on this tab enable you to define texts to be used in the component. The texts are available as FreeMarker model objects. Multiple languages are supported.
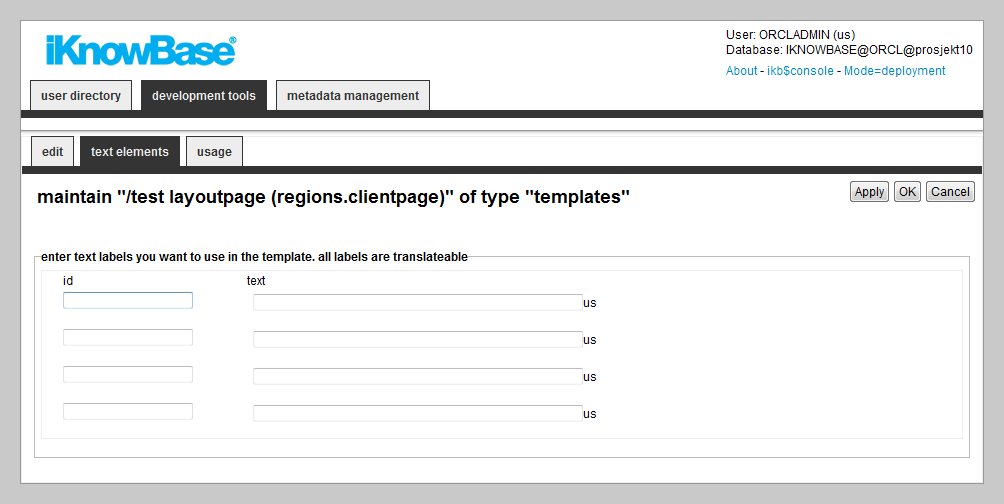
| Property | Description |
|---|---|
Id |
Type an identifier for the text element. |
Text |
Type the text labels that you want to use in the template. If multiple languages are supported in the solution, clicking the text input item expands hidden input items for all the languages, the language codes are specified behind the input fields. |
38. TinyMCE Profile
Please note that from version 4 of TinyMCE, we no longer use a TinyMCE profile to configure the editor. See the chapter on Forms for information on the recommended mechanism.
iKnowBase, by default, uses the TinyMCE WYSIWIG html editor to edit html-based content. Define different TinyMCE profiles to use different TinyMCE configurations throughout the system.
iKnowBase contains TinyMCE plug-ins to access the iKnowBase document- and image archive. This enables the end user to insert document links and images into the TinyMCE editor from the iKnowBase archives.
When you first install iKnowBase, three TinyMCE profiles will be configured:
-
Standard: Showing a selection of buttons on the TinyMCE toolbar.
-
Simple: Displays only the basic functions on the TinyMCE toolbar.
-
Full: Showing all of the buttons and features on the TinyMCE toolbar, including iKnowBase buttons.
The Simple profile is default on most description fields, and the Full profile is default for text content fields.
You can change the existing TinyMCE profiles or create you own to match your needs. The configured TinyMCE profiles are available when you set a style for a text field in a Form (on the Style tab of the Edit pane).
The TinyMCE documentation is available at: http://tinymce.moxiecode.com/index.php.
The following languages are supported: Norwegian and English. You can define more language profiles; see the TinyMCE documentation for information.
38.1. Properties
This section describes the properties of a TinyMCE profile, as shown on the corresponding Edit pane.
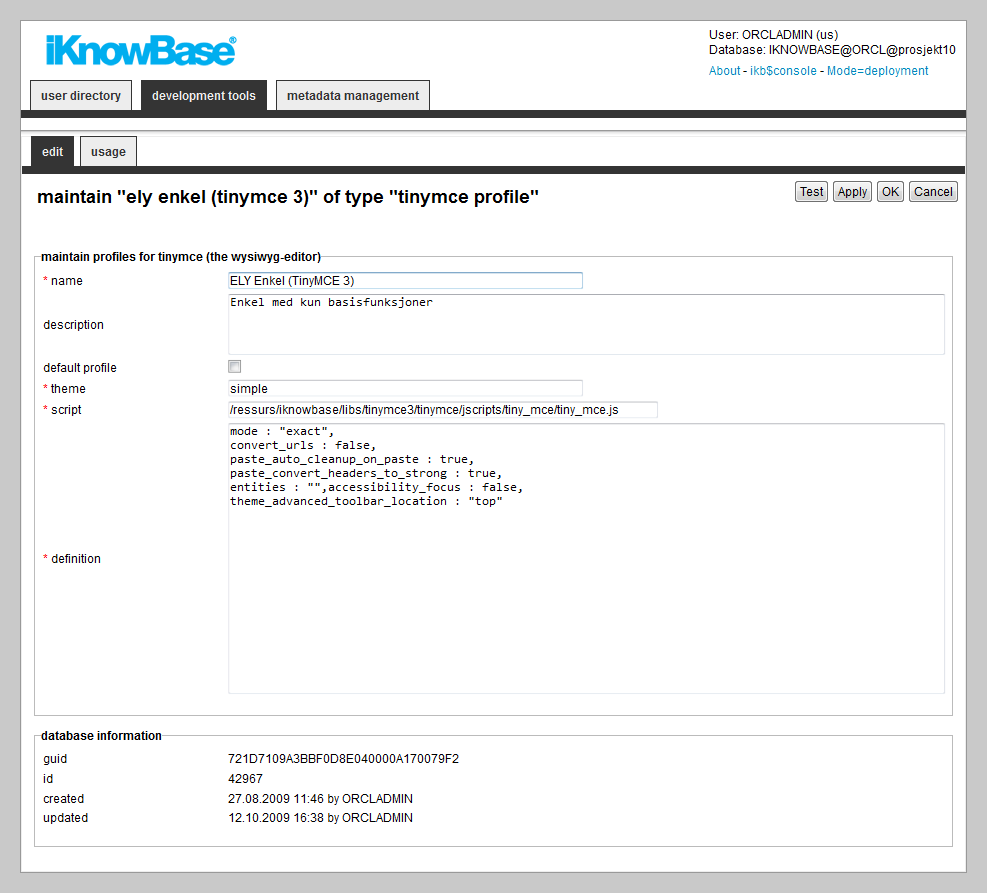
| Property | Description |
|---|---|
Name |
Type a name for this TinyMCE profile. |
Description |
Type a description for this TinyMCE profile. |
Default profile |
Check this check box to have this TinyMCE profile be the default one. |
Theme |
Type the reference to the TinyMCE setup that is based on different themes. For more information on themes, see the TinyMCE documentation. |
Script |
Enter the name of the script file required to configure this particular profile. The following scripts are included in the iKnowBase distribution: /iknowbase/libs/tinymce3/tinymce/jscripts/tiny_mce/tiny_mce.js |
Definition |
Enter tags used for building a TinyMCE profile. To include iKnowBase buttons in the toolbar, the definition must contain the following: plugins:"iknowbase"
theme_advanced_buttons1_add : "iknowbase.link, iknowbase.image"
iknowbase : {
imageURL: '',
linkURL: ''
}
For more information, see the TinyMCE documentation. |
38.2. Testing your TinyMCE profile
To test your TinyMCE profile, click the View Editor on the Edit pane tabs for the TinyMCE profile.
39. Transformation
Transformations are used to transform content in iKnowBase. Typical examples are image scaling or transformation to a different content type (e.g. from word to PDF). Transformation are based on instructions to providers supported by iKnowBase. By now we have the following providers : cloudconvert, fileconverter (Oracle InsideOut), image (iKnowBase image converter), ordimg (Oracle ORDIMAGE) and ctxdoc (Oracle Text conversion). A transformation definition can have rules and include or exclude certain mimetypes or file formats.
39.1. Properties
This section describes the properties of an image variant, as shown on the corresponding Edit pane.

| Property | Description |
|---|---|
Subsystem |
Select the appropriate subsystem. |
Display name |
Give the transformation a name to describe the transformation. |
External key |
External key is a logical name that will be used as an instruction to the transformation service. Its is more readable than the actual instruction and creates more readable links. e.g. /transformation=scale95x95 instead of /transformation=image:resize:200:200:best-fit-shrink. NOTE: be aware if you change the external key, all links using the name like the document body will not be changed. |
Sort order |
Used to order the variants in image selectors (e.g. the image selector used in editors). |
Enable? |
Defines if the variant is enabled. No variants will be created (or available from images functions) if the variant is disabled. |
Content action type |
Used from a content viewer and decides if the returning object should be a link or an image link. |
Use in Wysiwyg-editors (image picklist) |
Used when you want to insert a image link to a variant from the Wysiwyg-editor. |
Use this variant as thumbnail? |
Defines if the variant should be used as thumbnail in the image archive. Only one variant can be checked as thumbnail. |
Define instructions and include / exclude content types |
|
Format |
Create a rule for a certain file format. It can either be included or excluded. It you include the file format you need to give an instruction. |
Mimetype |
Create a rule for a certain mimetype. It can either be included or excluded. It you include the mimetype you need to give an instruction. Wildcard are allowed, e.g. image/*. |
Transformation instruction |
Enter a valid instruction if the rule is an including one. |
Exclude |
Decide if the rule is an exluding one. |
Output format (extension) |
Enter the extension to the transformed file. If not given, it will use the original extension. e.g when transforming to pdf the extension should also be set to pdf. |
40. Viewer
A Viewer enables you to present content from iKnowBase. When configuring a viewer, you must specify which content to retrieve (similar to the WHERE clause in SQL). You can use both static and dynamic criteria. You can associate the Viewer with a Presentation style to define how to present the content. If you do not specify a Presentation style, iKnowBase tries to find a Presentation style at run-time based on current domain/document type. If the document type is not associated with any presentation style, the viewer cannot retrieve a document.
There are two types of viewers.
-
iKnowBase shared viewer: Most common, used by a content viewer component on a page.
-
SOLR Viewer: It is used to enhance the result set from SOLR by running a viewer with a presentation style. The presentation style can retrieve everything a shared viewer can, but will only be retrieved for documents in the SOLR result set. This will allow you to run database functions, build links and so on easily. Only appropriate properties are available for this mode.
40.1. Properties
This section describes the properties of a viewer, as shown on the corresponding Edit pane tabs. A SOLR viewer has only a subset of the properties available.
40.1.1. Edit Tab
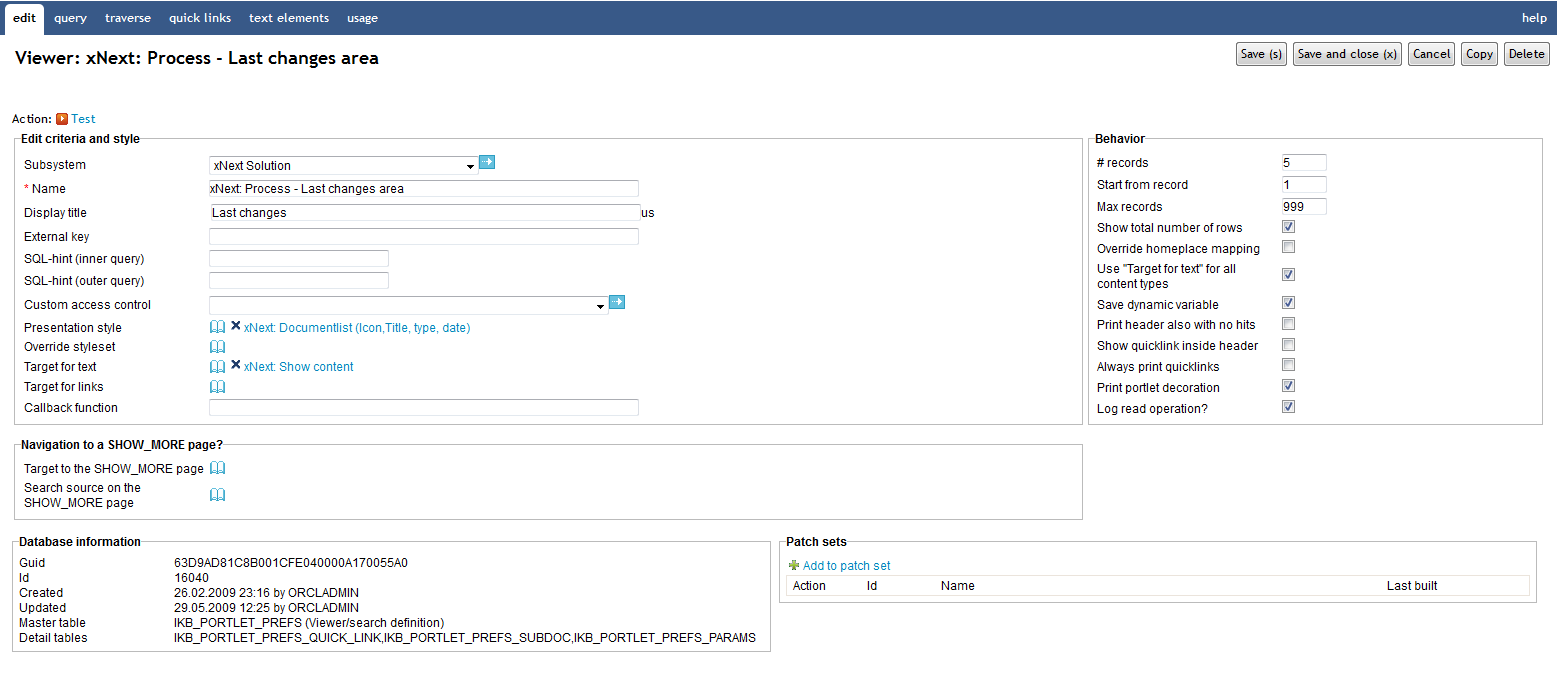
| Property | Description |
|---|---|
Subsystem |
Select the appropriate subsystem. |
Name |
Type a name for this viewer. |
Display title |
Type a title for this viewer. This may be presented to the end-user by a Presentation Style. The title supports multiple languages. |
External key |
Type the appropriate external key. For SOLR viewers external key is a mandatory field, otherwise its optional. |
SQL-hint (inner query) |
For advanced users only, type the appropriate SQL hint for the inner query (where-condition part). The hint will be inserted into the SQL-query; using the appropriate hint may help speed up query execution. |
SQL-hint (outer query) |
For advanced users only, type the appropriate SQL hint for the outer part of the query (select-part). The hint will be inserted into the SQL-query; using the appropriate hint may help speed up query execution. |
Custom access control |
Type the name of the appropriate database procedure to use a special access control, if you want to extend the default access control. Note: You should use this carefully, as controlled security model may be set aside. The following signature must be used for the database procedure: PROCEDURE <package>.<procedure name> ( site_id in number, user_id in number, reference_path in varchar2, result out ); The returned result must be an SQL fragment which fits into the SQL WHERE clause generated by the Viewer. For example, the function could return or oi1.owner_id = 125 and the query would then be ... and (oi1.owner_id = <userid> or ((oi1.acl_guid is null or oi1.owner_id = 125 or oi1.acl_guid in (select v_acl.acl_guid from v_acl) ... |
Presentation style |
Select the Presentation style you want to use to format the output. |
Override styleset |
Select the Styleset you want to apply. If set, this will override the styleset defined on the Presentation style to be used. |
Target for text |
Select the target page to use for link to documents with text content. |
Target for links |
Select the target page to use for link to documents with file or URL content. |
Callback function |
A function used as callback from Forms when adding new documents or editing existing documents initiated from the viewer. You can use this property to avoid page redirect upon save from form. The parameter passed to the callback function is a json object with the properties action and documentId. The callback function could for example reload the viewer. |
Target to show_more page? |
Select the target page to use for the "show more" link. Please note that the target definition should have a parameter named p_search_id as Parameter1. |
Search source on the show_mode page |
To reuse a single target page for multiple "show more" pages, select the search source you want to display on the target page. |
# records |
Type the number of rows that you want to extract at a time. The default value is 10. |
Start from record |
Type the row number from which you want to display the result set. The default value is 1. |
Max records |
Type the maximum number of documents that you want to extract. The default value is 100. |
Cache interval (0 is none) |
Type the time in minutes for which you want to keep content in the cache. |
Show total number of rows |
Select this check box to display the total number rows on the status line. |
Override homeplace mapping |
Select this check box to use the targets defined on this Viewer rather than the target selector mechanism. |
Use "Target for text" for all content types |
Select this check box to use the target defined in the Target for text property for all links to documents, disregarding the content type. |
Save dynamic variable |
Select this check box to use a session save on all the dynamic parameters. If these values are not in the URL, this property allows iKnowBase to save the last values. If you do not save the session variables, no content appears when you enter the page without the necessary dynamic parameters specified on the portlet. |
Print header also with no hits |
Select this check box to display the title of the portlet if the search finds no documents. |
Show quicklink inside header |
Select this check box to display the quick links within the header section of the viewer. |
Always print quicklinks |
Select this check box to display the quick links even it mandatory attributes are not set. |
Print portlet decoration |
Select this check box to print the portlet decoration that surrounds the content in a portlet. |
Log read operation |
Uncheck if you want to avoid logging to the document statistic table. By default it will insert one row everytime a document with HTML-content is displayed. |
40.1.2. Attributes Tab (only available for iKnowBase shared Viewer)
You can choose between four types of parameters:
-
Dynamic parameter: Parameters defined as iKnowBase parameters.
-
SQL parameter: Parameters defined as SQL parameters.
-
Attribute: iKnowBase attributes, used to set constant values in the query.
-
External: Parameters defined for iKnowBase external data sources. Only available if the data source is an external datasource.
When the parameter is selected, you must save before you can set any values.
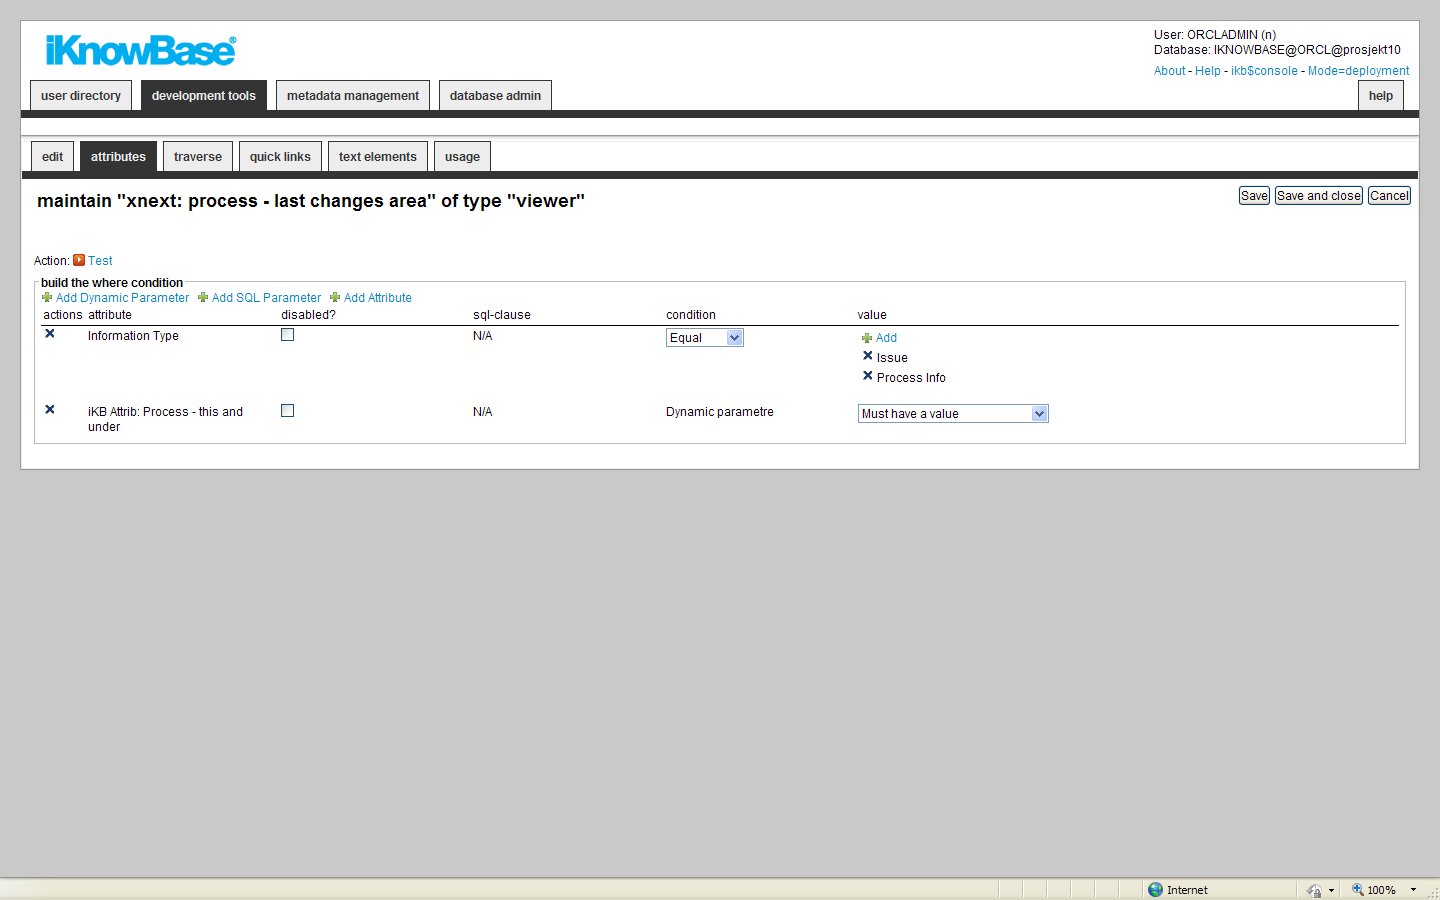
| Property | Description |
|---|---|
Actions |
Delete the parameter by clicking the icon. |
Attribute |
Displays the names of the selected attributes to use as conditions for the Search source. |
Disabled? |
You can for debugging reasons disable attributes. |
Sql Clause |
Used for performance reasons for advanced users. Will generate a SQL with either IN or EXISTS. |
Condition |
Select the appropriate conditions for the selected attributes. The conditions depend on the type of attribute. If the conditions exists or not exists are available you don’t need to add any values. Note: You cannot select a condition for parameters. |
Value |
Select or enter the appropriate values for the selected attributes. Available options depends on the attribute/parameter type. Date attributes allow use of NOW (with timestamp) and TODAY (truncated value) Applicable to SQL parameters only when the parameter is defined with an attribute. |
40.1.3. Traverse Tab (only available for iKnowBase shared Viewer)
The properties on the Traverse tab enables you to define a Viewer with traverse features, e.g. possibilities to display subdocuments or versions of the extracted documents. Examples are discussion forums and view all versions of a document.
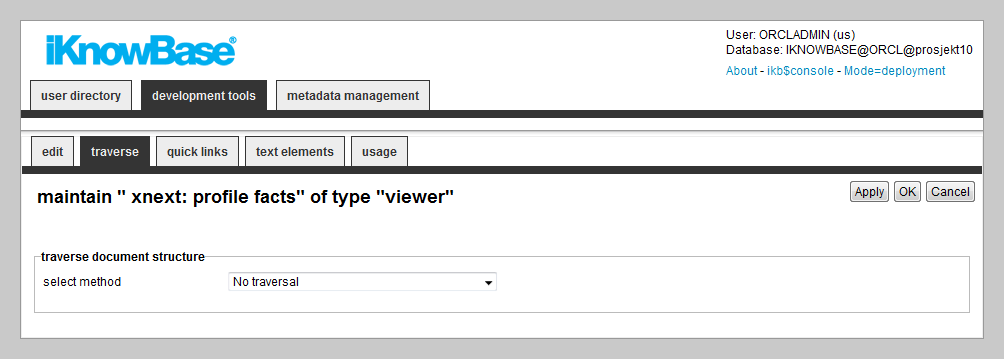
| Property | Description |
|---|---|
Select method |
Choose how you want to traverse the document structure. You can choose between :
|
Level |
Type the level for the extraction source. Level 1 specifies first level, but you may specify extraction sources that traverse further on level 2 documents, etc. |
Select source |
Select the appropriate Search source as the base for the extraction of subdocuments. You can vary the style and layout on different levels. |
Expand Collapse |
To enable the expand/collapse functionality for the subdocuments, click Yes. To display the subdocuments directly, click No. |
Icon Expand |
Enter the reference to the icon to be used to expand the list of subdocuments. Note: You must click Yes in the Expand Collapse list. |
Icon Collapse |
Enter the reference to the icon to be used to collapse the list of subdocuments. Note: You must click Yes in the Expand Collapse list. |
40.1.4. Quick Links Tab (only available for iKnowBase shared Viewer)
The properties on the Quick links tab enable you to generate links to create new documents in the Viewer. The link can point to a quick link, iKnowBase Form or Task Wizard. In order to use the Quick link to create a subdocument, you should define the Quick link to take a document ID as a dynamic parameter, which may be used to set the parent document for the document to be created.
| Property | Description |
|---|---|
Link to subdocuments |
Select the appropriate dynamic parameter, must be a document ID, to pass to the Quick link in order to be able to create a subdocument. |
Add quicklink |
The link opens a window with all available quicklinks. Select one or more. |
Add Form |
The link opens a window with all available iKnowBase Forms. Select one or more. |
Add Task |
The link opens a window with all available task wizards. Select one or more. |
Title |
Type the title that to use for the Quick link. If multiple languages are supported in the solution, each language displays a box, where you can type the title that appears. When you click in the Title box, the language box appears. The language code is placed behind the box. |
Font class |
Type the font class to use for the Quick link text. |
Icon |
Type the path of the image to use for the quick link. |
Show text |
Select this check box to display both text and image. |
Sort |
Type the sorting IDs to sort the quick links that you select. |
Description |
Displays the description of each quick link. |
40.1.5. Text Elements Tab
The properties on the Text elements tab enable you to define texts to use in the component. The texts are available as FreeMarker model objects in template-based Presentation styles. Multiple languages are supported.

| Property | Description |
|---|---|
Id |
Type an identifier for the viewer. |
Text |
Type the text labels that you want to use in a template. If multiple languages are supported in the solution, each language displays a box, where you can type the name of the form that appears. When you click in the Text box, the language box appears. The language code is placed behind the box. |